This is Part 3 of a 3-part series on transitioning from various popular RAW image editing programs to Capture One Pro Sessions.
Part 1 describes methods to transition from Lightroom to Capture One Pro with as many adjustments and info as possible.
Part 2 shows how to switch back to using Sessions in Capture One Pro if you have been using the recently introduced Catalog system, which we still currently do not recommend using for instability reasons. Here, Part 3 discusses moving images from Apple Aperture 3 to Capture One.
There’s good news & there’s bad news…
The Bad News:
It’s no surprise that Apple likes to be on their own. The I’m-fine-on-my-own mindset has been describing Apple for both its hardware and software titles for a long time, and it is no different for its pro-sumer photo editor, Aperture. What that means for Aperture users is not a lot of your past work is not going to transfer directly to another program. All those adjustments you’ve been making over the years are not going to transfer. All those albums, books, slideshows, etc., are not going to transfer either. It may seem bad, but if you think about it, you are switching because Capture One Pro does SUCH a better job processing and delivering higher-quality edits of your images (*6/8/2014 and now also because Apple has ceased development of Aperture). If you get too hung up on that fact, it’s like complaining that your new Corvette doesn’t have that same feel as your old beat-up pickup truck.
The Good News:
You are not entirely up a creek without a paddle. Even though your adjustments don’t transfer, your IPTC metadata will. What’s that do for you? Ratings transfer. Keywords transfer. Your copyright and contact / address info will transfer (however, color labels do not). So while your previous adjustments don’t make it over, you at least know what your favorite images are and can jump right away into editing those without having to start all the way back at square one.
Before you do anything else!
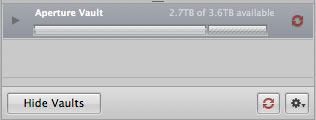
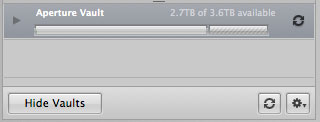
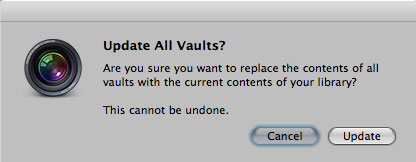
If you have read any of the other parts of this series, you should know by now how important it is to back up your files!! This cannot be over-emphasized. Back it up twice if you have the storage space. Back up your files, then test your backup and make sure it works. In Aperture, it has a built-in method for backing up the library and any managed files called Vaults. If you don’t have a vault, click on the gear icon in the bottom right corner of the Inspector’s Library tab and choose Add Vault. This tutorial isn’t going to fully describe setting up a Vault, but ApertureExpert.com has a great tutorial. Hopefully, you have already done this! You may need to update your aperture vault if you haven’t in a while. The refresh icon will be yellow or red depending on how much has changed since your last vault update. Click the Refresh/Update button (two arrows forming a circle) and let it finish. The updated vault will have black arrows in the Refresh button.
-
Show / Hide Vaults
(click to see whole image)
-
Vault That Needs Update

(click to enlarge)
-
Updated Vault

(click to enlarge)
-
Update Warning

Two methods: Quick vs Thorough
The Quick Method
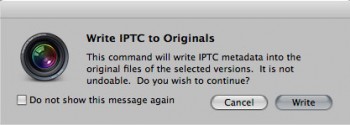
- The quickest way to save your metadata involves writing the metadata to the raw file itself. To do this, select the images you want to transfer and choose the Metadata menu > Write IPTC Metadata to Originals. You could do this to all the images in your library at once, but doing so may take a while. It may be better to do this step in small batches, especially if you have a large library.
-
Write Metadata to Originals
(click to enlarge)
-
Alert Window

(click to enlarge)
- Once the Metadata has been written (or while it’s in progress) you can begin setting up Capture One Sessions for your Projects. Open up Capture One, and go to File Menu > New Session. Choose the location where you wish to store the Session, and give it a relevant name. Many people prefer to still use a Tethered session type, since the created Capture Folder is a good way to keep all of your raw files in one place, even if you use subfolders.
-
Create a New Session
(click to enlarge)
-
New Session Details
(click to enlarge)
- Once you have written the Metadata to the original files, you need to Relocate the Originals to the new session you just created. If they are already referenced by Aperture, you could just drag the files to the session’s Capture folder, but this could mess up the internal file referencing of Aperture (which can be very, very bad). It’s best do this step from Aperture, in case you need to refer back to it later. Select the images you want to relocate, then go to the File Menu > Relocate Originals (earlier versions of Aperture may say “Relocate Masters”). You have the option to create a subfolder or rename the files on export if you desire. Otherwise, choose the Capture Folder of the Session you created and hit the Relocate Originals button.
-
File > Relocate Originals
(click to enlarge)
-
Choose the Capture Folder
(click to enlarge)
-
(Optional) File Naming
(click to enlarge)
- Once the images have been relocated, not much in Aperture has changed. You should notice a small “badge” that contains a Box with an Arrow on it which signifies this image is now referenced by Aperture and no longer stored in the Library itself.
-
Relocating Progress Bar
(click to enlarge)
-
Referenced Indicator
(click to enlarge)
- In Capture One, open the session you created and navigate to the Capture folder or the folder where you placed your raw files. You may notice that no data has transferred. Select all the images, then go to the File Menu and choose Load Metadata.
**Note: if your raw files are or have been converted to Adobe’s Digital Negative format (.DNG), the internally-stored metadata does not load for the DNG files. The more thorough method mentioned below should work as an alternative.
-
No Metadata?
(click to enlarge)
-
Load Metadata
(click to enlarge)
The More Thorough Method
The Quick method mentioned above can be ideal for many users, but there are some caveats for both methods. For the Quick method, some people may not want to write data DIRECTLY on to the RAW file, and additionally DNG files won’t load the metadata in Capture One. A more thorough way to move your images out of Aperture into Capture One Pro solves both of these problems, but duplicates your images and creates sidecar XMP files which Capture One can read.
- In Aperture, navigate to the Project containing the images you want to transfer and choose Edit > Select All. This selects all the images in that Project.
- If you haven’t already, create a New Session in Capture One. See step 2 of the Quick Method for details.
- In the Menu bar, go to File and choose Export > Originals.
- Locate & Select the Capture Folder for the session you just created. Be sure to select “Create IPTC4XMP Sidecar File” under the Metadata popup near the bottom of the window. If you wish to rename the files, you may do so here. When ready, press the Export Originals button.
- That’s it! If you navigate to that capture folder in the Finder, you will see the raw files with matching .xmp sidecar files next to it. Capture One reads this information automatically and automatically applies your ratings.
-
Export Single Project Originals
(click to enlarge)
-
Create Sidecars
(click to enlarge)
-
Results in Finder
(click to enlarge)
- Create a New Session for each project you plan to export. You can alternatively have subfolders within one Session’s Capture Folder.
- Select a group of Projects, then Select All the images for those projects.
- Choose File > Export Originals.
- It’s a good idea to create a holding space for the exported projects. Navigate to a convenient location and hit the New Folder button, and give it a name like “Holding Space” or “Temp”.
- Under the Subfolder Format popup, choose Project Name so Aperture will automatically create a folder named for each Project you are exporting automatically.
- Be sure to select “Create IPTC4XMP Sidecar File” under the Metadata popup!
- Once the export is complete, drag the raw files & sidecar files to the correct session’s Capture Folder.
- It’s up to you if you want to delete the original images from Aperture to save disk space. First verify the transferred images are working properly in Capture One by zooming to 100% on a few of the images to make sure they render on screen properly.
Summary
Any time you are working with important files, you should always perform a backup. This is especially true when you may begin deleting files. The biggest reason for exporting from a catalog (versus just dragging them to a folder) is to get the .cosettings files which contain your editing instructions, but if you chose to store your images internally in the catalog, you will need the raw file too. The simplest way for both methods creates duplicates, which you can safely remove after a successful transfer.
When working with your images, it is always good to exercise caution. If you have any questions regarding this, don’t hesitate to reach out to us at Capture Integration for help or advice!