Last week, Phase One released another major update to Capture One Pro. As usual, it’s packed with a lot of new features that increasingly enhance the usability of the software. After working for Apple for several years – and a freelance web designer for many, many, (oh-no-the-nightmares-are-starting-to-come-back) many years – Usability is king in my book. Even if a software tool is critical to me, if it is clunky or difficult to use, I will often abandon it before long because it’s just not worth fighting over. Seeing Phase One priority usability and functionality over “hey-that’s-neat” features continues to be why I choose Capture One over Adobe Lightroom in my workflow.
Here are my top 10 features of the new 9.1 update (in no particular order):
10. HSL Uniformity Controls in Color Editor
9. Improved Tiff Handling
8. Canon PTP Tethering Engine
7. Live View Orientation Control
6. Next Capture Adjustments: Orientation
5. Next Capture Adjustments: Metadata
4. Next Capture Adjustments: Styles
3. Library Magic
2. Better XF Integration
1. More Shortcuts!
10. HSL Uniformity
If you’ve ever heard me speak at one of the Serious Technical Trainings, or read my blog post, Top 10 Reasons Why I Chose Capture One Pro Over Lightroom, you know I’m a bit of a fan of the Color Editor. It’s still my favorite tool, and it just keeps getting better and better. Capture One 9 introduced the ability to create Local Adjustment masks from Color Editor selections, a feature I didn’t even think about or see coming.
Phase One did it again by the adding Saturation and Lightness sliders in the Uniformity section of the Skin Tone Editor. Before 9.1, you could use the Uniformity slider to take a Skin Editor color selection and push the Hue of all selected colors toward a particular hue (designated by the inner white dot in the selection). It’s a great adjustment to unify skin discoloration, and Christian Grüner wrote a fantastic article on Phase One’s blog that shows how well this works. Another good post by Cameron Davidson expounds on a suggestion from our very own Tower of Wisdom, Steve Hendrix, that you can use the Skin Tone Editor’s Uniformity control for tones *other than skin tones!
However, I often received questions about unifying other parameters with skin tone correction – often if there’s skin discoloration, there’s also skin luminance differences right along side or saturation issues. Phase One answered with the new controls in 9.1.
Hue
The Hue slider works just as the Uniformity slider did before.
Saturation
The Saturation slider does just what you would expect; it tries to take the saturation levels of each tone and push toward the selected saturation level.
Lightness
The Lightness slider is one that needs to be used sparingly, and in most cases used only as a local adjustment later. Like the other uniformity tools, it tries to centralize the luminance values of the selected tones – but can quickly look fake/incorrect without due care.
Used with the new brush controls, layer adjustments such as curves, white balance, HDR, and new Color Editor controls, you can do so much with your post-production solely in Capture One.
Before / After using HSL Controls
9. Improved Tiff Handling
While you can do so much post-production and retouching inside Capture One, there are still times when you need to take the image outside of Capture One for advanced retouching or effects. Often, that leads to layers, some of which may be Alpha channels and the like, which did not play well with Capture One (or sometimes the files even failed to appear in the browser). With the 9.1 Update, TIFF files with layers and alpha channels will appear in Capture One, although editing and additional processing are limited. After all, it is a RAW conversion software, so if you need to do more work after your Photoshop retouching, you should use a flattened copy.
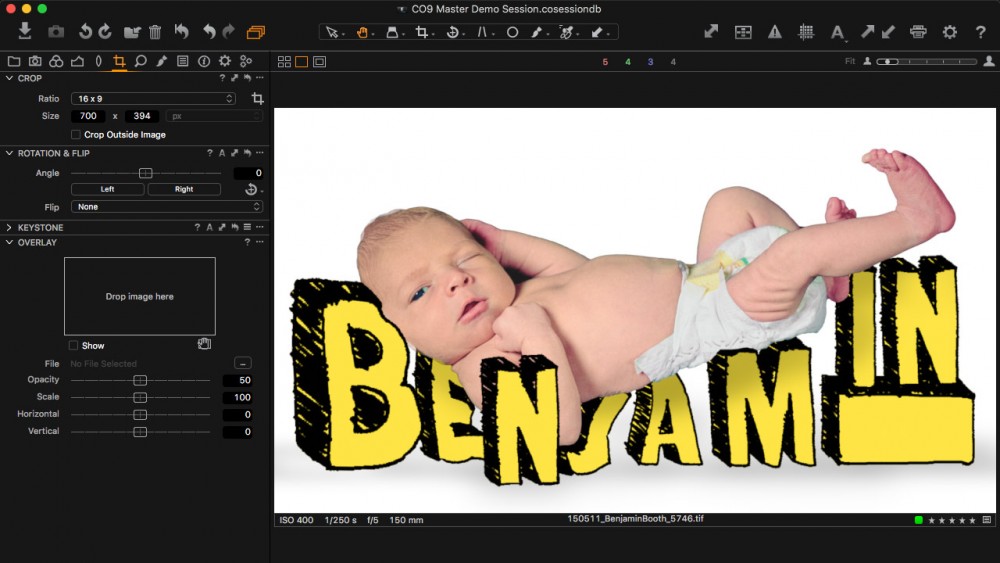
8. Canon PTP
What does Canon PTP tethering mean? Well, before 9.1, Phase One could only access the features of particular cameras based on what Canon’s SDK (Software Development Kit) allowed them to… so things like Orientation and Live View were somewhat limited. Capture One Pro 9.1 moves away from the Canon SDK to Phase’s method of communicating with Canon cameras – which ultimately means more stability, features, and even…
7. …Orientation control in Live View!
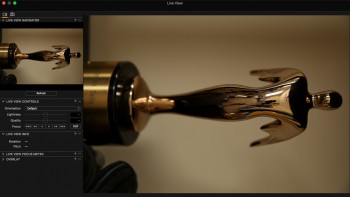
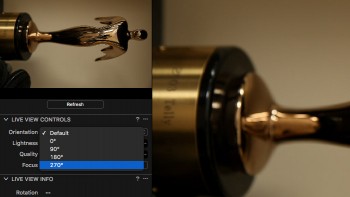
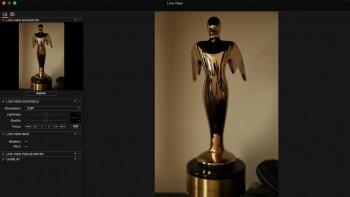
This has been a long time request from many customers – and until now it was not possible to force orientation during Live View except with Phase One cameras. Phase One was able to overhaul the Orientation system in Capture One to give you more control over your Live View orientation – even on Canon cameras! While in Live View, you can choose a particular Orientation from the Live View Controls tab. This will synchronize with the Next Capture Adjustments Orientation.
-
Incorrect Orientation
-
Change Orientation
-
Corrected Orientation
6. Next Capture Adjustments: Orientation
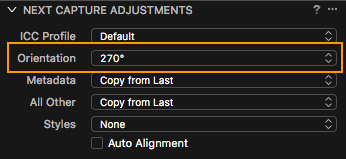
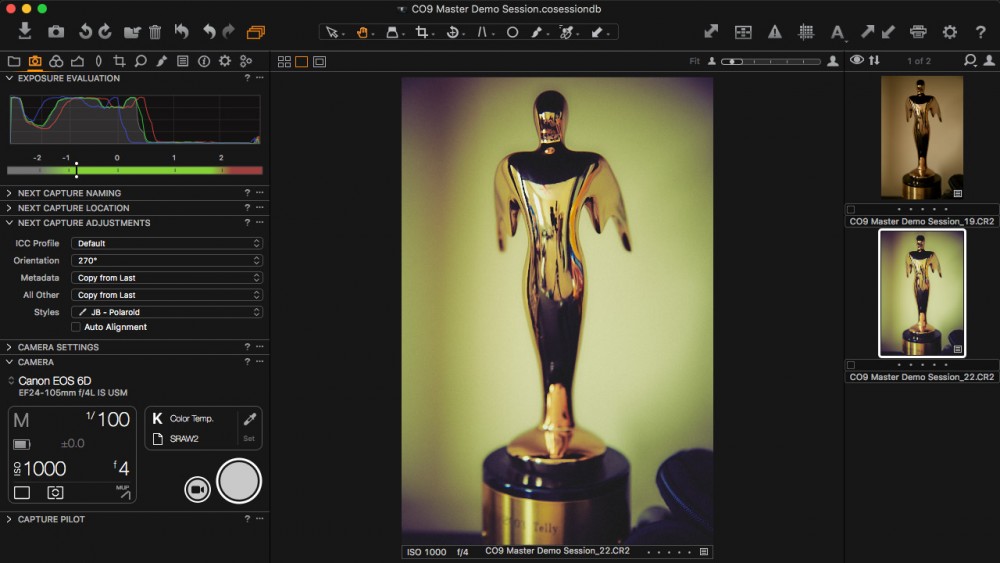
In previous versions of Capture One, if you rotated an image (technically changing its orientation) while tethering, that adjustment would not apply with the other Next Capture Adjustments. There were workarounds, but it ultimately decreased the usability of Capture One if you needed this functionality. Now you can simply choose which orientation you want, and it will be applied to your subsequent shots.
5. Next Capture Adjustments: Metadata
Another common question our Tech support team gets is how to apply Metadata on the FRONT end of a shoot… so you’re working as a digital tech and you need to set up the photographer’s info, title, and other relevant metadata and keywords for the particular shot. In the past, there wasn’t an easy way to do this that would apply from shot-to-shot and Phase One recommened doing at the end of a series with batch copy and applying.
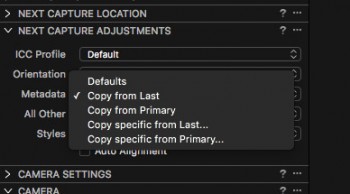
If you’re like me, often you’re booking to get ready for the next shot or simply thinking about the next shot and it was always easy to forget that very important step. Now you can take a shot, and set up your metadata to apply with each capture… You have the same options as most of the other drop-downs in the Next Capture Adjustments tool… including Copy from Last, Copy from Primary (the currently selected image – regardless if it was the last one taken), and Copy Specific from Last/Primary – which allows you to choose which fields copy or not.
4. Next Capture Adjustments: Styles
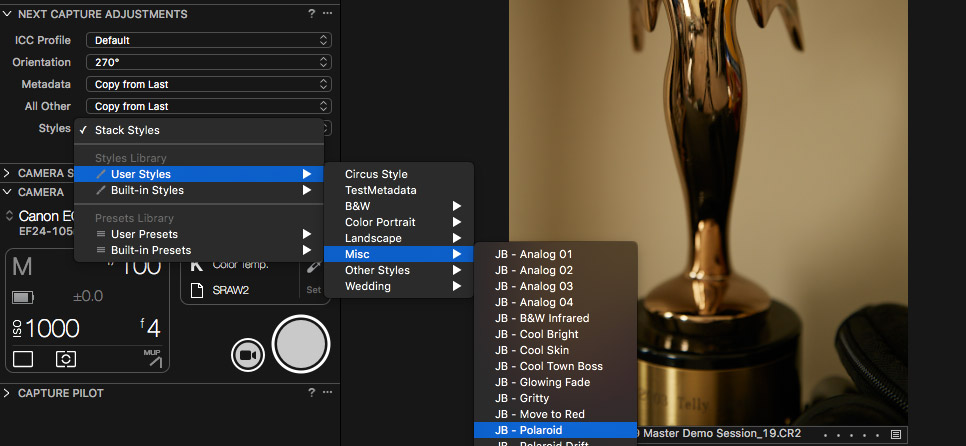
Lastly, another Next Capture Adjustment upgrade doesn’t seem like much, but it massively increases the usability of an existing feature. Now you can easily apply Styles to your next captures… “But wait,” you might object… “You could apply Styles via Next Capture Adjustments in previous versions” and you are correct. However, you could only apply while using All Other [adjustments] as “Defaults with Styles”. In other words, none of your other adjustments (like exposure, white balance, crop, etc.] would copy with your Styles unless they were designated as Capture One defaults. Now in Capture One Pro 9.1, that limitation has been lifted so you can be free to apply and shoot straight into Styles (or looks) as well as use your Metadata and Keyword presets. One tiny tweak has instantly made this a much more usable and ultimately valuable piece of your workflow.
-
Choose a Style
-
Capture with Style!
3. Library Magic
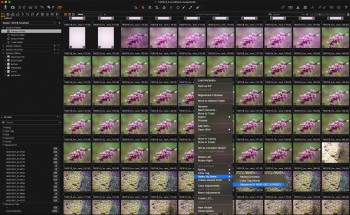
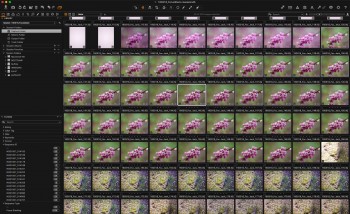
I understand that term might be a little dramatic, but Phase One has added in a significant amount of it in 9.1. First, they did a “Under the hood Library refactor” on the Mac – which means faster and more stable performance when viewing files and collections. Then they added other extra features such “Select by [Rating/Color Tag/Sequence ID]” and “Create Album by […]”. So if you wanted to easily process all your five-star images, only need to select one image that is rated five stars, the Right click (or Control + click on Mac) and choose “Select By Rating [five-stars]”. Then hit process and voila!
After a long day of shooting, you could also Select All of your images – or just click on the All Images album (to see multiple capture folders of images *provided they are marked as Favorites) and select all – and Right click > Create Albums By [Rating/Color Tag] to instantly see all of your selects in individual Albums. As we’ll detail below, this is also extremely handy when shooting Sequences with the XF.
-
Right Click – Select By…
-
Selection Results
2. Better XF Integration
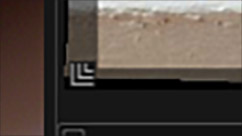
With the XF Feature Update #2 firmware, there are a lot of really nice features particularly with sequencing – such as bracketing for HDR photography, Time Lapses, or Focus Stacking. Using these handy sequencing tools can easily produce quite a large number of shots… fortunately, Capture One Pro 9.1 not only supports these new features but implements some critical organizational needs related to these tools. First of all, Sequence images have their own little badge icon that displays in the bottom left-hand corner of the image to help distinguish from non-sequence images.
-
Sequence Icon
-
Sequence Icon
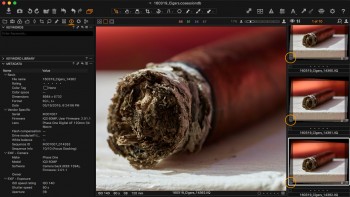
We have already discussed being able to Select By or Create Albums from Sequences (which is immensely useful when you are looking at a sea of images and aren’t sure where one sequence ends and another begins…), but you can also take advantage of Dynamic Locations, Image Filtering, and Advanced Naming… Along with accessing the Sequence ID (which is a unique identifier for each sequence captured using the XF), you have access to the Sequence Type, Sequence Count (5 of 20), and Sequence Total. All of these can be used throughout Capture One 9.1.
Dynamic Locations
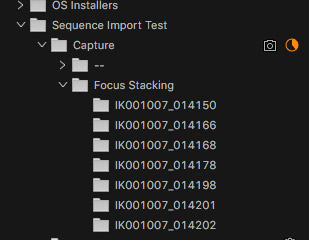
If you have been out shooting focus stacks all day, or are shooting focus stacks in the studio, you may want to have each stack in its own folder… Another option I’ve personally used is when processing images to send to Helicon Focus; I want a separate folder for each Focus Stack to keep the files organized. Whatever your intent, you can use these tokens for dynamic locations on import or output/processing.
To use them, click on the […] button near a location tab like the subfolder tab under Import To in the Import Images dialog. If you click on Group, all of the tokens are under Metadata – Vendor Specific. Drag the ones you want to the format bar, using a “/” if you want subfolders based on your tokens. When you import, your images will be broken down into subfolders based on your tokens. In the example below, I had it create a subfolder for the type of sequence (HDR vs. Time Lapse vs. Focus Stacking) and another subfolder based on the Sequence ID. While this example was on import, the same principles apply to output as well.
-
Setting up Dynamic Locations
-
Results
Filtering
If having a bunch of folders created for you on import isn’t your thing, perhaps you want to quickly filter the images you are viewing. In the Filters tool (usually located in the Library Panel), click on the […] button in the top right-hand corner and choose “Show/Hide Filters.” From here you can check or uncheck as many options for filtering as you’d like, including filtering by Sequence Type, Count, Total, or ID. Once you click OK, you will see those options and available values under the Filters tool. If you’d like to see more than one option at a time (like two different sequences, etc.), just hold the Option / Alt key when clicking on additional filters.
Advanced Naming
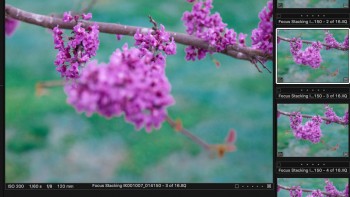
You can also use the tokens for advanced naming options… For example, I may want my focus stacked images to have the naming scheme [Sequence Type] [Sequence ID] – [Sequence Count] of [Sequence Total]. You do this just as we have discussed with the folders but in a Naming tool, such as on Import, Output Naming, or even Batch Renaming.
-
-
Naming Results
1. More Shortcuts!
Shortcuts are just that… ways to help you improve efficiency and get things done faster! Phase One has introduced several new options for available shortcuts you can use within Capture One – some of which aren’t necessarily tied to new features. To customize your keyboard shortcuts, Go to the Capture One Menu (Mac) or Edit menu in Windows and choose Edit Keyboard Shortcuts. If you haven’t customized any keyboard shortcuts yet, you’ll need to press the Create button to duplicate the Default scheme. Then you can go about your editing.
Some of the new Keyboard shortcuts available to you are listed below:
Summary
These are not even all of the new features that made it into the Capture One Pro 9.1 update – Export / Output Keyword Restrictions, Additional Camera Support, and Additional Lens Profiles also appeared in this update. All of these new features point toward greater usability for both the photographers, post-production & retouchers, and those who wear all of those hats!
Questions?
Don’t hesitate to reach out to us! Contact our technical support team for questions or additional information!