The first time I attempted focus stacking I admittedly used a method that was lacking in perfection, but I still got some fun results from the process. This time, my process still isn’t perfectly refined, but with the help of the XF’s focus stacking tool my results hit a new level of success.
Per Phase One: “With added focus control, the XF Camera System can now systematically capture a sequence of images while precisely adjusting focus for each frame. You set the parameters and the XF Camera System does the rest. Perfect in the studio or in the field, the Focus Stack Tool results in image sequences perfect for integration into post processing solutions like Helicon Focus…”
In my first attempts at focus stacking, (see blog post “IQ3-100 Live View using Capture Pilot for Macro Focusing” ) I was using manual focus and live view at 100% through my iPad, focusing and shooting, focusing and shooting, and only later realized that 48 manually driven slices were not enough to adequately cover the depth of field I was trying to achieve.
Enter Feature Update #2 from Phase One on the XF and built in focus stacking
Phase One XF IQ3-100, Phase One AF 120 Macro, 100 image Focus Stack
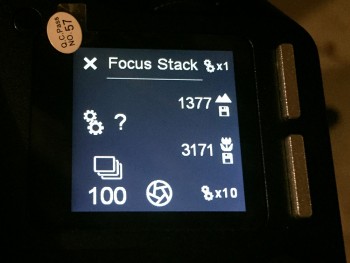
My failures in this process were to first realize ahead of time how many shots would be necessary to adequately capture each of the perfectly focused slices of macro image to assemble into the final piece, and secondly, to move the manual focus in movements small enough to move to the next spot of focus. After several near hits using the Focus Stack Tool, to guarantee success I started to just overshoot the stack to have safety in numbers, and while I can’t recommend shooting a hundred frames per stack on a 100mp camera to everyone, the 12TB of RAID-0 hard drive space inside my machine allows me to shoot with reckless abandon. (edit 11/22/19: Since XF Firmware version 3, there is no guessing required with any prime Schneider Kreuznach LS lens, the engineers in Denmark have created perfectly crafted math tables that the camera can access and know exactly how many frames are necessary based on your focal length, digital back, aperture and distance in your focus stack. This number will be shown in blue in the Focus Stacking Tool as long as Image Count is set to Auto in the sub-menu)
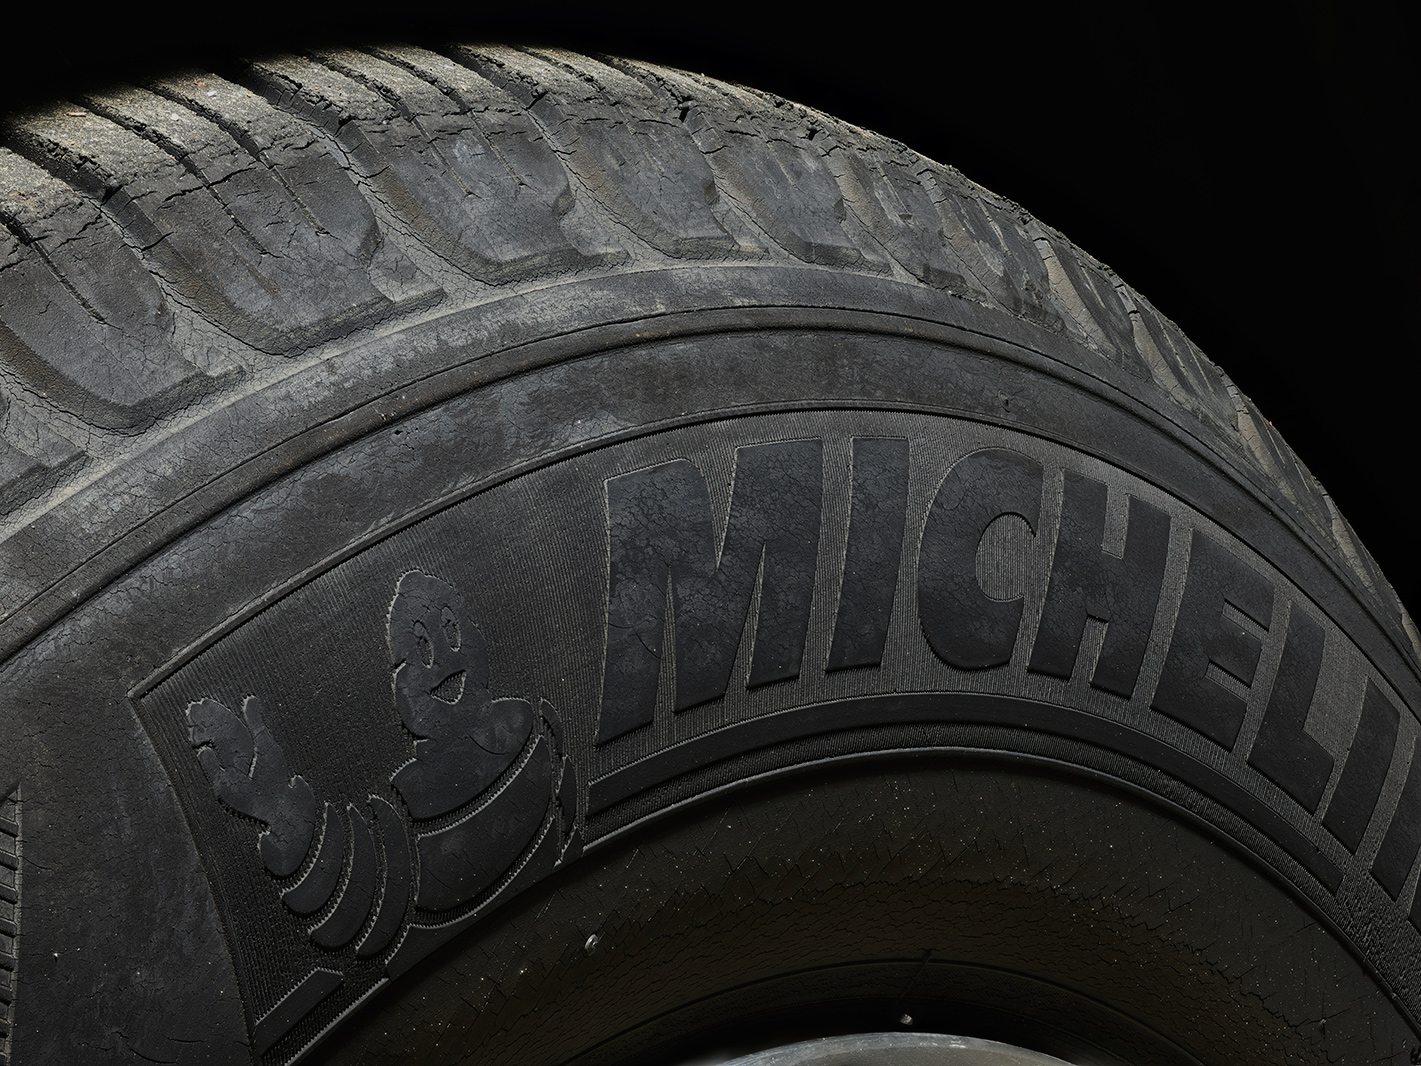
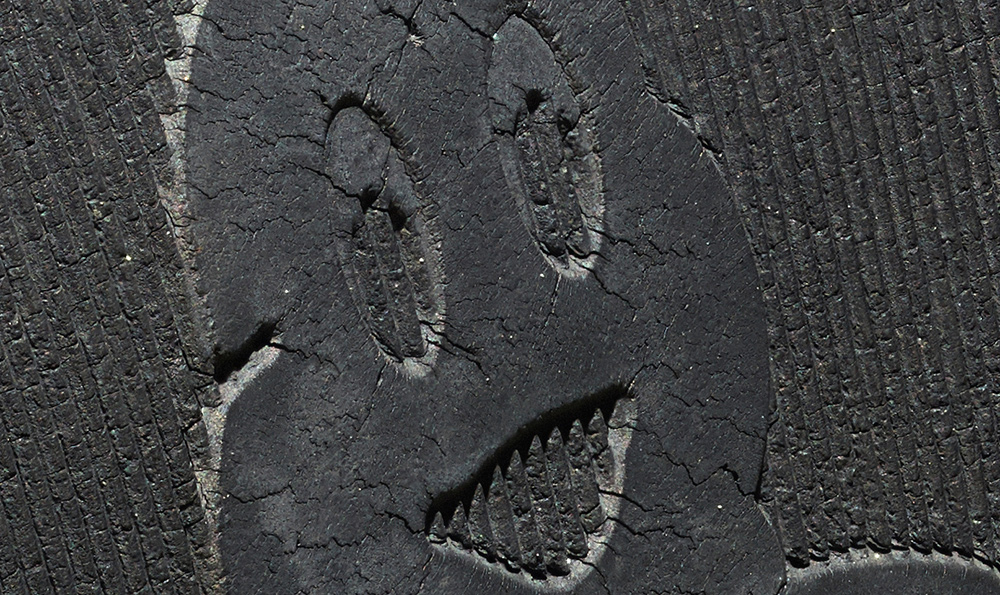
To look at a single shot of the 100 frames at only 1000 pixels in this blog, may make someone question why at f8 would I need to shoot so many images.
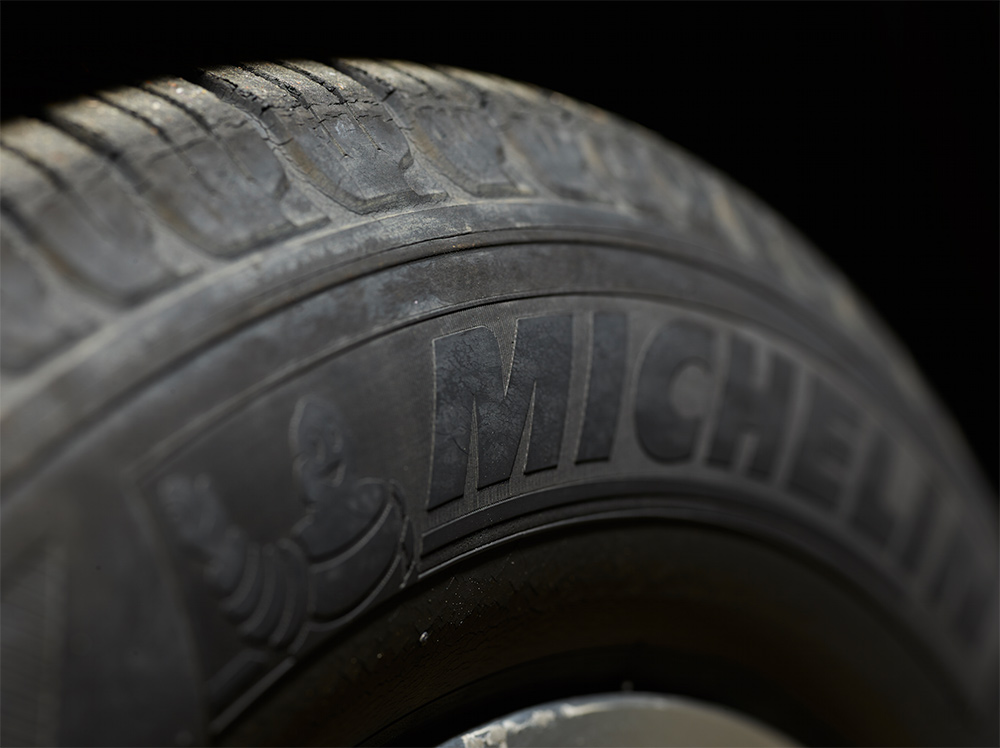
Single Slice of 100 shot Tire
Closer inspection at 100% reveals the sliver of critical focus that is actually captured in one image.
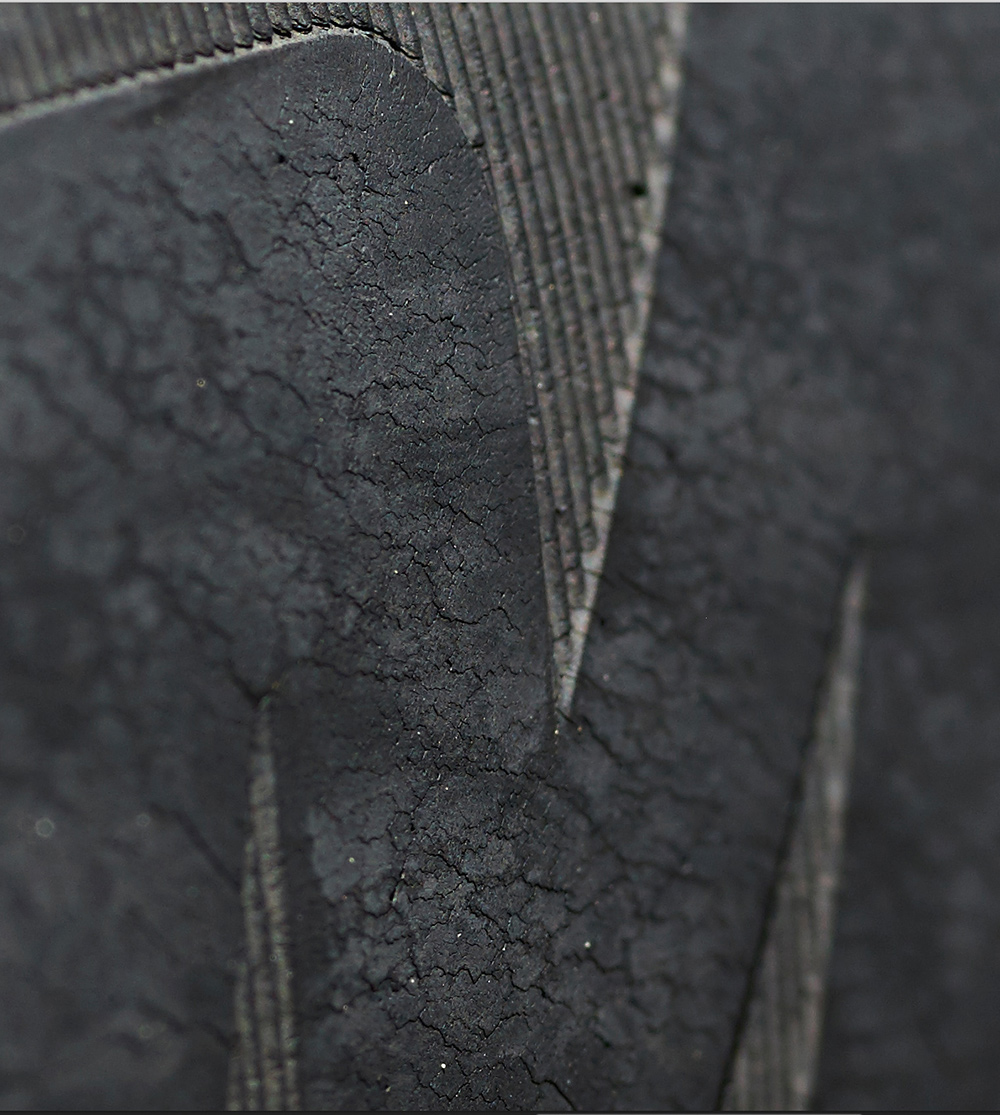
Single Slice of 100 shot Tire Detail
In my previous test while shooting the manually driven focus stack, I was able to shoot the 48 images of the tire in just over 10 minutes. Based on the number of soft areas in the frame, I later realized that I needed to shoot at least 60 frames to get the whole thing in focus. This time, I shot a hundred, and with the Focus Stack Tool, it took less than 3 minutes.
Earlier in the day, I shot a 90 shot focus stack on the 200x 8GB card I had handy in the IQ-S compressed format and was able to click off 50 shots at about 1/second before the buffer overran and slowed down to 1 every 5 seconds. Moving to a 300x card next, I was able to capture the full sequence w/o seeing any hesitation due to buffering. My usual 32GB-1000x card, of course has no issues at all with the red indicator for disk writing turning off only moments after the 100 frame focus stack was captured. Word to the wise, don’t start a 40+ Focus Stack if your XF battery is less than 1/2 power by too much, the camera will shut down, your IQ back with it and you’ll lose your set points rendering any images shot so far useless. This feature makes the XF’s hunger for milli amp hours larger than anything else I’ve seen on this camera that until now I’ve never really been concerned about.
Phase One XF IQ3-100, Phase One AF 120 Macro, Detail at 100%
Another strength in the Focus Stack Tool is that you can approach setting up your shot in a myriad of ways: making use of the viewfinder, Live View on the back, on an iPad using Capture Pilot, or through a tether using Capture One. Once again, I was shooting untethered, using the Ad-Hoc driven WIFI signal straight off the IQ3-100 to connect through Capture Pilot so I could use my iPad as a larger Live View screen. And having run out of daylight on a weekday night, I set up the Profoto HMI, prompting neighbors to ask if I was ‘shooting a movie’ and gathering moths from miles away.
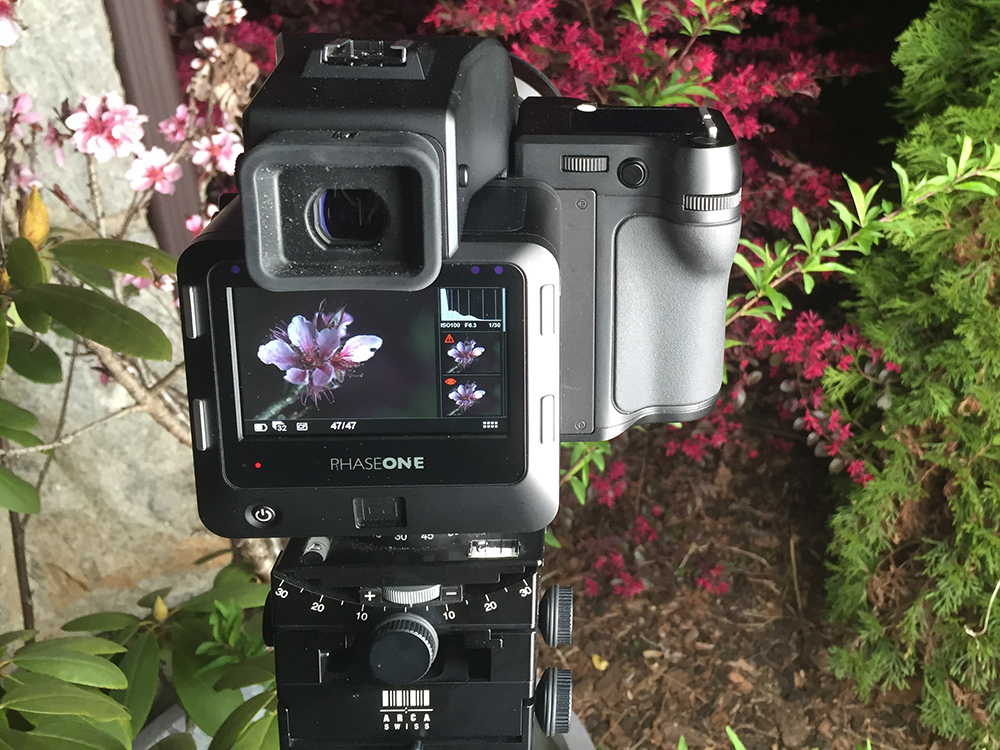
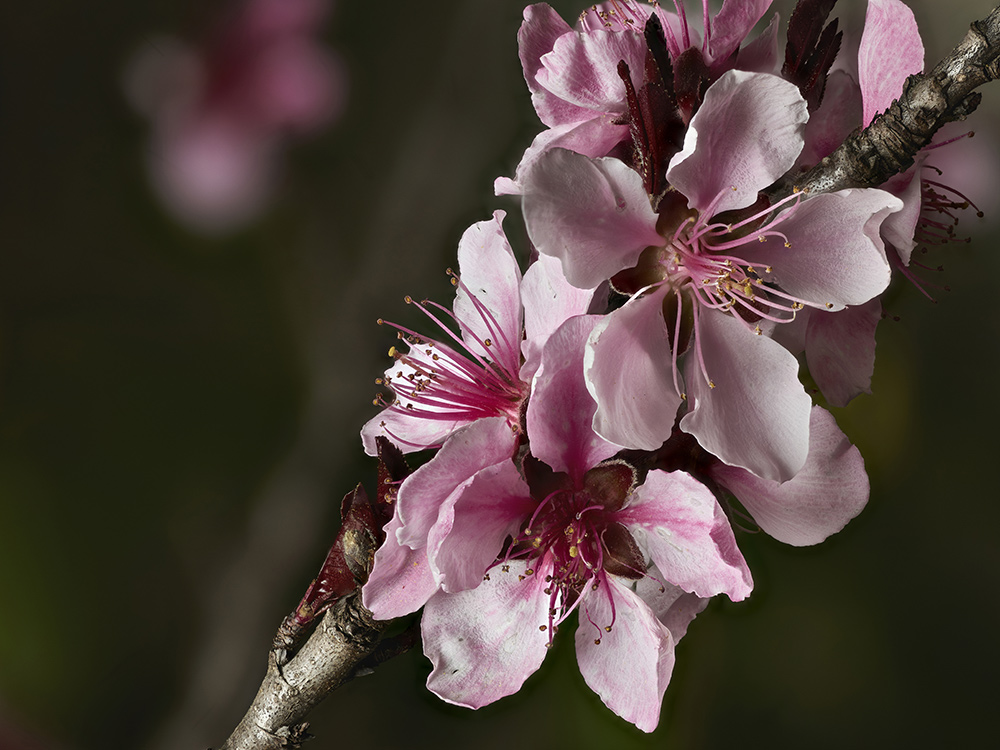
POLLEN DUSTED XF
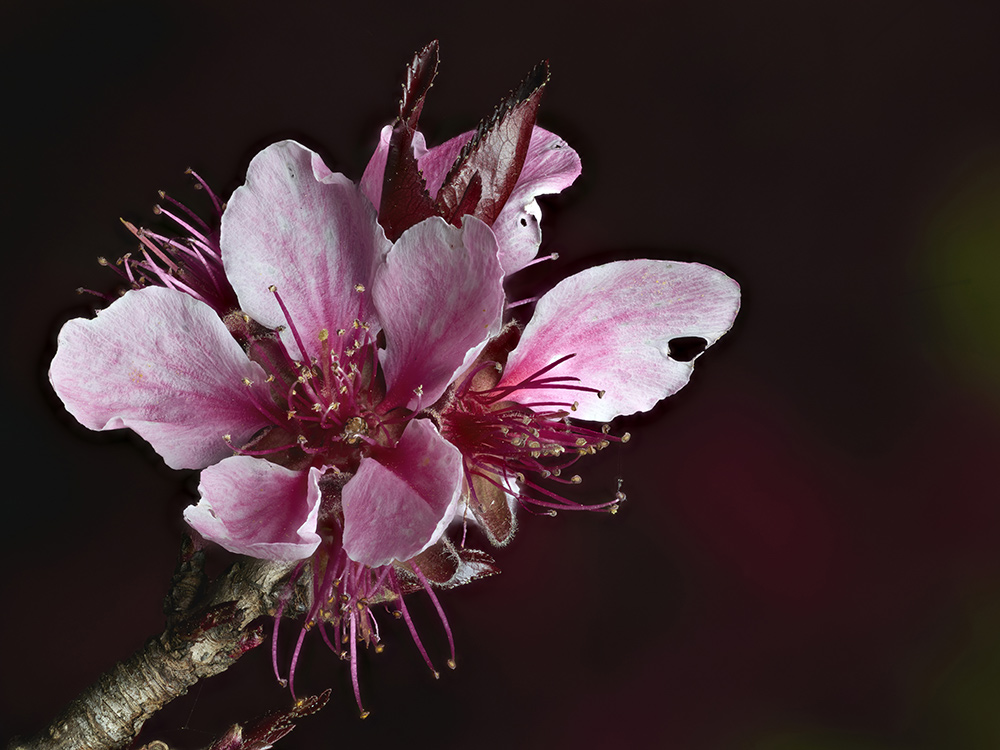
Cherry Blossom 30-Image Stack
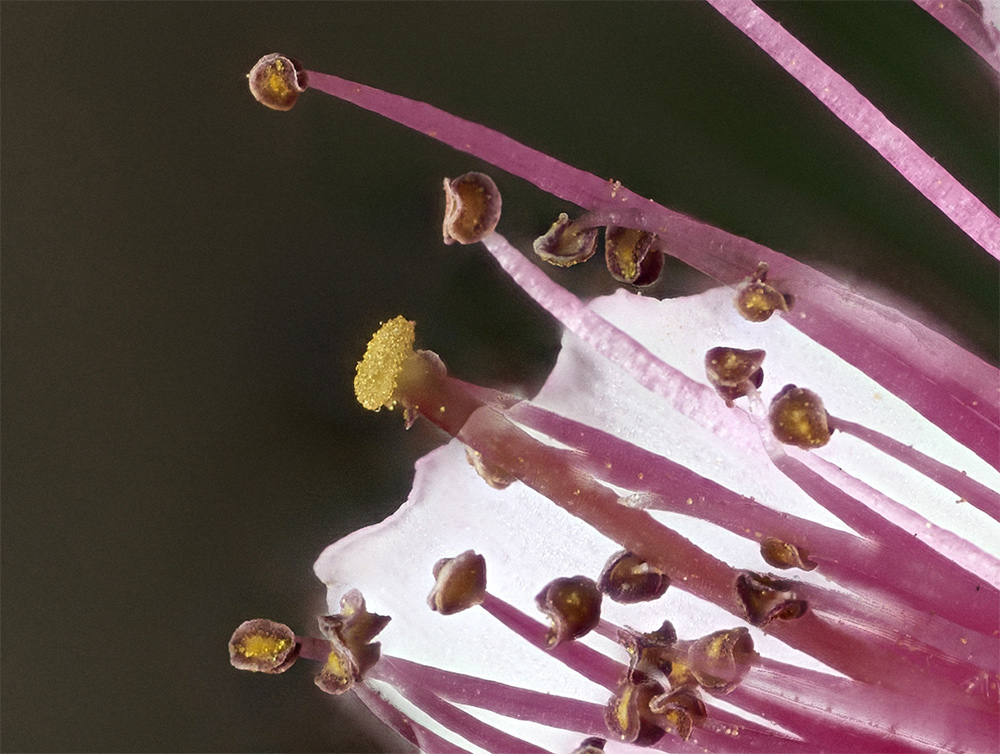
Cherry Blossom 30-Image Stack Detail
Cherry Blossoms 60 image stack
Cherry Blossoms 60 image stack Detail
In manual focus, you can rack the lens to either the furthest or closest point, enable autofocus, and then the camera automatically dials the lens forward and back to determine the full focus range of the lens. It then settles back in at the spot you began. Simply tap either the upper or lower hard menu buttons on the XF and you’ve marked your first position. At this point it is best to use the thumb wheel (gross movement) and/or index finger (fine tune) focus stepping to move the focus to the opposite set point. It takes a little bit of time to get muscle memory to know which rotation of the dial causes what, what rate of dial acceleration creates the most difference (sort of a flicking movement works best), and looking at the display. Somewhat counterintuitively, the further distance comes with a lower number. This makes sense because the increment shown is the amount of autofocus steps counted from infinity. This being said, the larger value should always be the number closest to you.
Once your two points are set, you’re good to go. I would then tap the shutter button to go to the home screen. With Vibration Detect on, shoot a single test image to check exposure, lock the mirror up and swipe back over to the Focus Stack Tool. Then hit the rear button and let the sequence begin. At this point, the process is entirely automated, quick and far superior to manually stepping the lens yourself.
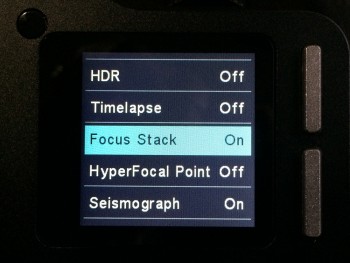
Also, very nicely, the rear body button that you use to start the Focus Stack Sequence doesn’t interfere with having autofocus set to that button in your primary camera modes. Outside of the focus stack tool, your programmed buttons act exactly as they should, within the tool, the rear button starts the sequence capture. Another nice feature is the ability to turn off the tools you don’t want on the top screen, so I disabled HDR and TimeLapse tools, so a single swipe left got me directly to the Focus Stack tool from my home screen. (The ability to order these tools in desired presentation would be a nice, future feature)
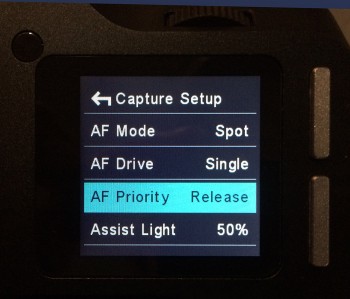
Very important note: Autofocus Priority must be set to ‘Release’ and not ‘Focus’ while using the Focus Stack Tool or pressing the start button will start nothing. (Firmware version 2.01.2) This was the only workflow oddity I found that conflicted with the global settings in the camera.
After importing the images into Capture One 9.1, I’d do a little exposure, contrast and dynamic range correction. I set the color temperature if even 1º Kelvin different so I could save and apply those corrections to the entire sequence. Then export from Capture One, so I could import the finished files into a focus stacking processor like Helicon Focus or Photoshop.
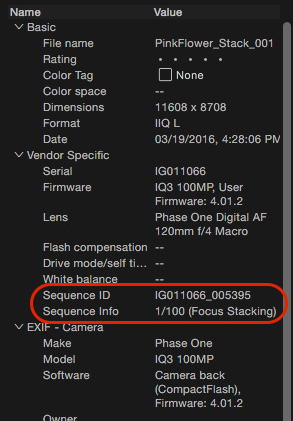
Crazy cool in Capture One 9.1 is the ability to see Time Lapse, HDR, and Focus Stacks as named logical groups with metadata burned into the file that keeps track of what frame of what sequence you’re currently viewing. They call this new feature Sequencing and its incredibly useful. No more white cards or blank frames necessary between groups, the software keeps track of it for you. (Well done, Phase One, well done.)
Helicon Focus is a fantastic, simple, and effective program for assembling the focus stack. It works much better than my experience using Photoshop and is able to find the single strand of focus through the 3D field, isolate it and intelligently merge it with the next. Helicon offers a Free Trial for 30 days and Free License Code for one year if you own Phase One gear. If you are a current Phase One Owner, just go to My Pages section of Phase One’s website and register for your free license.
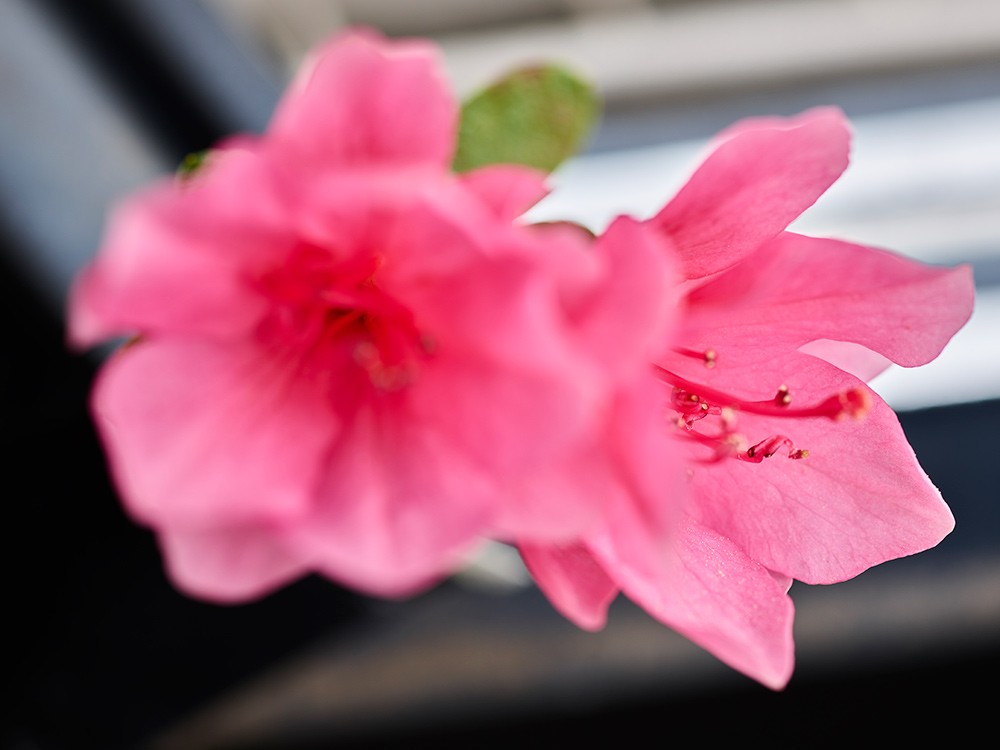
Pink Flower Stack 16/100
Pink Flower Stack 39/100
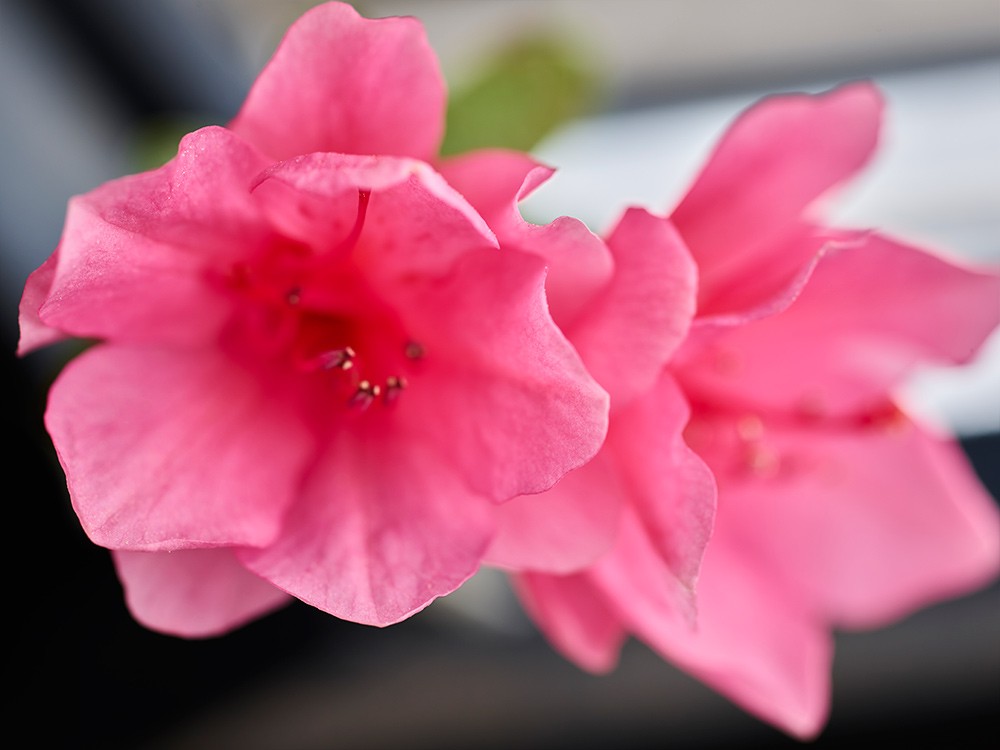
Pink Flower Stack 65/100
Importantly, aligning the color temperature to a single value before exporting from Capture One is very important because Helicon Focus, while superior in mapping and aligning the focus based layers, does not exposure merging the way Photoshop does. Thus consistent values in all of the images are very important to a successful stack that doesn’t show zebra stripes. (edit 11/22/19: This is no longer the case, but color/exposure continuity between all frames does produce a cleaner file)
I exported all the images shown here to 100% quality Jpgs from Capture One. The jpgs off the 100mp capture were around 50mb each compared to the 303.7mb per image as 8-bit TIFF. For commercial images, I always export out to 16-bit TIFFs, but if I’m just playing around the jpgs are sufficient. 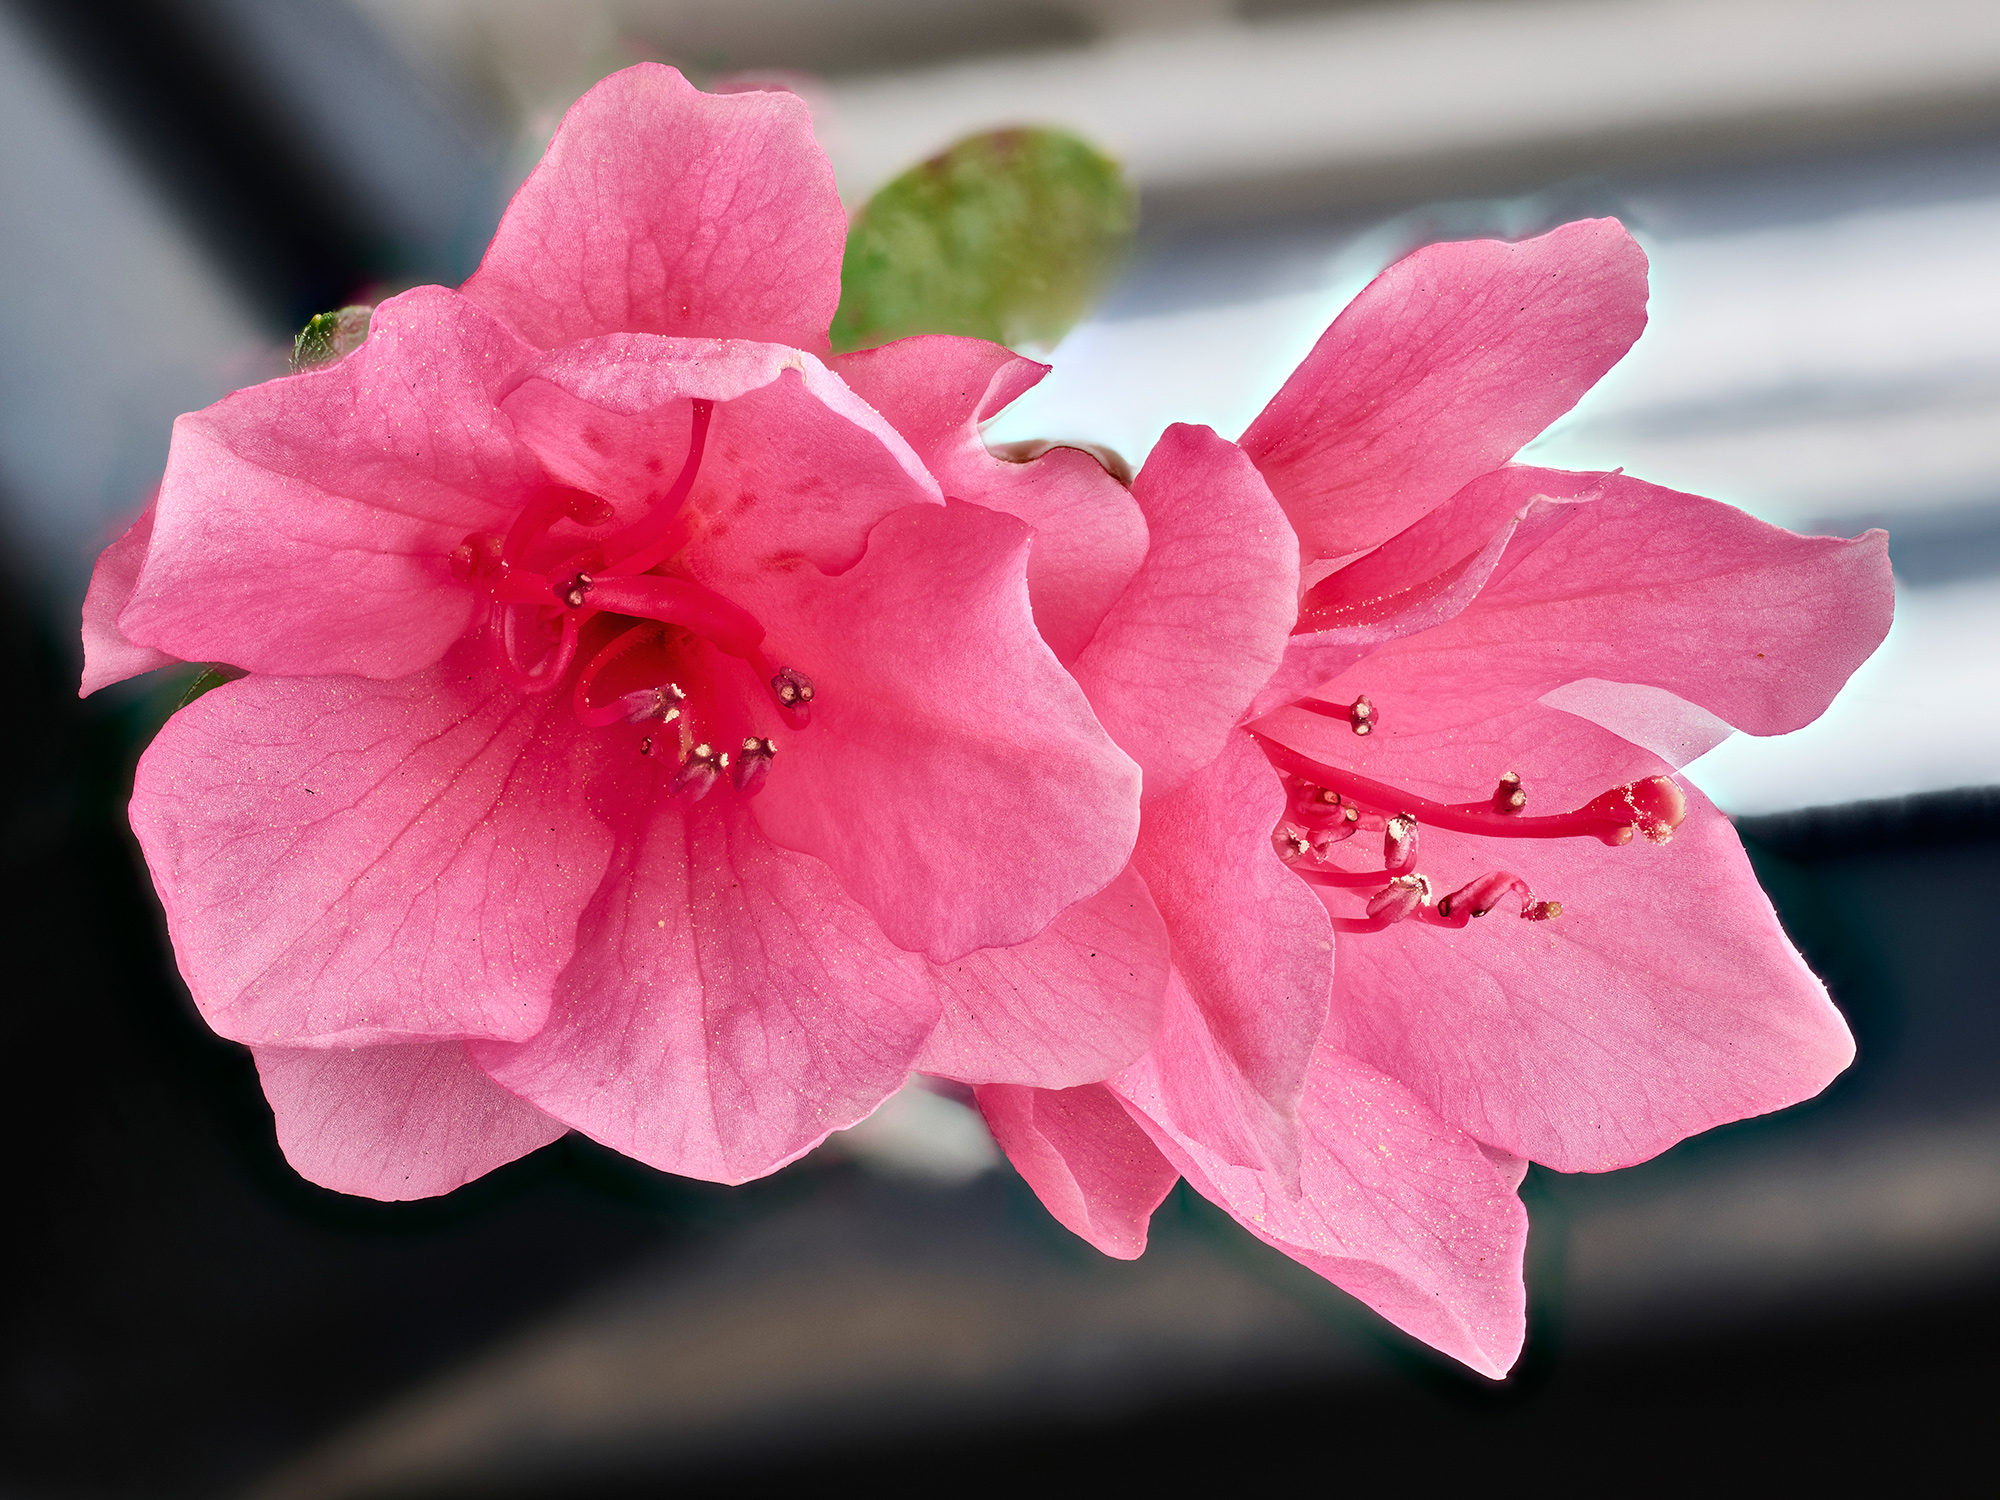
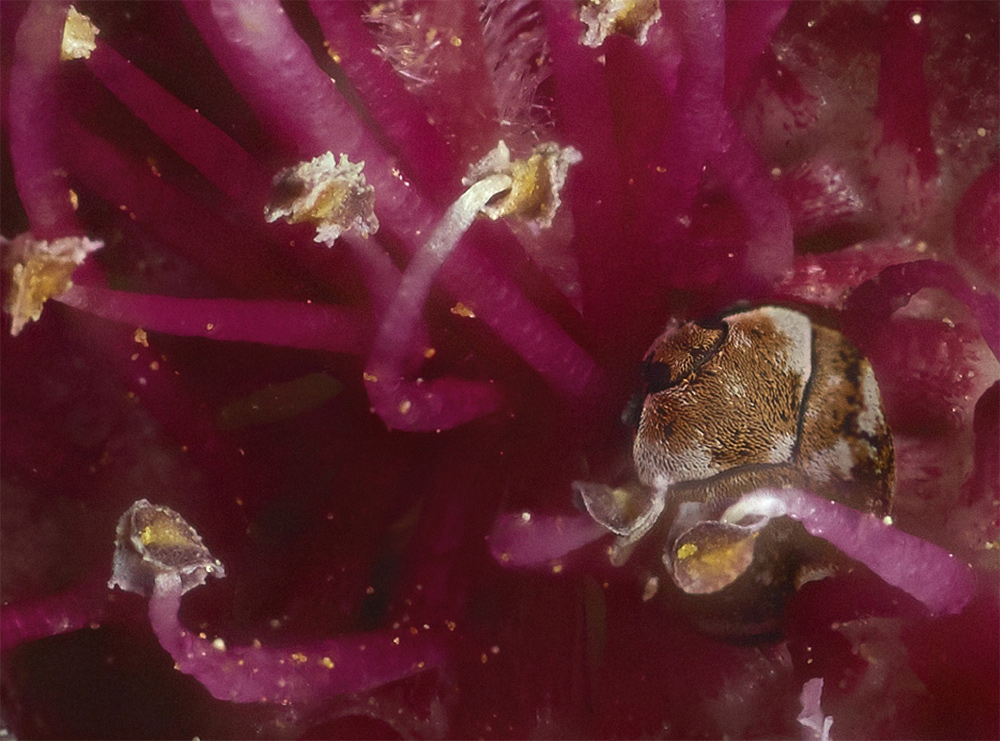
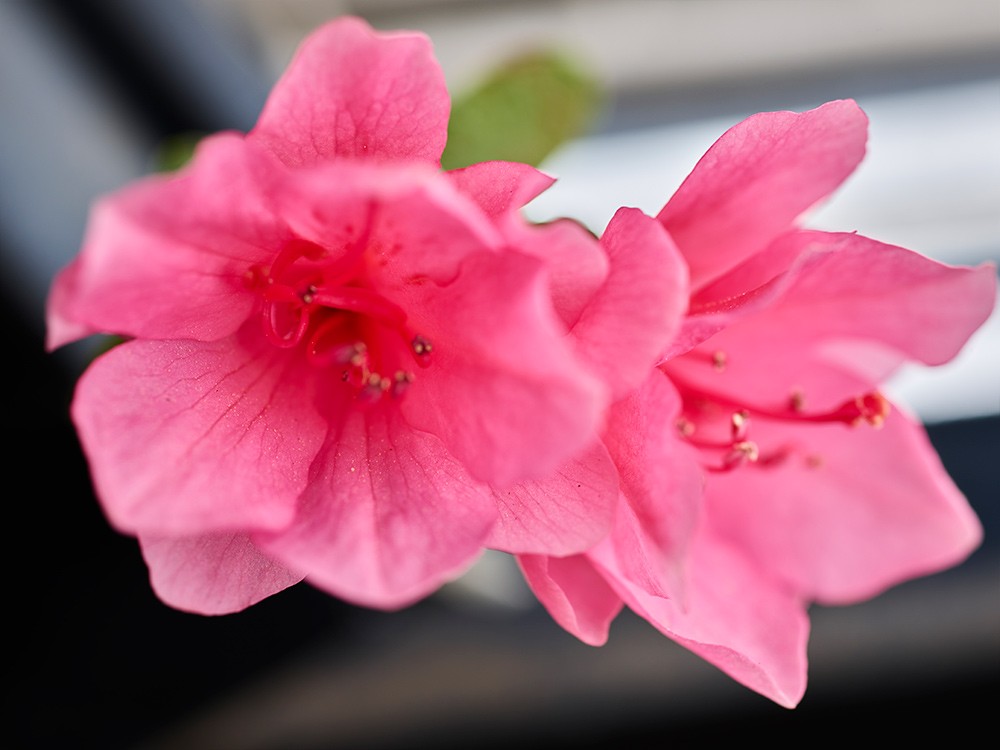
Pink Flower 100 Slice Image Stack
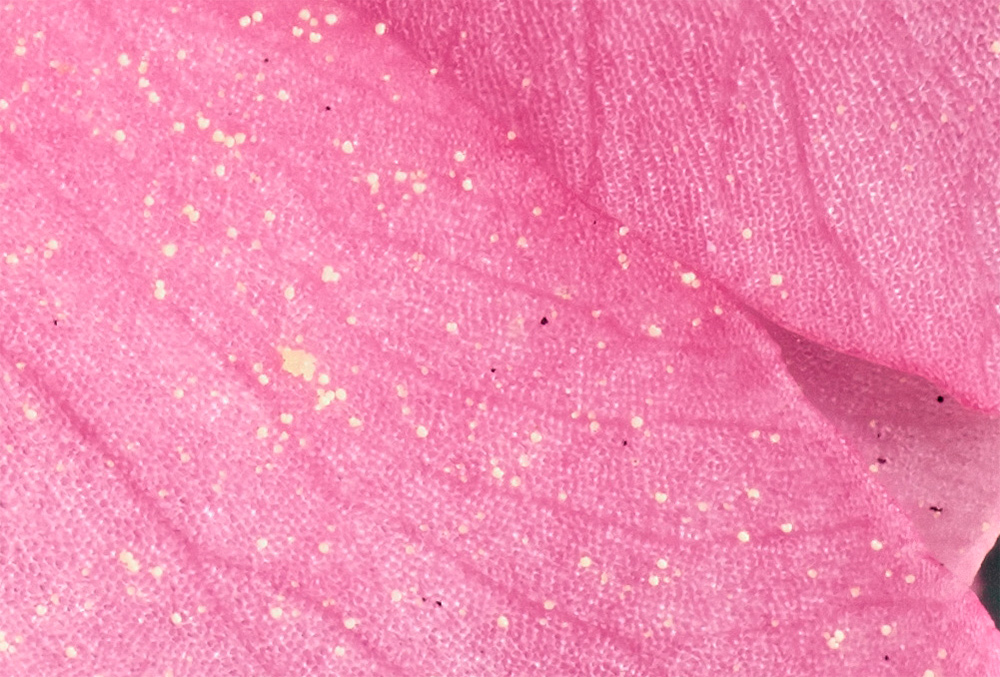
Pink Flower 100% crop
Helicon’s support documentation is quick, concise and very helpful, so I won’t go into that part of the process here. With a little trial and error, and only about 3 images, I ended up changing settings and re-exporting to get the results I wanted and I found the setting that worked for the bulk of my test images. Ultimately, Helicon works at the same speed with processed TIFFS as it does with the JPGs. (Slow Hard Drive performance or low RAM could potentially affect it, not that I noticed a grotesque difference in speed between my iMac and MacPro)
(edit 11/22/19: Helicon now can make use of GPU processing in their newest build(s) which is likely going to be faster than the default setting of using the computer’s CPU’s, depending on your configuration)
Phase One has implemented a game changer in just this one feature of Update #2 to this camera. There is some variance noticeable from sequence to sequence. Even with the same hard numbers in play. But I found that adding an extra 10 frames on either side of your starting points pretty much insures that every capture group contains all the crucially focused files you need. This feature deserves an A, just shy of an A+. Phase One, this is nearly perfect. Great job!