We live in an information age. However, with the plethora of information available online comes a substantial amount of information that is questionable or not even credible. Photographers are paid to “review” products. Websites review camera’s released by their current website sponsors. Manufacturers send out marketing material that is then picked up by their mass retailers and repeated over and over. Prestigious awards are handed out by publications to the highest bidder. Misinformation is rampant.
It is very important to the culture of Capture Integration that we approach distributed information from our manufacturing partners with integrity. We do not just repeat manufacturer claims word for word. We evaluate in real world terms. And when something doesn’t match the claims, we call it out. Not all dealers adopt this approach. When you come to our website and read our software and hardware tests, we want you to be able to trust the words that you read from our personal knowledge and experience on the product that we discuss. You can trust that we will never release information, exclamations, or “reviews” without validating for ourselves at our studio.
This is our promise to you. – Dave Gallagher
When we received the IQ4 150 frame averaging sample files from Phase One, our team had some questions and concerns about the files. Rather than just presenting these files and proclaiming that frame averaging is great, we wanted to dig into them a little deeper before we decided to publish.
We also decided to wait for the beta firmware so that we ourselves could unravel what this tool is doing. This cost us some time. We were not the first to reveal the frame averaging features for Phase One, but being first is not as important to us as being thorough in communicating to our clients what the sample files were really showing and what the tool itself could actually do.
Steve Hendrix
Amidst the announcement of the Phase One IQ4 150 last year and the many substantially upgraded and new features, one of these stood out as a bit of a wild card. That was the “Phase One Beta Labs”, which promised regularly downloadable feature firmware updates, similar to the ones the XF camera has seen. The first of these was to be the ability to produce Frame Averaged captures in camera. However, through 3 firmware releases (1.00.2, 1.03.26, 2.00.2), there was not a peep. But as of June 27th, a beta version of the Frame Averaging feature has finally been made available to dealers with the public beta version planned to release in the first week of July.
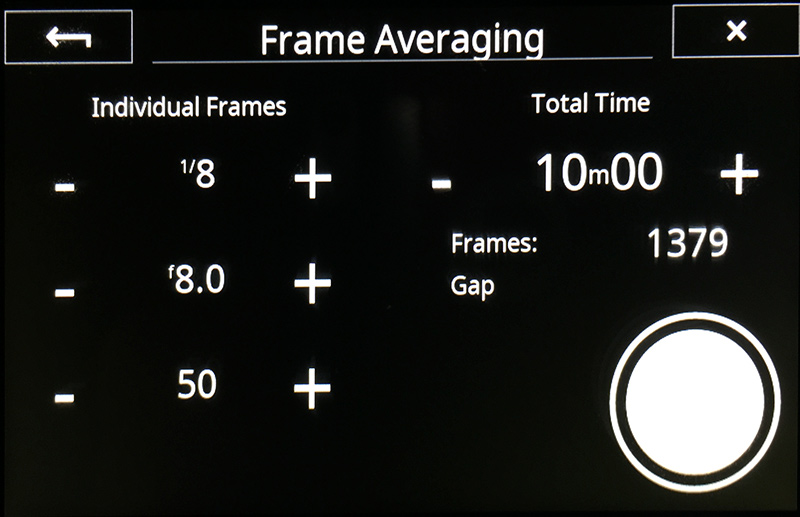
The Interface for the Frame Averaging Tool for IQ4 150
The version we now are working with could be called a pre-beta beta, since the point of the Beta Labs it to produce beta versions of features for end users to work with and present suggestions to Phase One for best practices for the final implementation. Yes, you get to take part in this! But first, dealers have their hands on this somewhat worty pre-beta version.
I’ve been excited about the feature since learning about it and was elated to finally find out where the rubber meets the road with this technology.
Frame Averaging offers benefits far beyond just the discarding of neutral density filters to create mid-day motion blurs, but also to increase the fidelity of the already exceptional files coming off the IQ4-150, IQ4-150 Achromatic and IQ4-100 Trichromatic digital backs.
The images supplied by Phase One for this late June information release tell some stories about this feature, and while they demonstrate some benefits of the technology, also serve as cautionary tales. I didn’t feel I could even start writing this article until I started playing with the firmware myself. Features like Focus Stacking on the XF have transformed my commercial photography, the Focus Trim feature transformed the speed that I could tune cameras in the shop, but It doesn’t serve our readers for me to parrot the marketing features that I haven’t applied myself to real-world situations in photography.
Note: Feel feel to drag any of these images off onto your desktop to view in higher resolution to avoid the in-browser viewing limitations of our current site. -BK
Many Slices make the Whole:
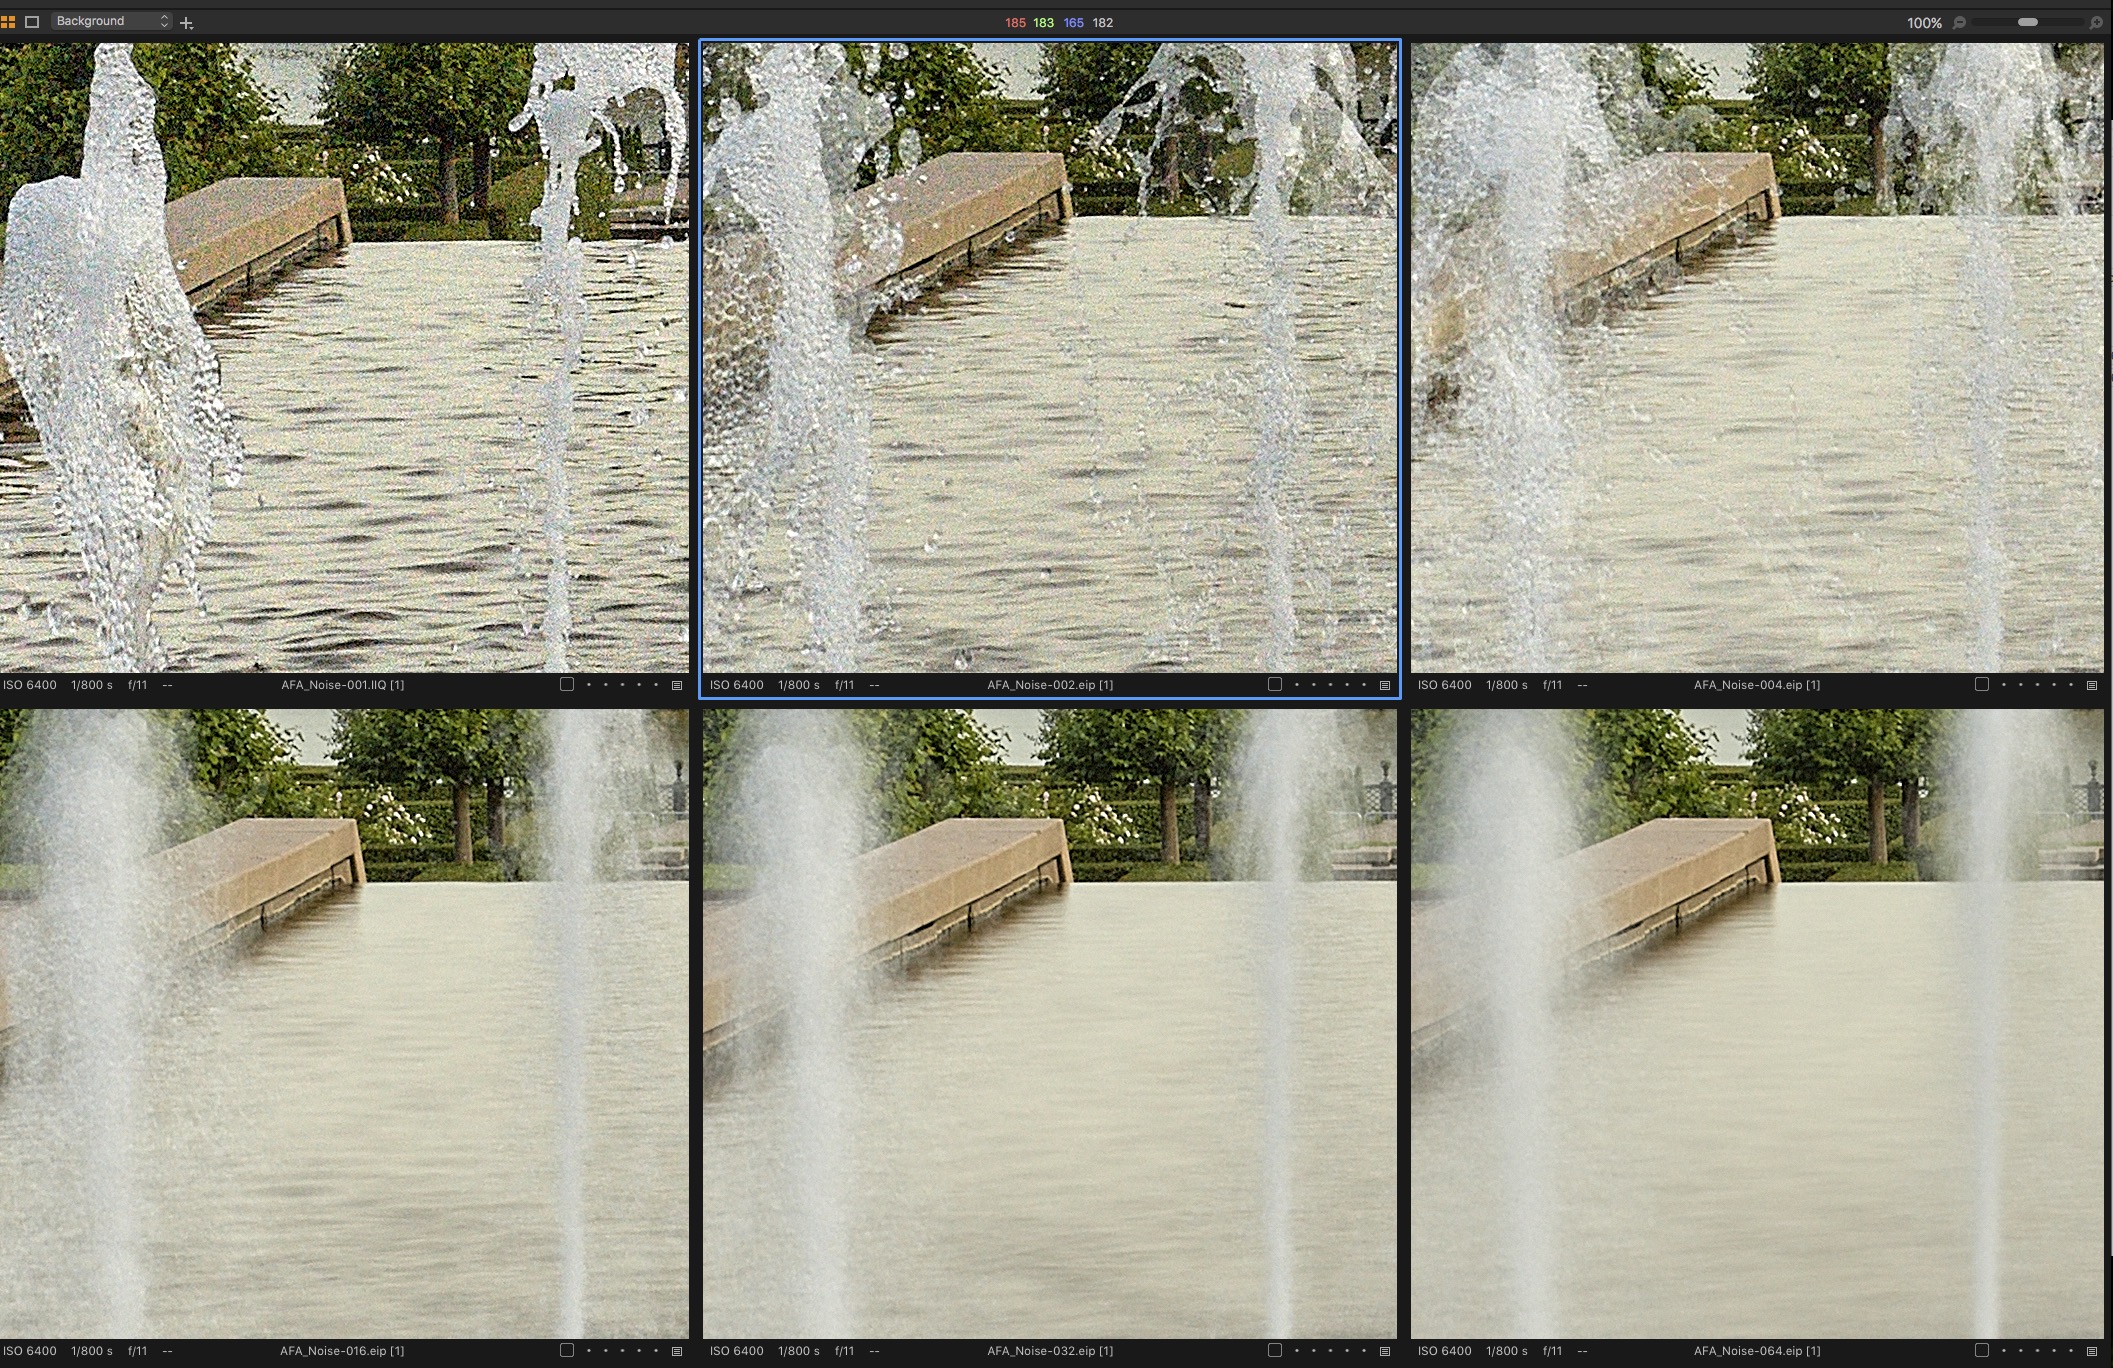
Phase One provided Frame Averaging Sample @ISO 6400 shows noise reduction
As the metadata on the images provided by Phase One indicate above, these images were shot at ISO 6400 and 1/800th of a second. The noise reduction created by the oversampling of the scene dramatically reduces the color noise of the (very unusual for daylight) high ISO selected for this test, and shows benefit with just one additional sample and with 2/3rds of the benefit evident with only a total of 4 shots.
The blur effect, however, isn’t convincing with only 4 shots, as you see the averaging of 4 unique fountain sprays captured at 1/800th of a second, with the definition of each of those frames readily apparent.
- Key takeaway: Frame averaging a high ISO exposure will result in a decrease in luminance and chromatic noise. Frame averaging moving subjects like water can have a smoothing effect – even in daytime with short exposures times – but you may need to “season to taste”. This is one benefit for being able to frame average in-camera, since you can evaluate the results while in front of your subject to arrive at the best result, instead of shooting tons of image sequences and sorting them out in post. With in-camera frame averaging, the result is potentially one single raw capture, just the way you want it.
Word to the wise: If your intention is to blur something in daylight, go for base ISO and the longest shutter speed you can get away with at your chosen aperture.
Be aware of environmental impact:
When evaluating one of the other images provided by Phase One, while seeing the intended daylight effect to create massive motion blurs of the ocean waters, I was left with a ‘meh’ feeling about the image:
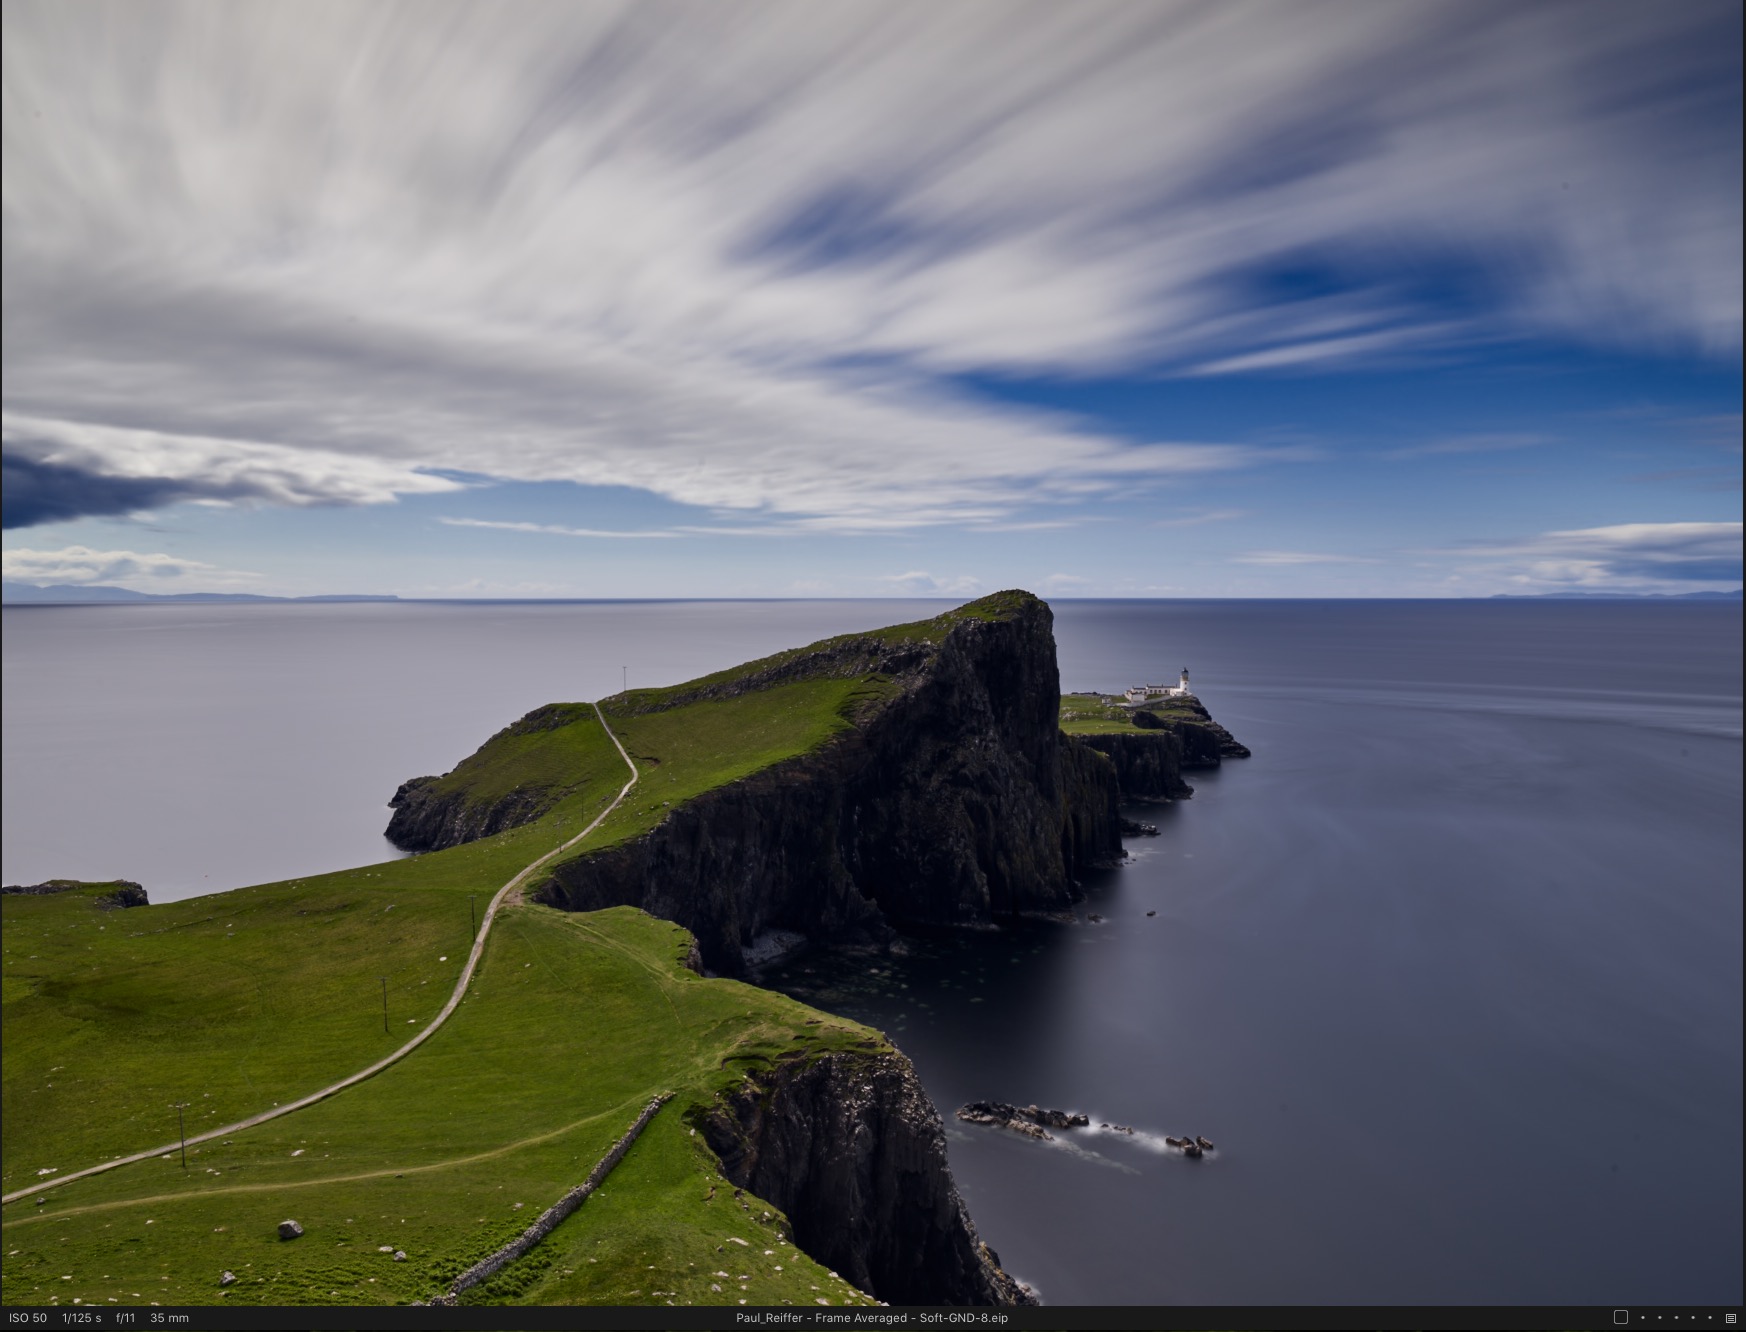
Phase One provided Frame Averaging Sample shows water smoothing
The reason being, the Frame Averaged image was lacking the detail that the single shot image has. Notice especially the detail in the walkway, there is a significant difference.
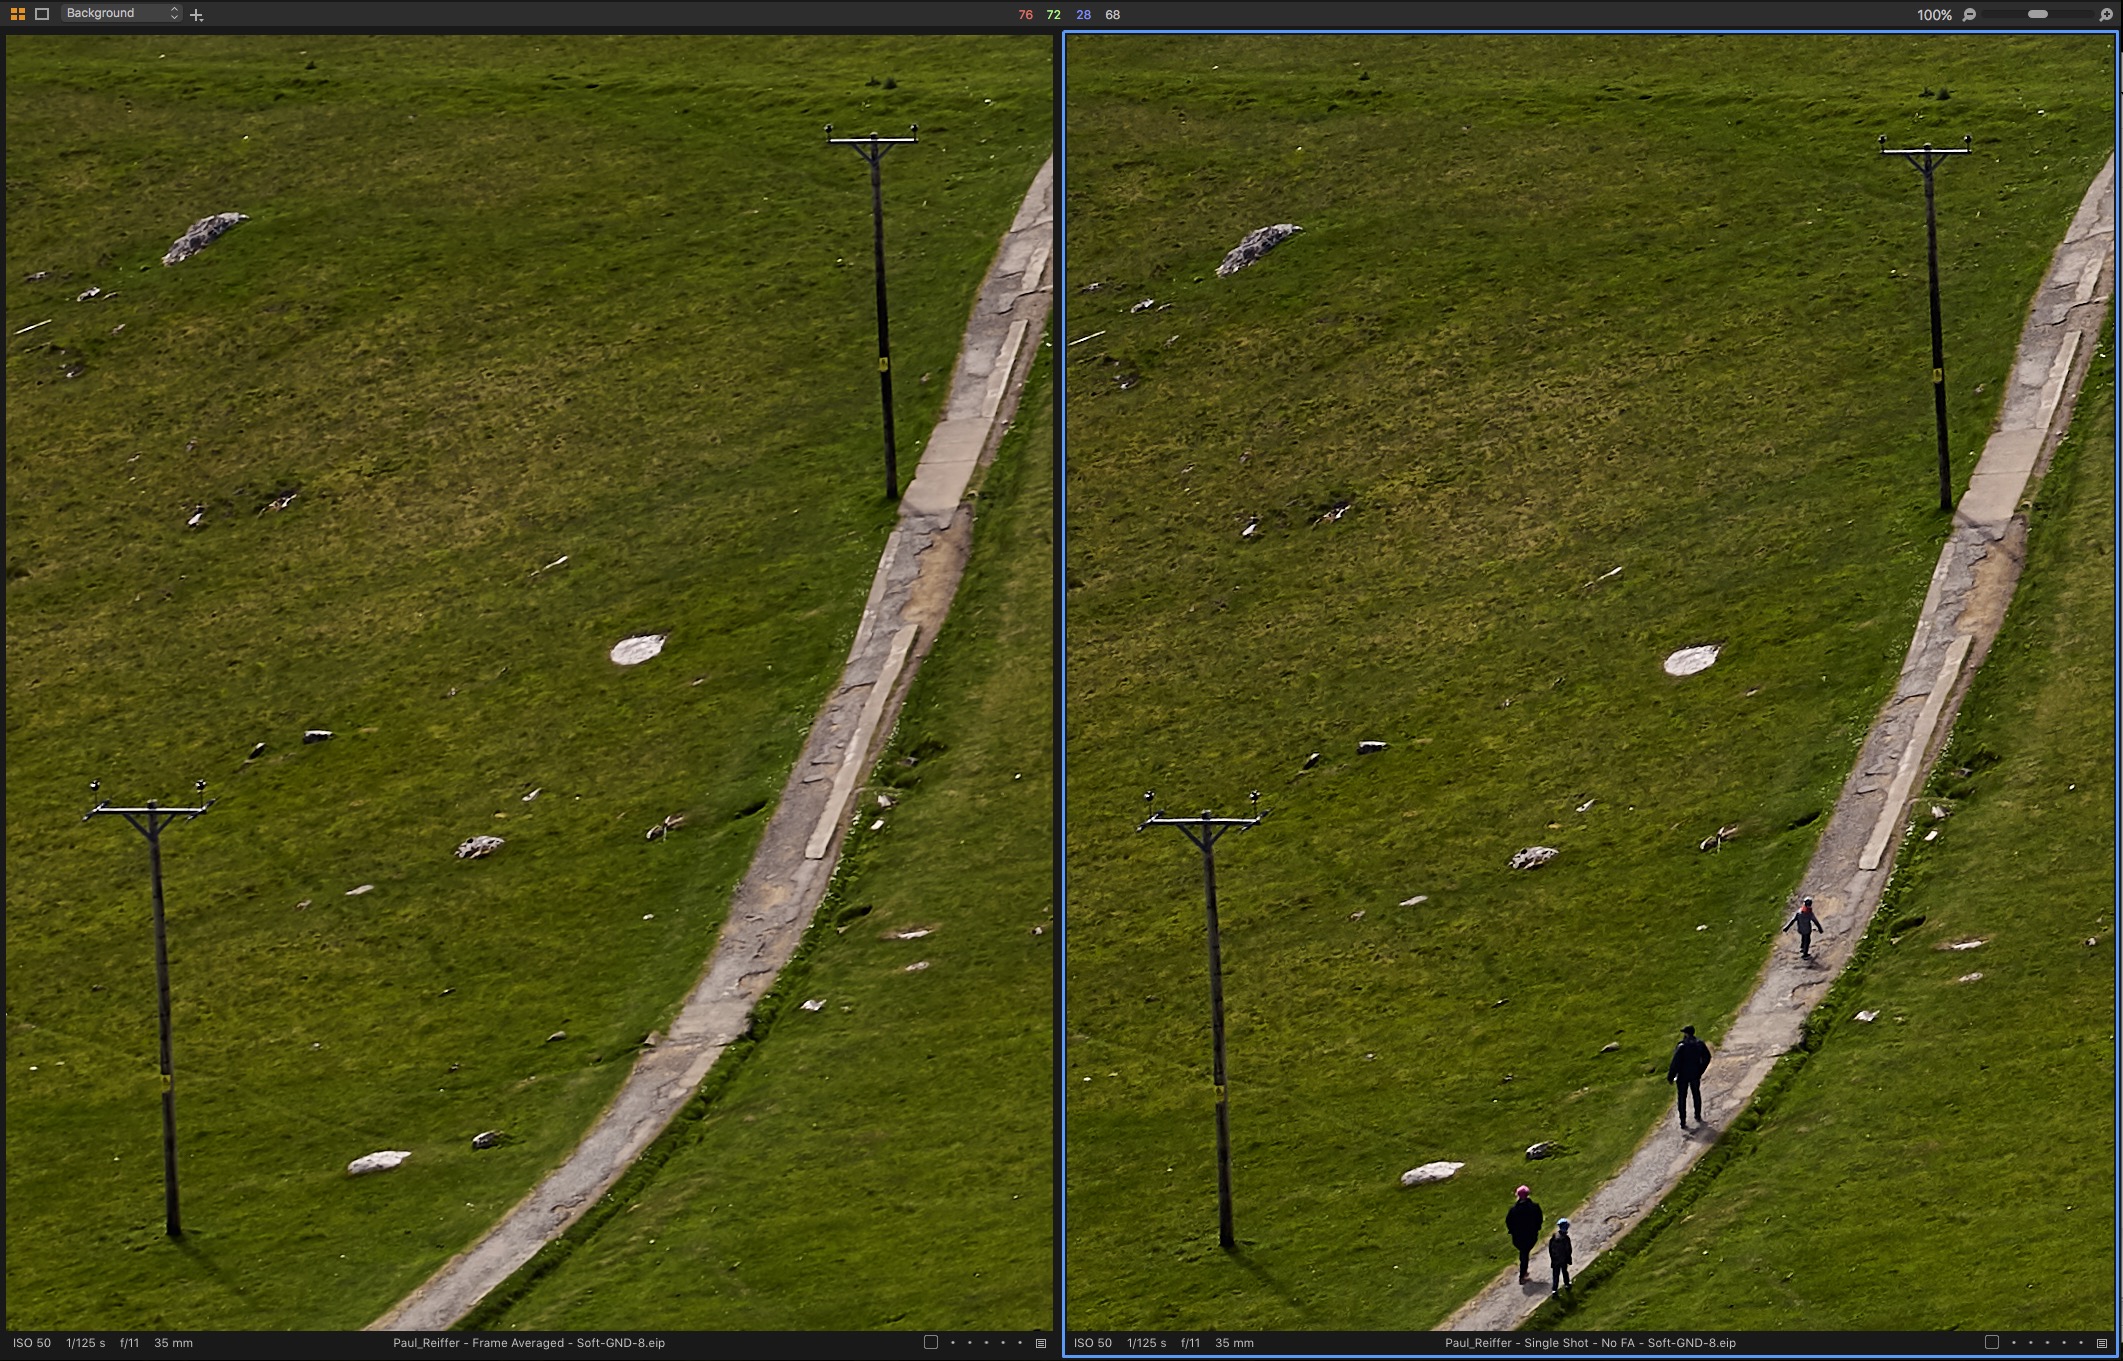
Frame averaged on the left, single frame on the right.
The reason for this is likely a combination of several variables at play. Obviously, the process of Frame Averaging is a series of events over time, and if your camera moves over time, the exposures will become soft. Being situated high up on the coastline, this result could potentially be a wind-induced effect. Environmental effects such as wind buffeting a camera can be easily remedied of course by compositing the blur from one frame averaged image to a matching sharp single image in post processing, if sand-bagging the tripod and waiting for wind gusts to quell weren’t sufficient tactics.
Word to the wise: Your rig has to be locked down as tight as possible and you need to observe all the regular rules for long exposures as Step One for successful Frame Averaging captures.
Note: With the following tests, the image name at the bottom of each image (if not otherwise noted) denotes whether Frame Averaging was in use and the length of time of the exposure in the feature, by using IPTC ‘Description’ token as a naming convention in Capture One.
Phase One has once again been very helpful in entering the used parameters into metadata to aid photographers in post-capture review and organization.
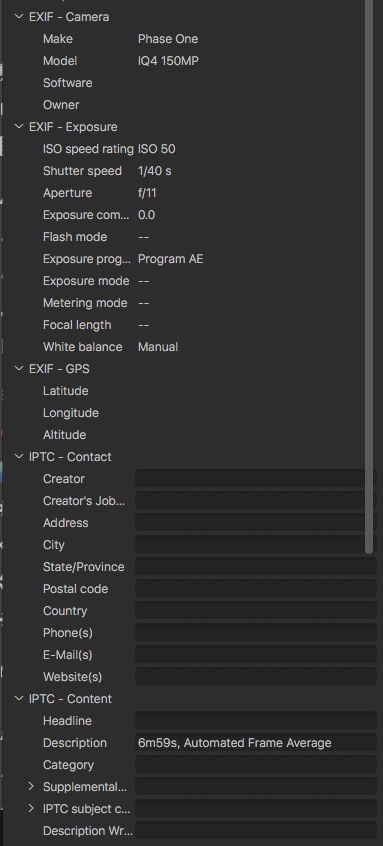
Capture Integration Testing – TEST #1 – City Elements:
Mercedes Benz Stadium served as my first subject, directly down the street from our Atlanta HQ and an object that I stare at weekly if not daily for the tuning I provide to clients with XF cameras for Focus Trim and Hyperfocal programmed settings.
Frame averaging unfortunately provided no benefit in this case, and for a reason you might not have thought of, but I was hopeful that it might mitigate.
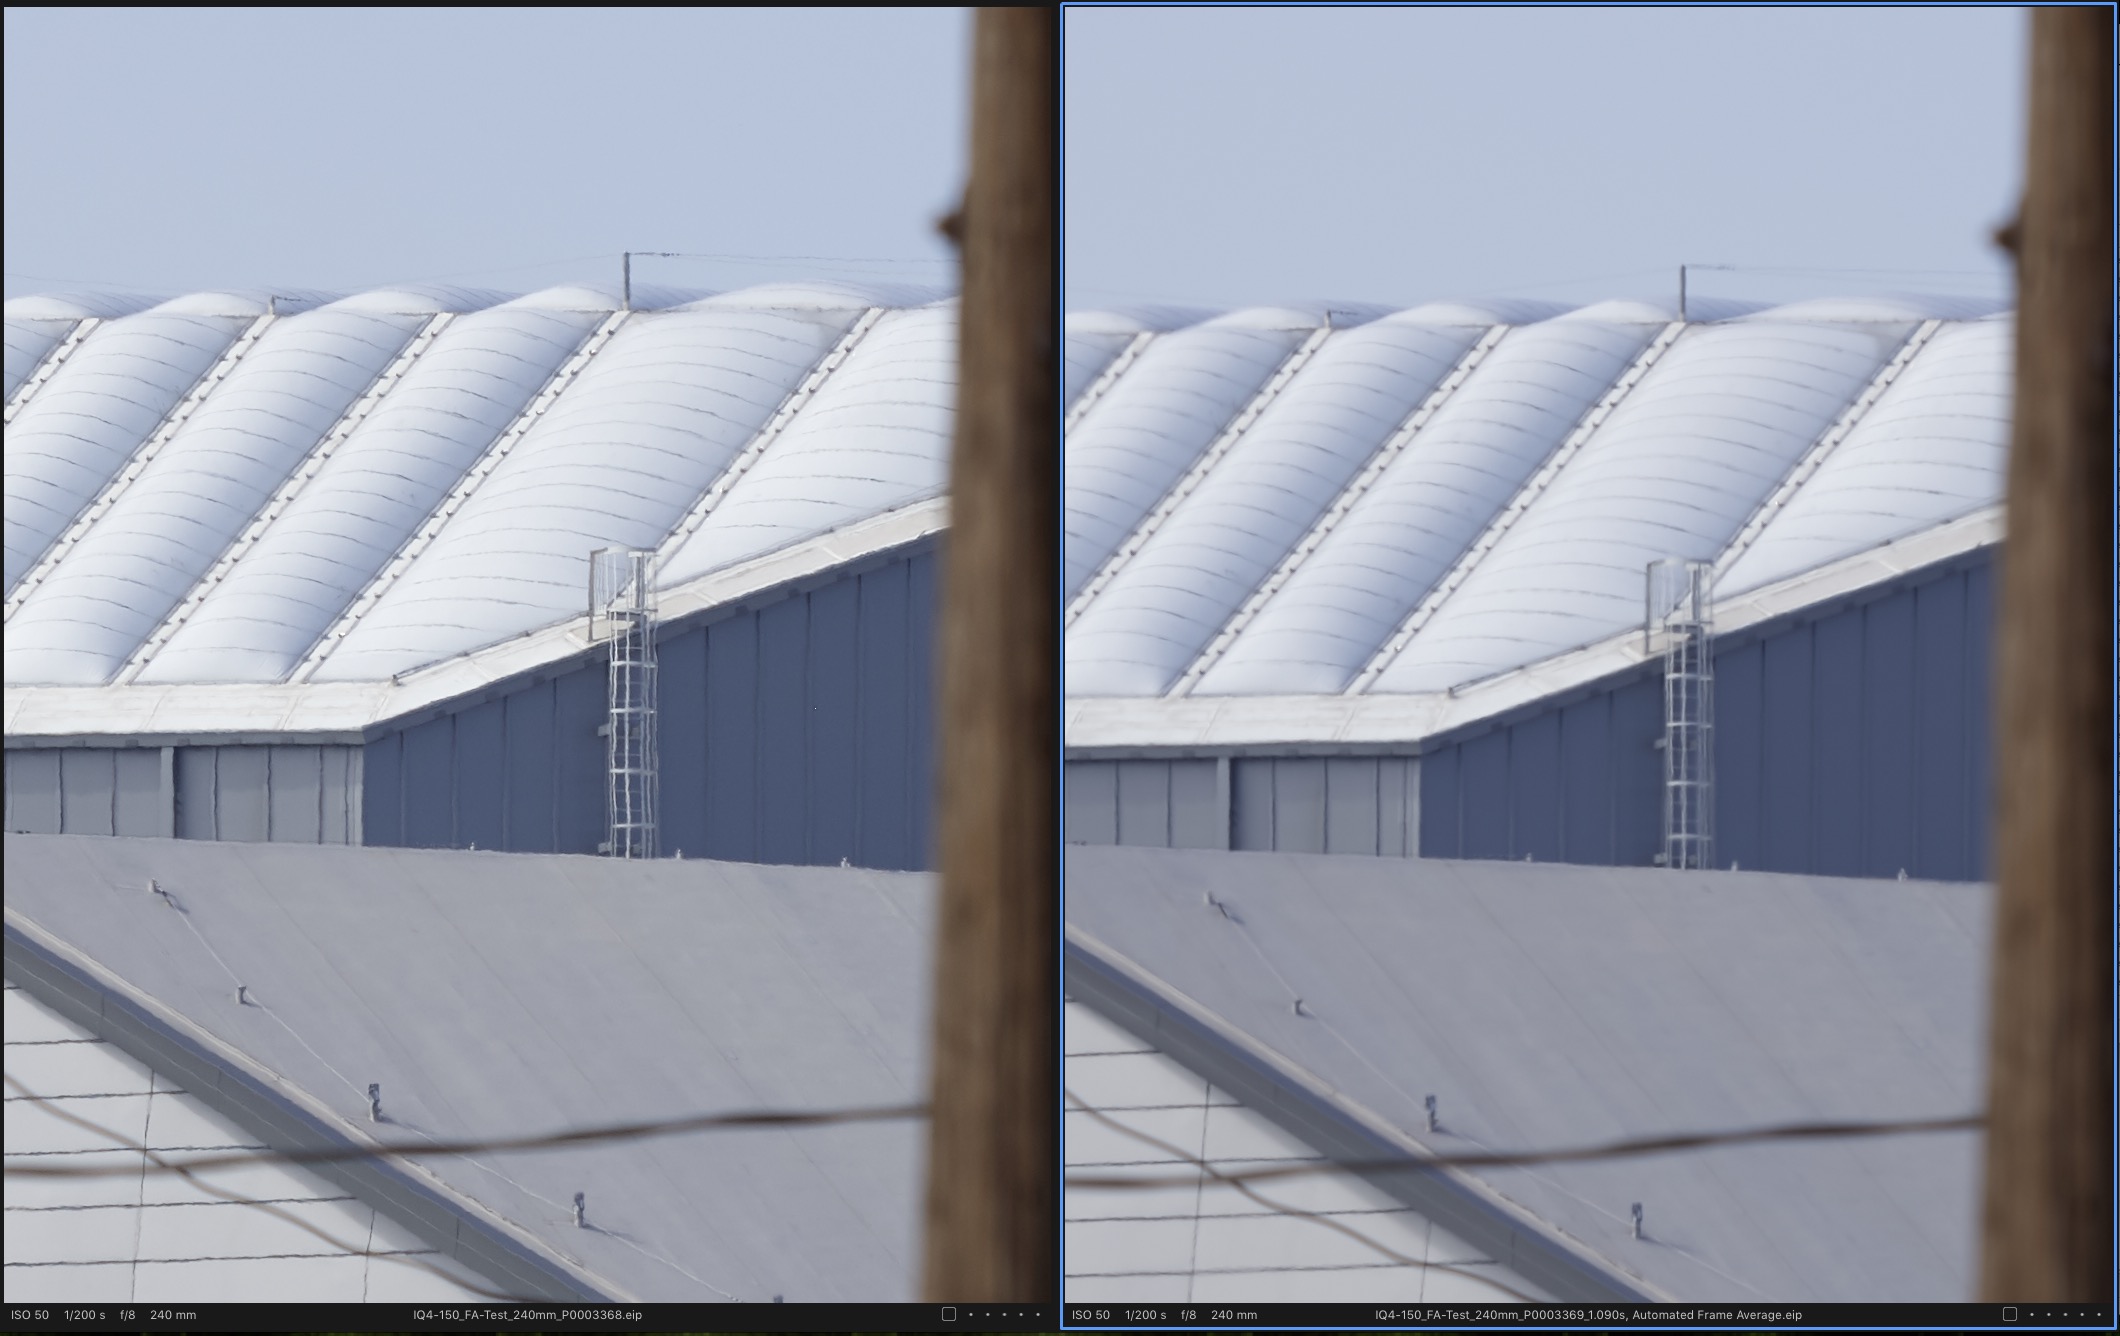
Single frame on the left, frame averaged on the right.
Image on left is the single shot, image on right just a 2-shot (1 second) Frame Average which is notably softer. Increasing the captures by seconds and even a minute had no benefit whatsoever. Have you ever looked at the Live View being produced down the barrel of a 240LS on a hot, humid summer day? (yeah, have fun with that). So what is going on there? A phenomenon known as atmospheric diffraction that is more prevalent in warmer climates as hot air from surfaces interacts with cooler air. Does that mean we would have a superior result in say, October vs July? Yes it does.
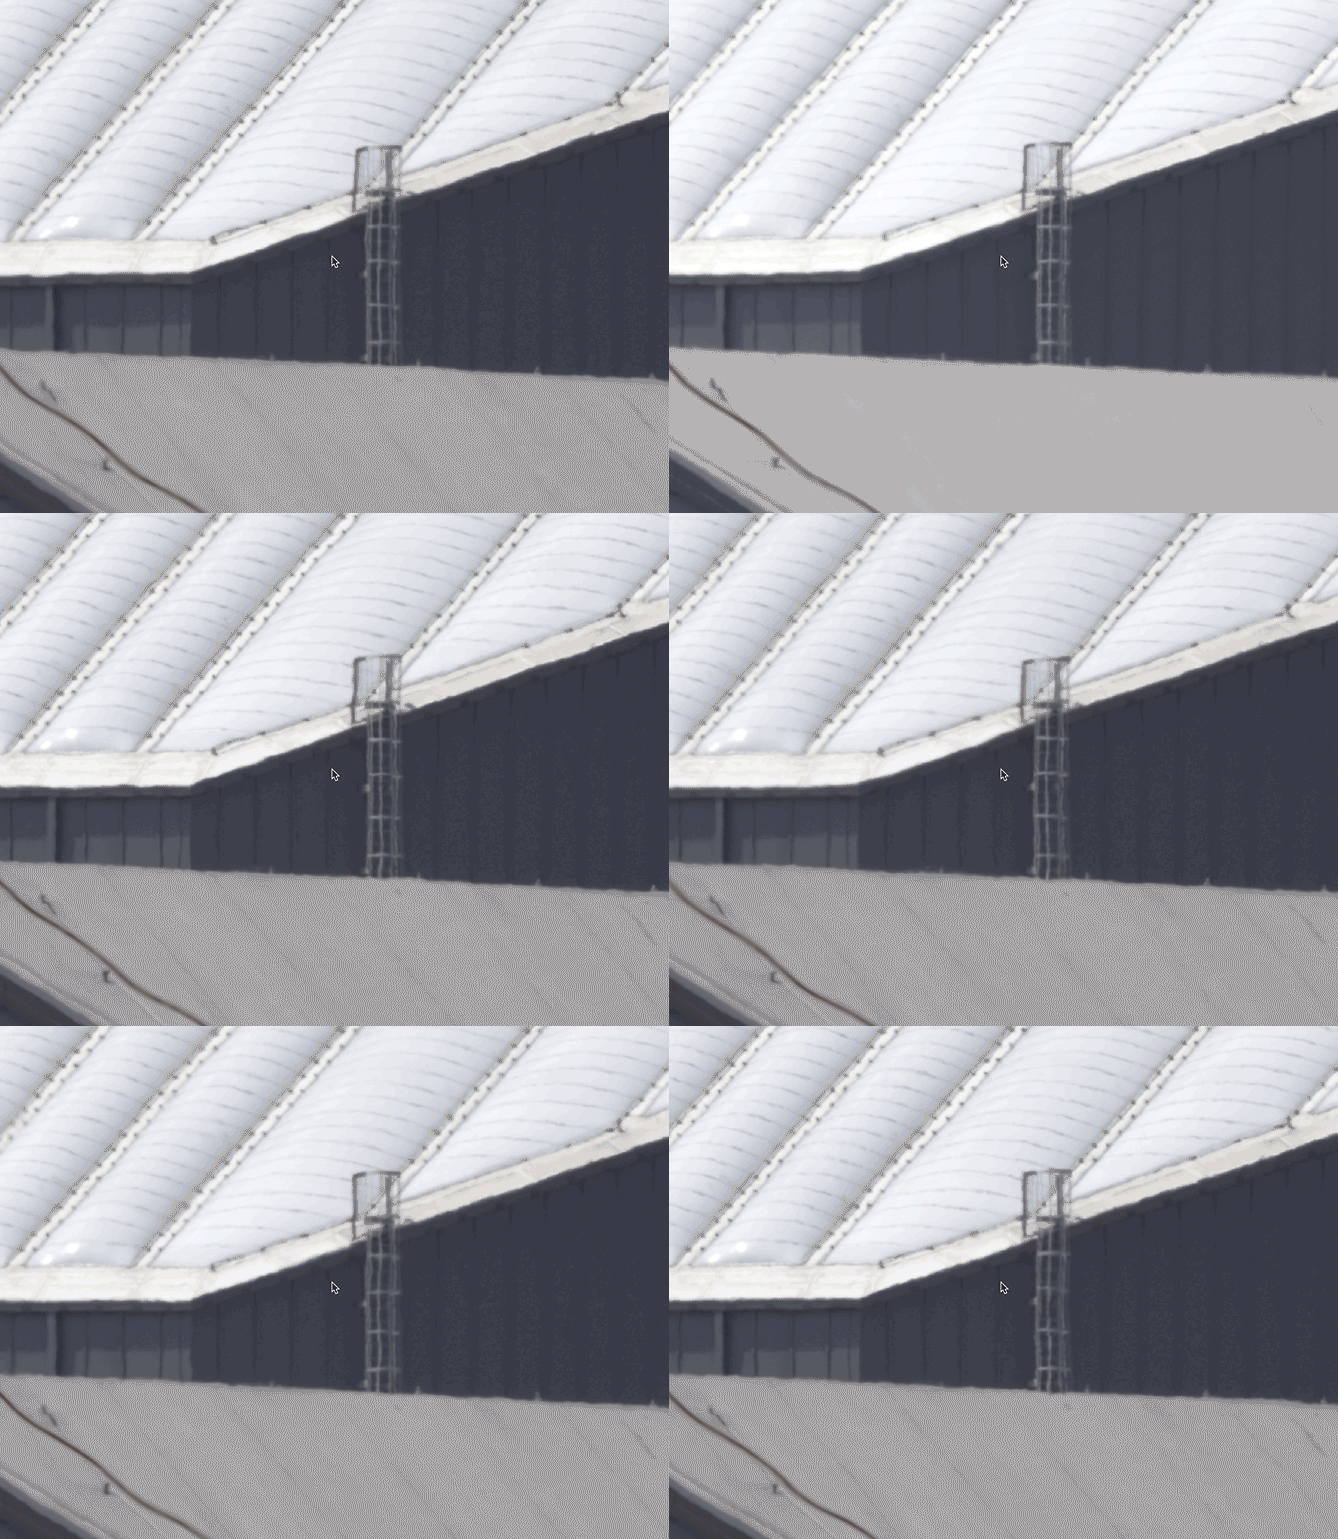
But clearly, trying to assemble a group of images captured with the Frame Averaging tool whose content is fluctuating in shape like the image above is not going to lead to anything but softness, albeit with straighter lines.
Word to the wise: It is unlikely that Frame Averaging will allow you to shoot a single image on a hot, humid day that can be used without retouching it into a separate, traditionally shot single-shot image.
Side Note – City-speed street traffic can have a centipede effect:
While shooting my distance subject test, I also tested specifically for the kind of things that can end up in your scene, and of course cars are ubiquitous in any urban environment.
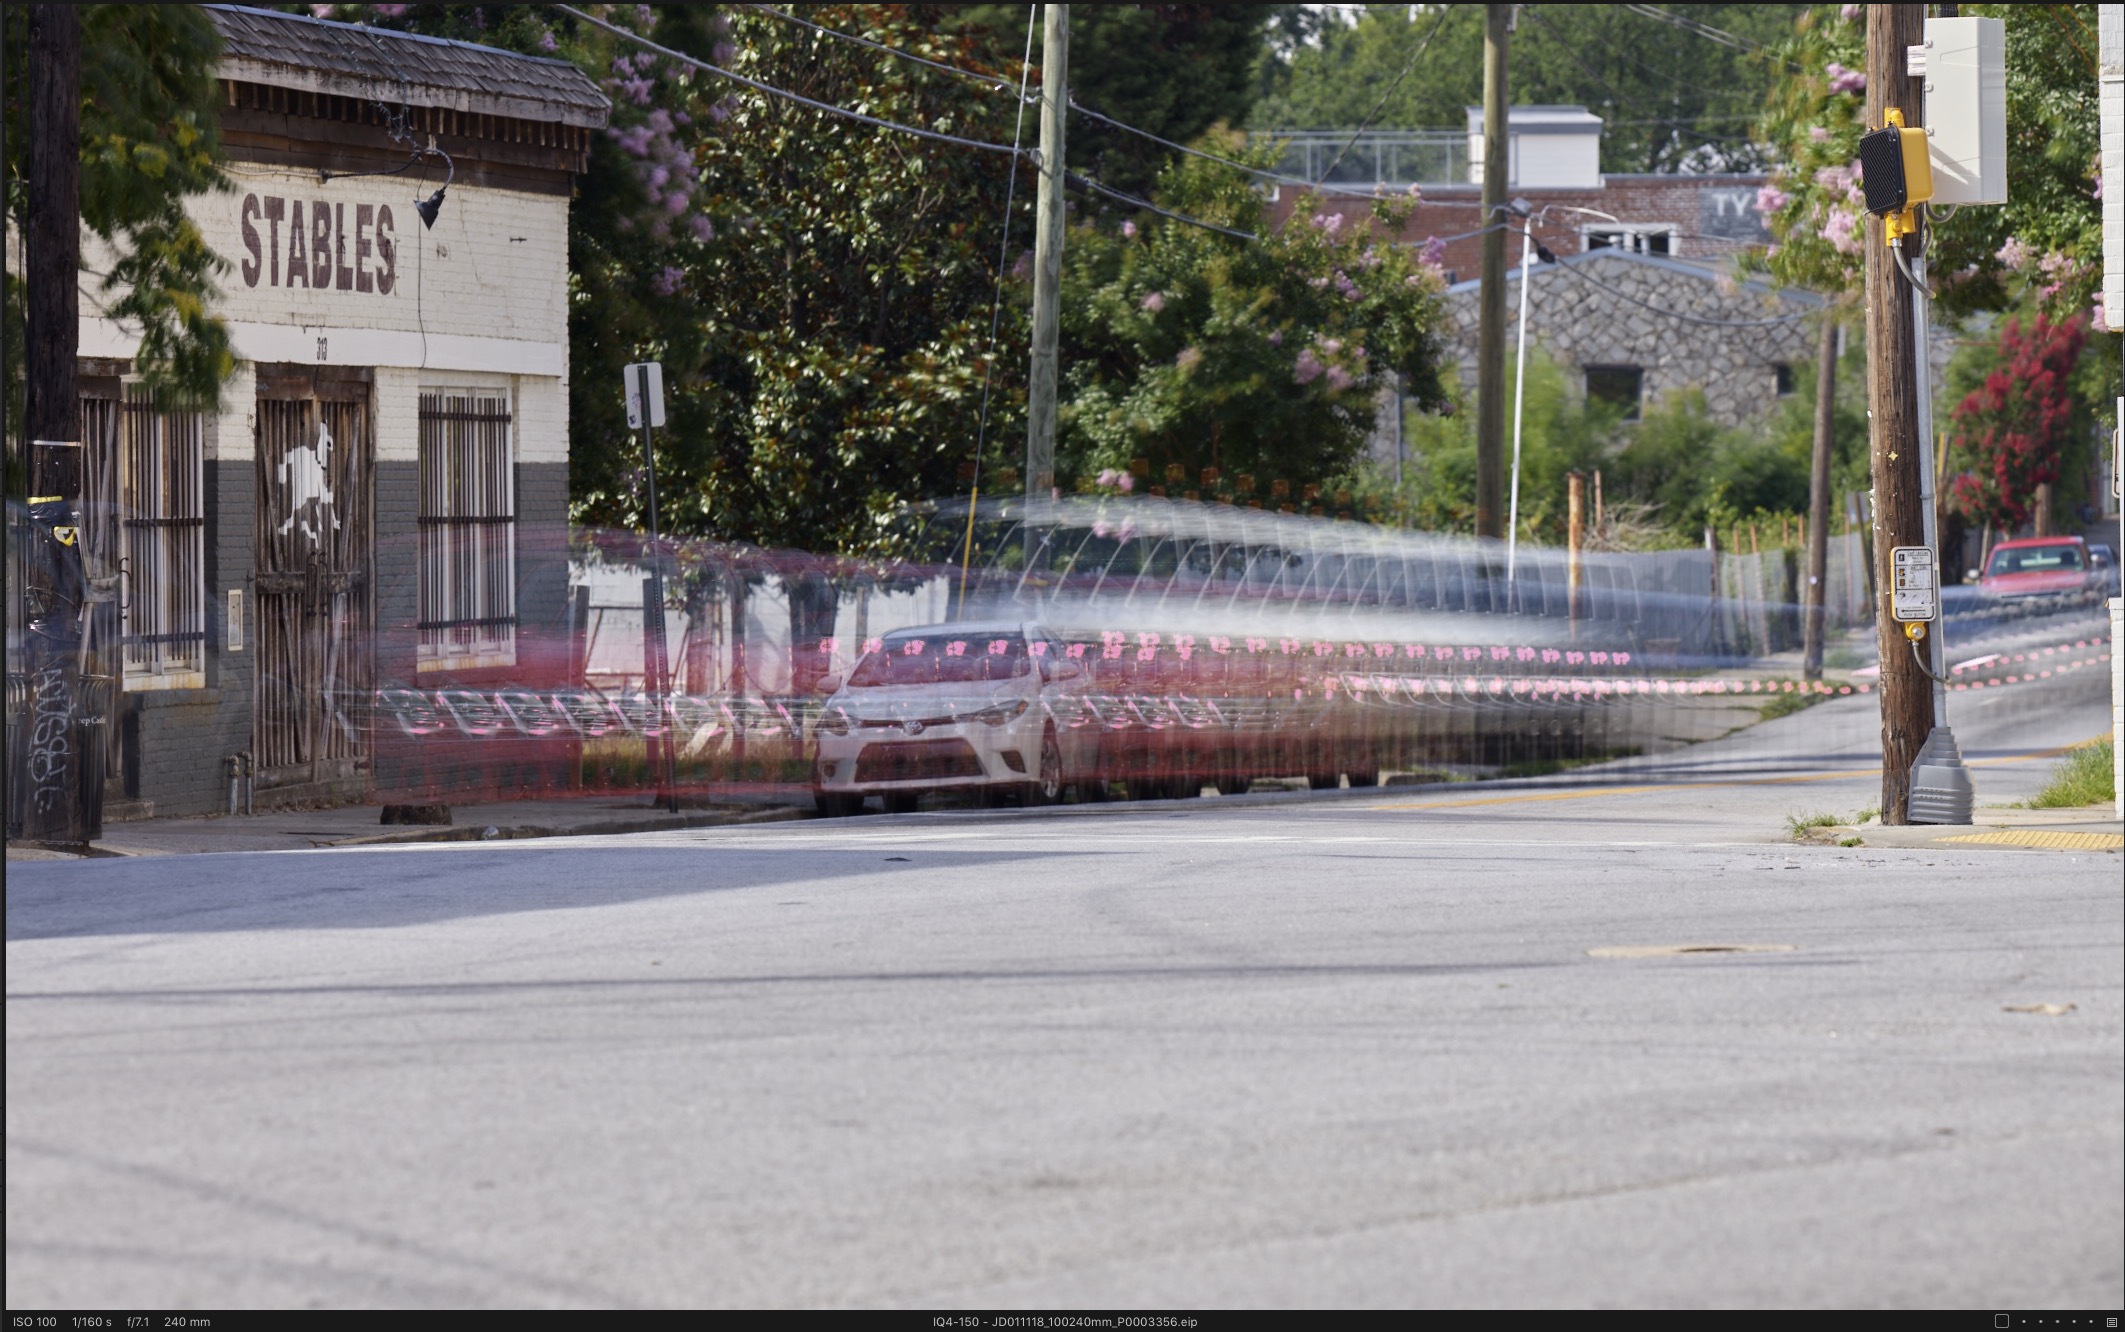
If your exposure time is going to freeze an object in one frame, it’s going to freeze the object in a bunch of frames, over and over, creating the very non homogenous ‘blur’ image above, shot at 1/160th of a second with 4 seconds of Frame Averaging. Image below shot at 1/30th of a second with the same 4 second Frame Average… better, but still not great.
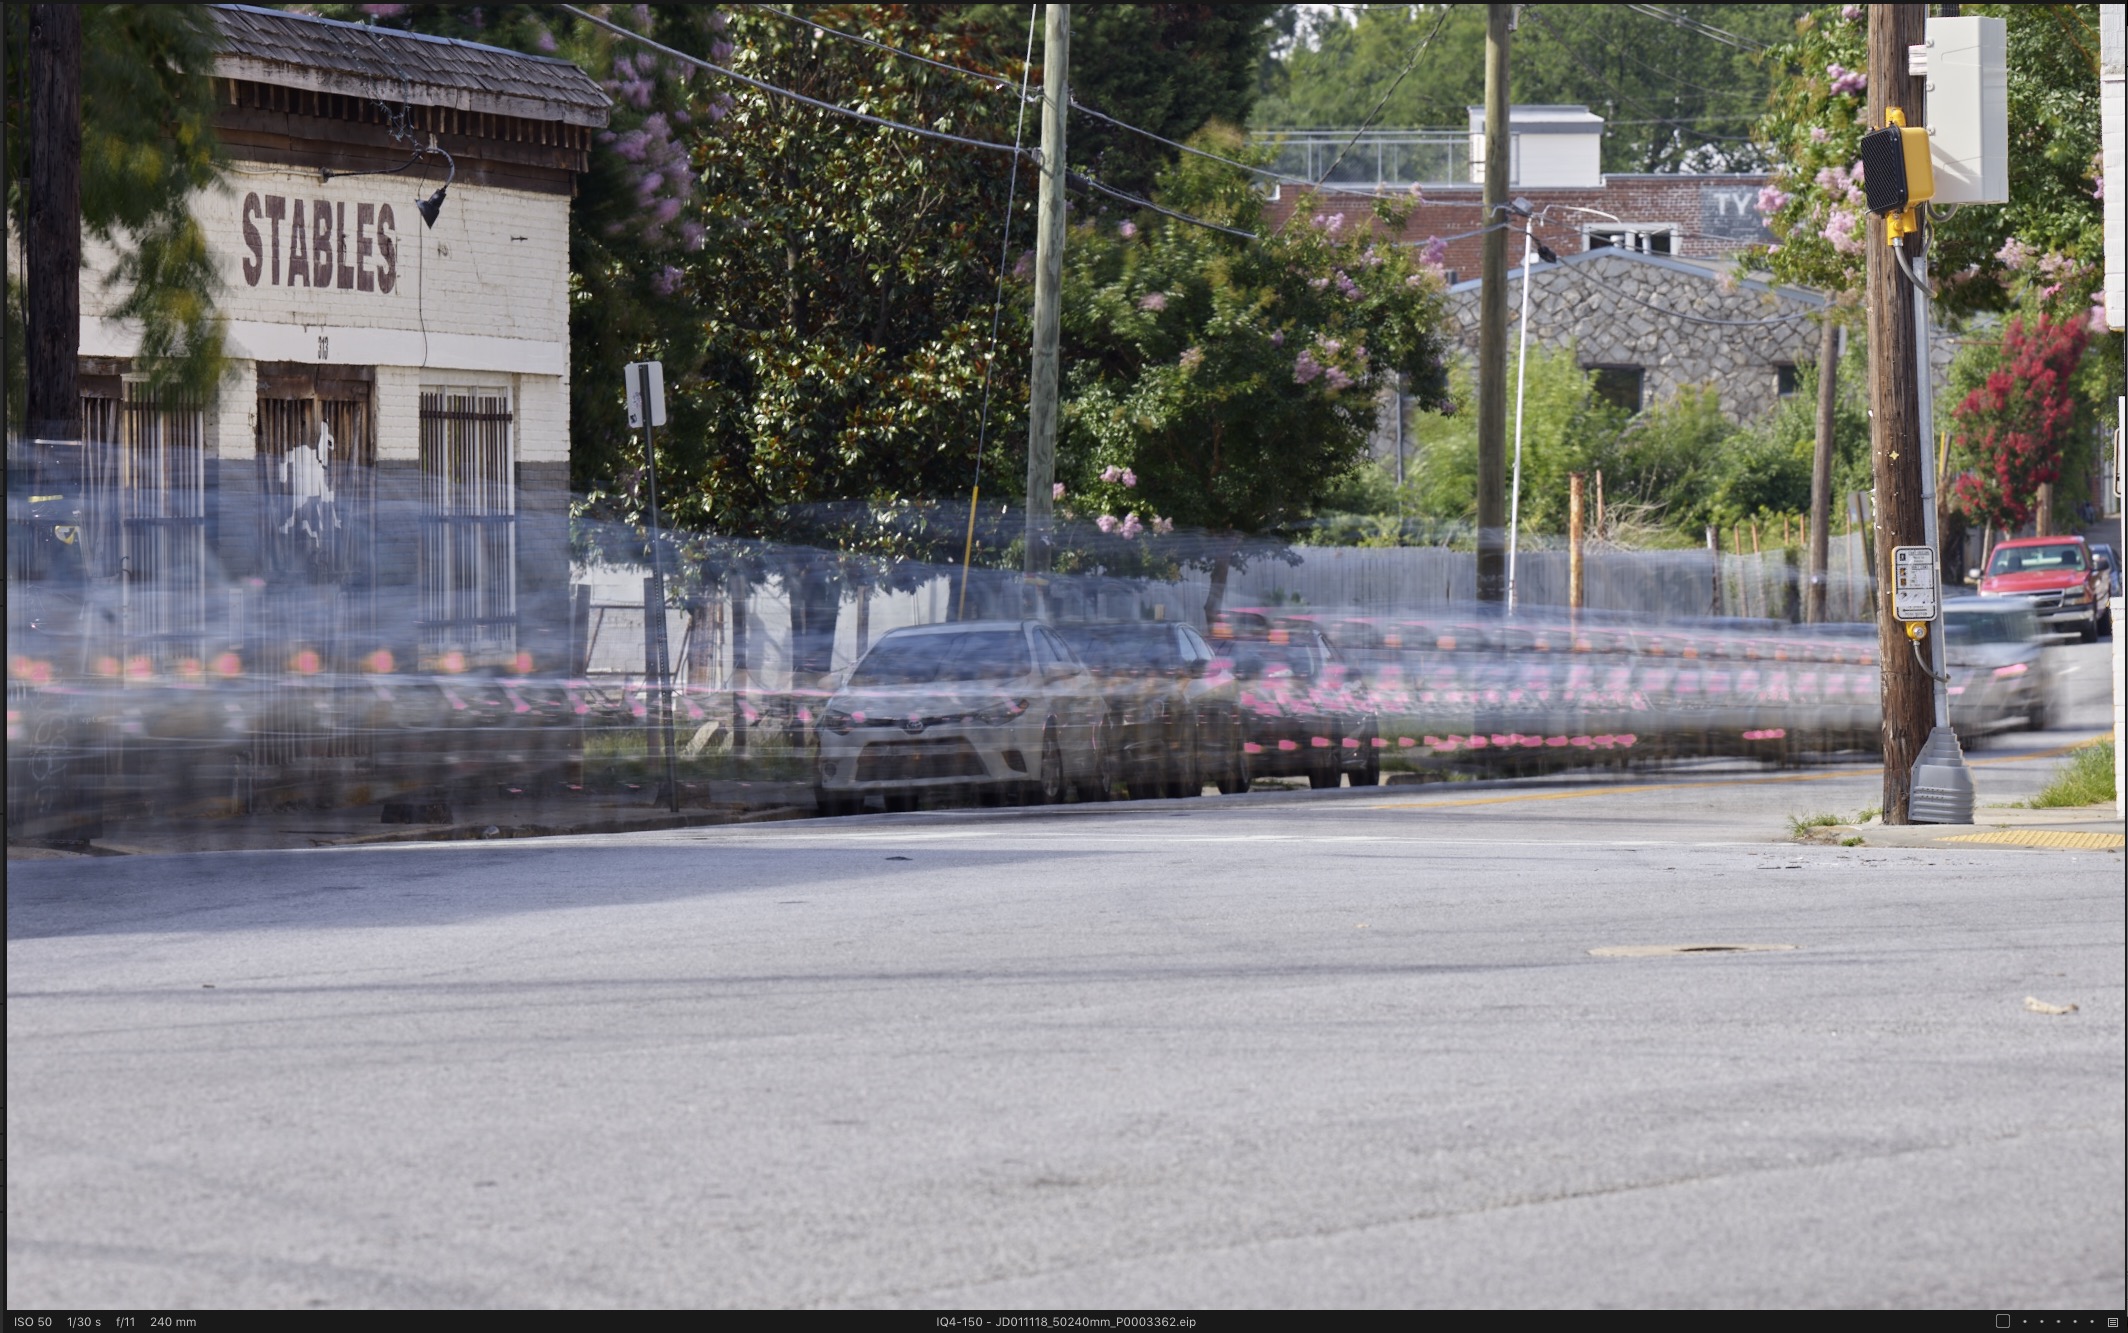
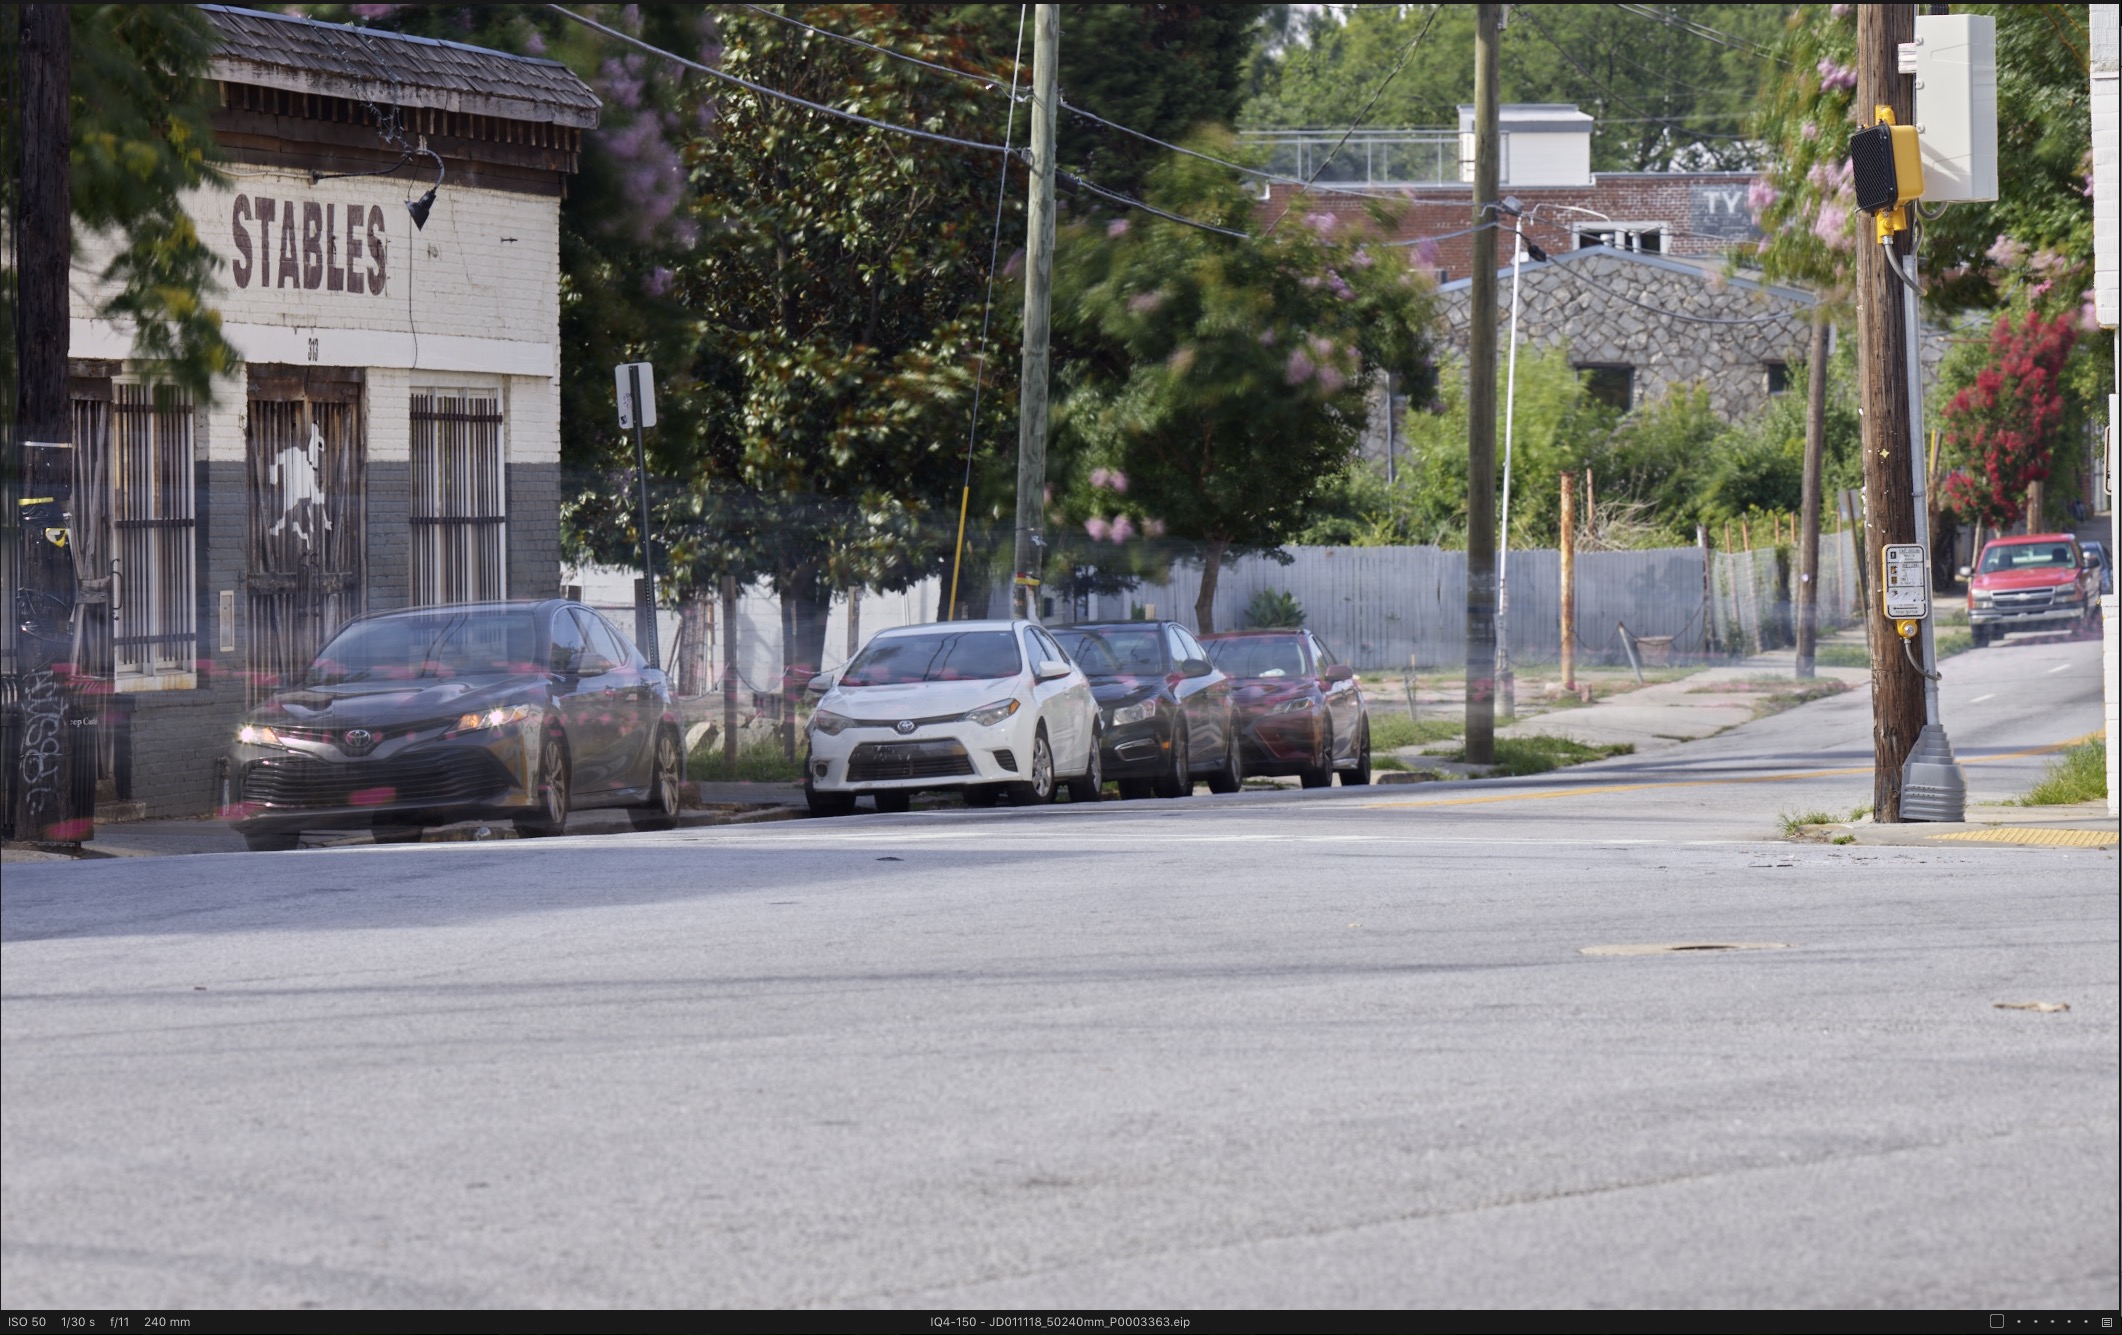
Extend to 15 seconds of Frame Averaging and the cars that were passing by start to really disappear, losing all of their detail except for their shiny bits.
Capture Integration Testing – TEST #2 – Quiet, cool alley:
So at this point, we can see that high ISO noise can be reduced, water (or other moving objects can be smoothed or manipulated even with fast shutter speeds), we’ve also seen that you must keep in mind environmental factors. Ok, with that last caveat in mind, I set up in our cool and calm alley that abridges our office. I thought this time I’d nail it. I was, however, met with a similar result to the seaside shot, even given the relatively still and low wind/wind free conditions of our walking alley.
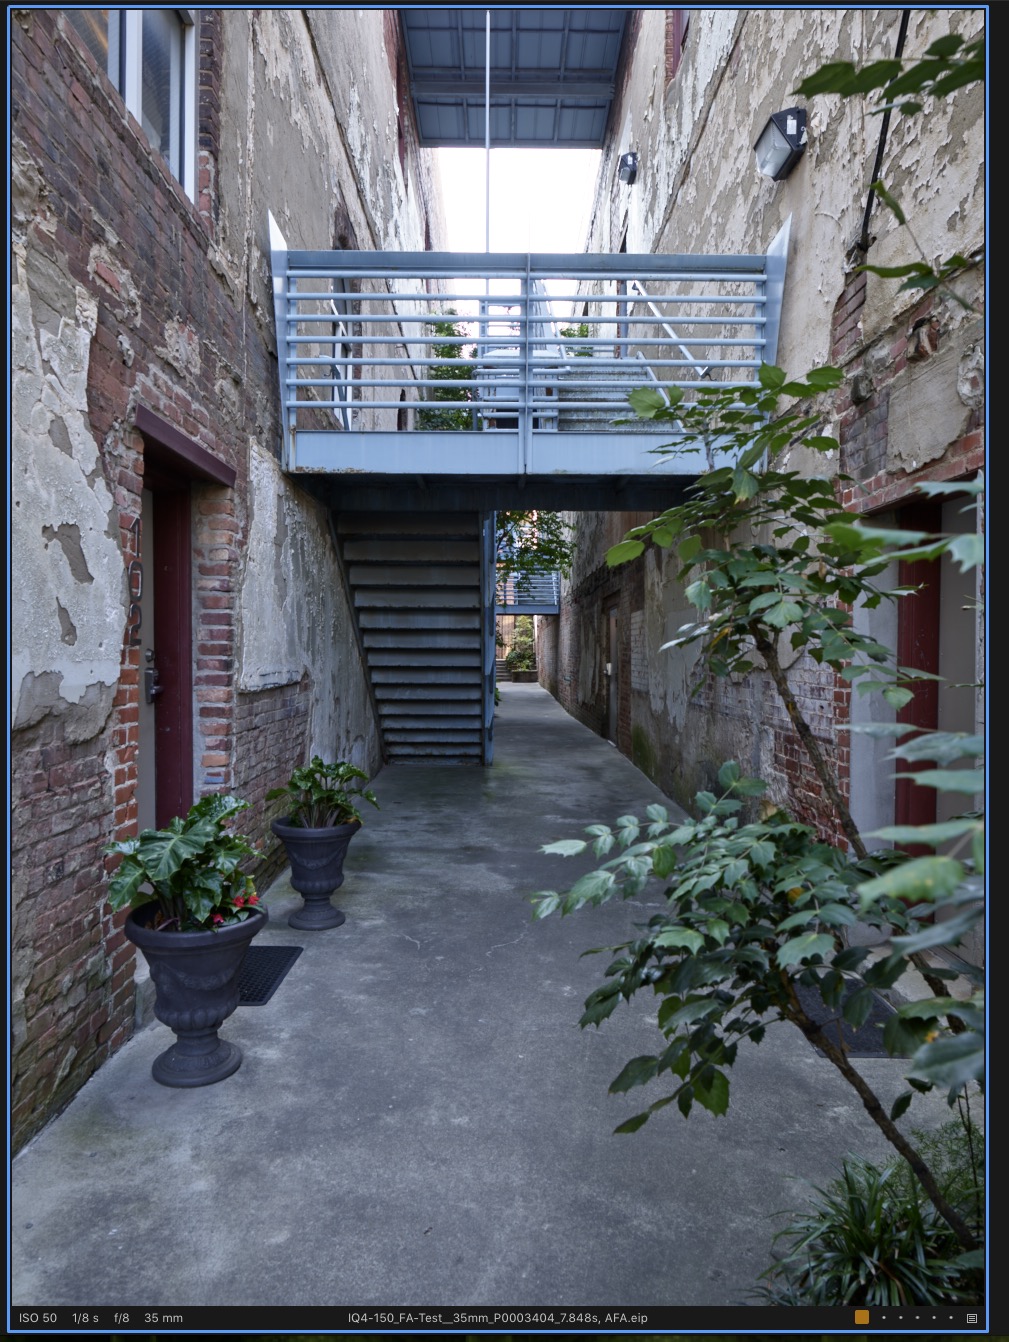
The detail of the Frame Averaged shot (left) just wasn’t as crisp as the single image. Close, but no cigar. So what was going on?
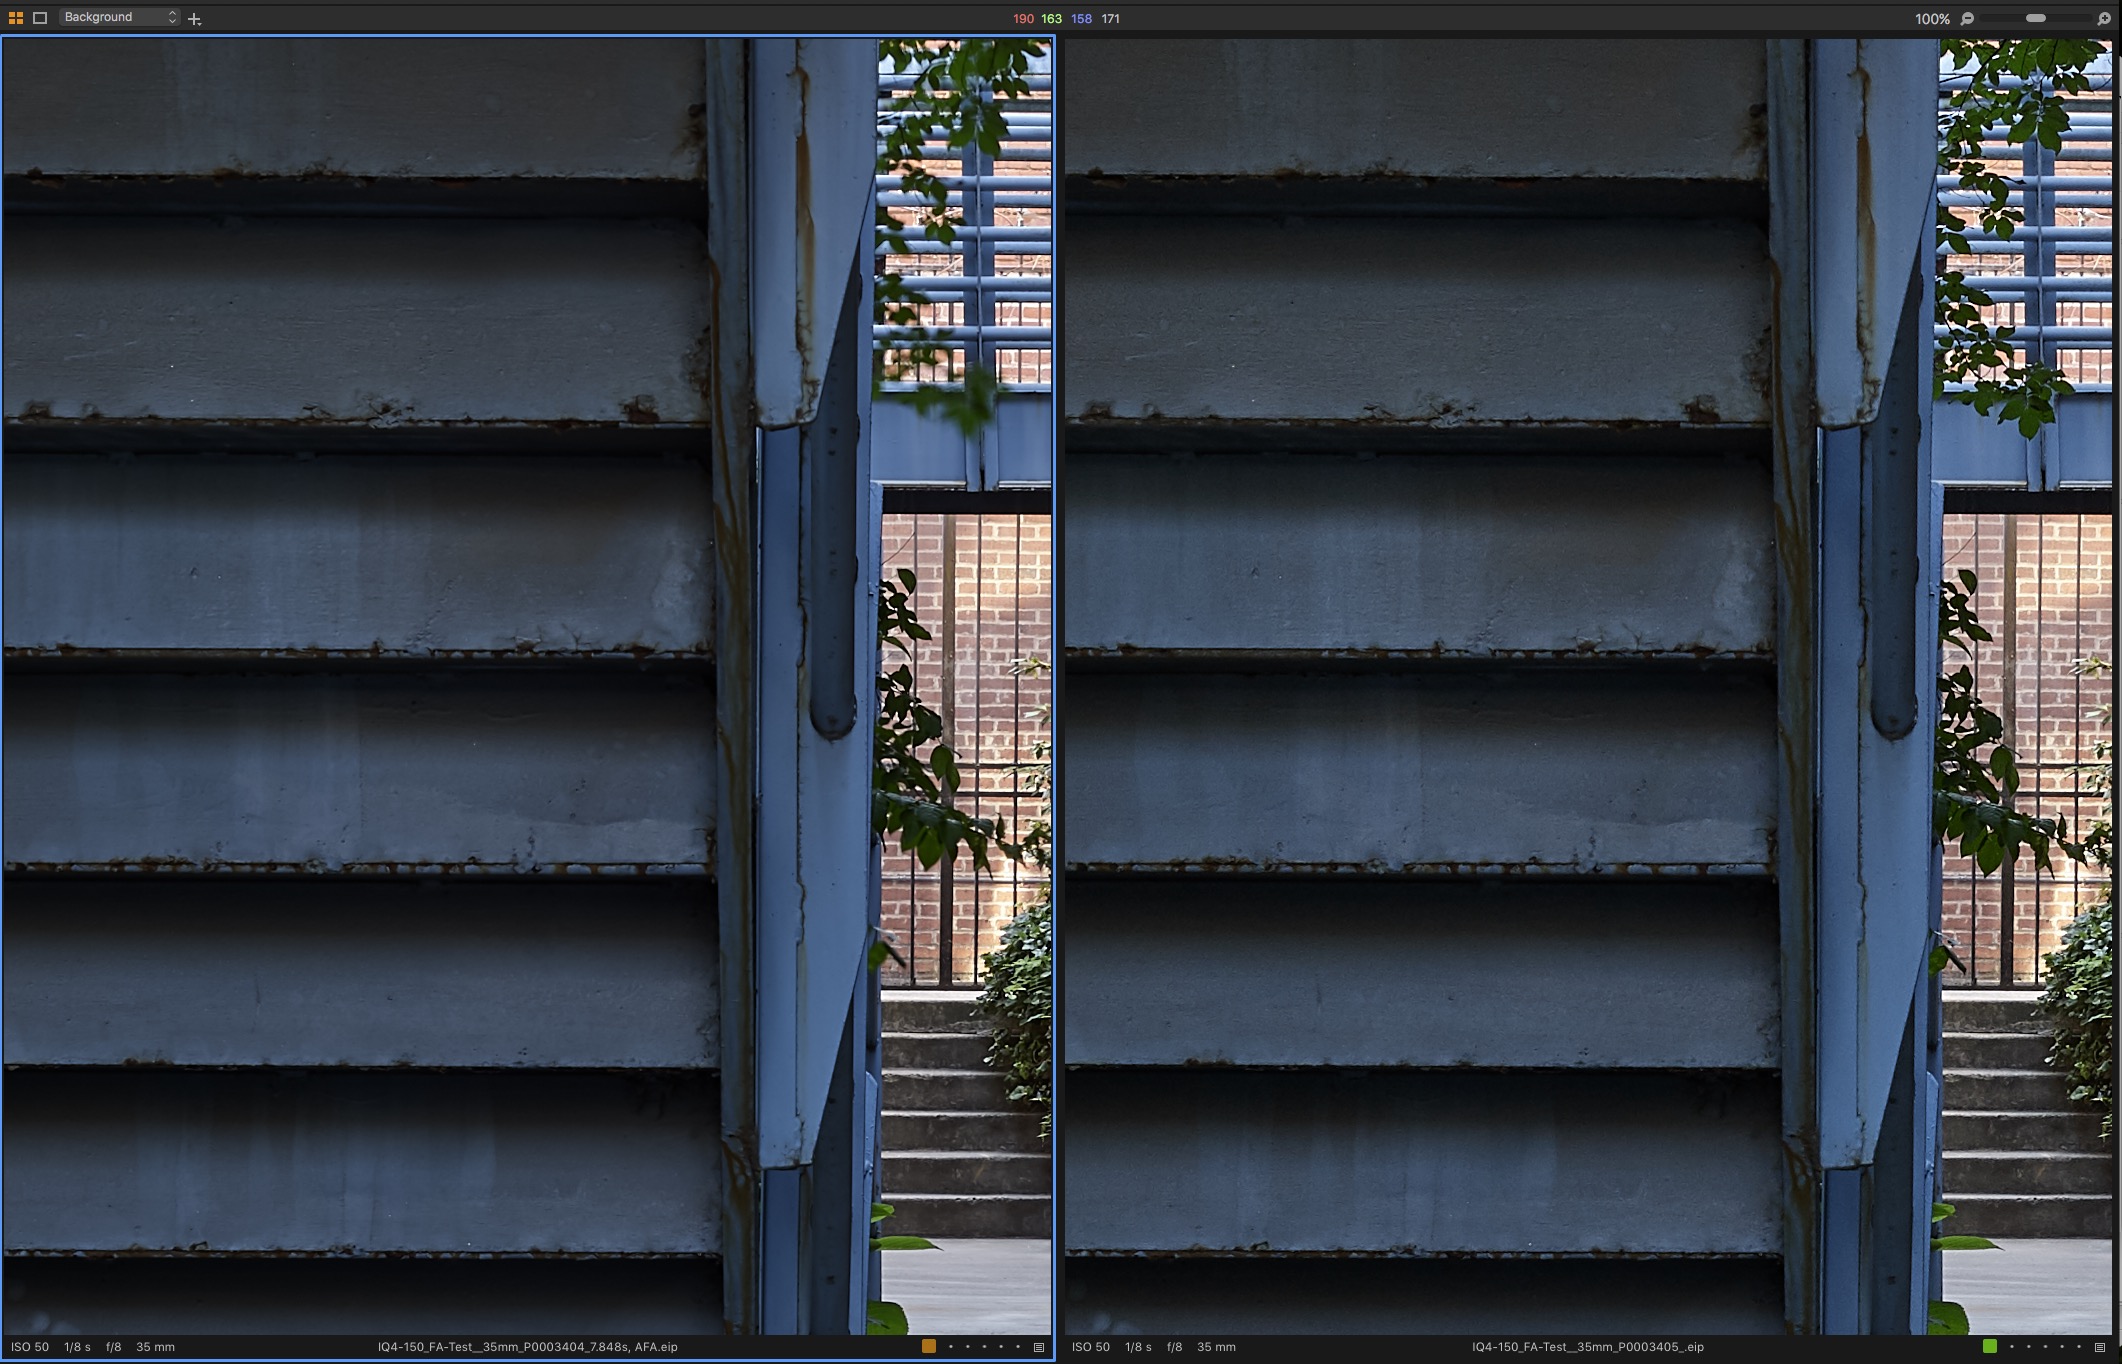
Frame averaged on the left, single frame on the right.
I was concerned that the tool wasn’t working as advertised but I continued to reduce vibration inducing variables, including locking the mirror up on the XF, but not even this produced a perfect result. The reason being that we were initially told by Phase One that the beta firmware for Frame Averaging does not acknowledge the XF’s seismometer/vibration delay, it does not have a timer delay built into the tool and does not allow triggering the tool via an external remote. So as we tapped the tool button with our finger on the back without the Vibration Mode or Timer Mode engaged; this slightest of movement was enough to take the detail down, and I devised some additional tests. (Correction 7/9/19: Thanks to our client Wayne Fox, for questioning this and pointing out that Vibration Delay is indeed being acknowledged by the tool as well as the Timer Mode. If you set a 4 second capture delay, for example, on the top of the XF, the Frame Averaging Tool will acknowledge it, as well as any time + seismometer setting in the Vibration Delay Tool).
Capture Integration Testing – TEST #3: – Enter the Technical Camera:
Once again, our good client and friend David Naughton lended his ALPA 12 XY Shift Camera and the location of his offices to aid in my next test. The following shots were captured in 16-bit-EX, through the Rodenstock 32HR with Center Filter installed, no LCC’s, shot with the built-in Electronic Shutter of the IQ4-150 and not with the electro-magnetical shutter of the e-Shutter 250 as would be controlled (normally in this case) by the ALPA Silex Mk-II that David frequently uses in conjunction with the XY.
We quickly found that with the technical camera, the frame averaging tool is reacting differently, that it respected the use of the self timer mode in the Electronic Shutter, while the XF does not. This cleaned up the softness issue that was seen in the above images that were shot with no wind present. It is (hopefully) likely that recognition of the self timer mode, and/or a remote capability will be found in a future beta edition of this tool. Capture Integration will feed this information back to Phase One Beta Labs as part of the beta program.
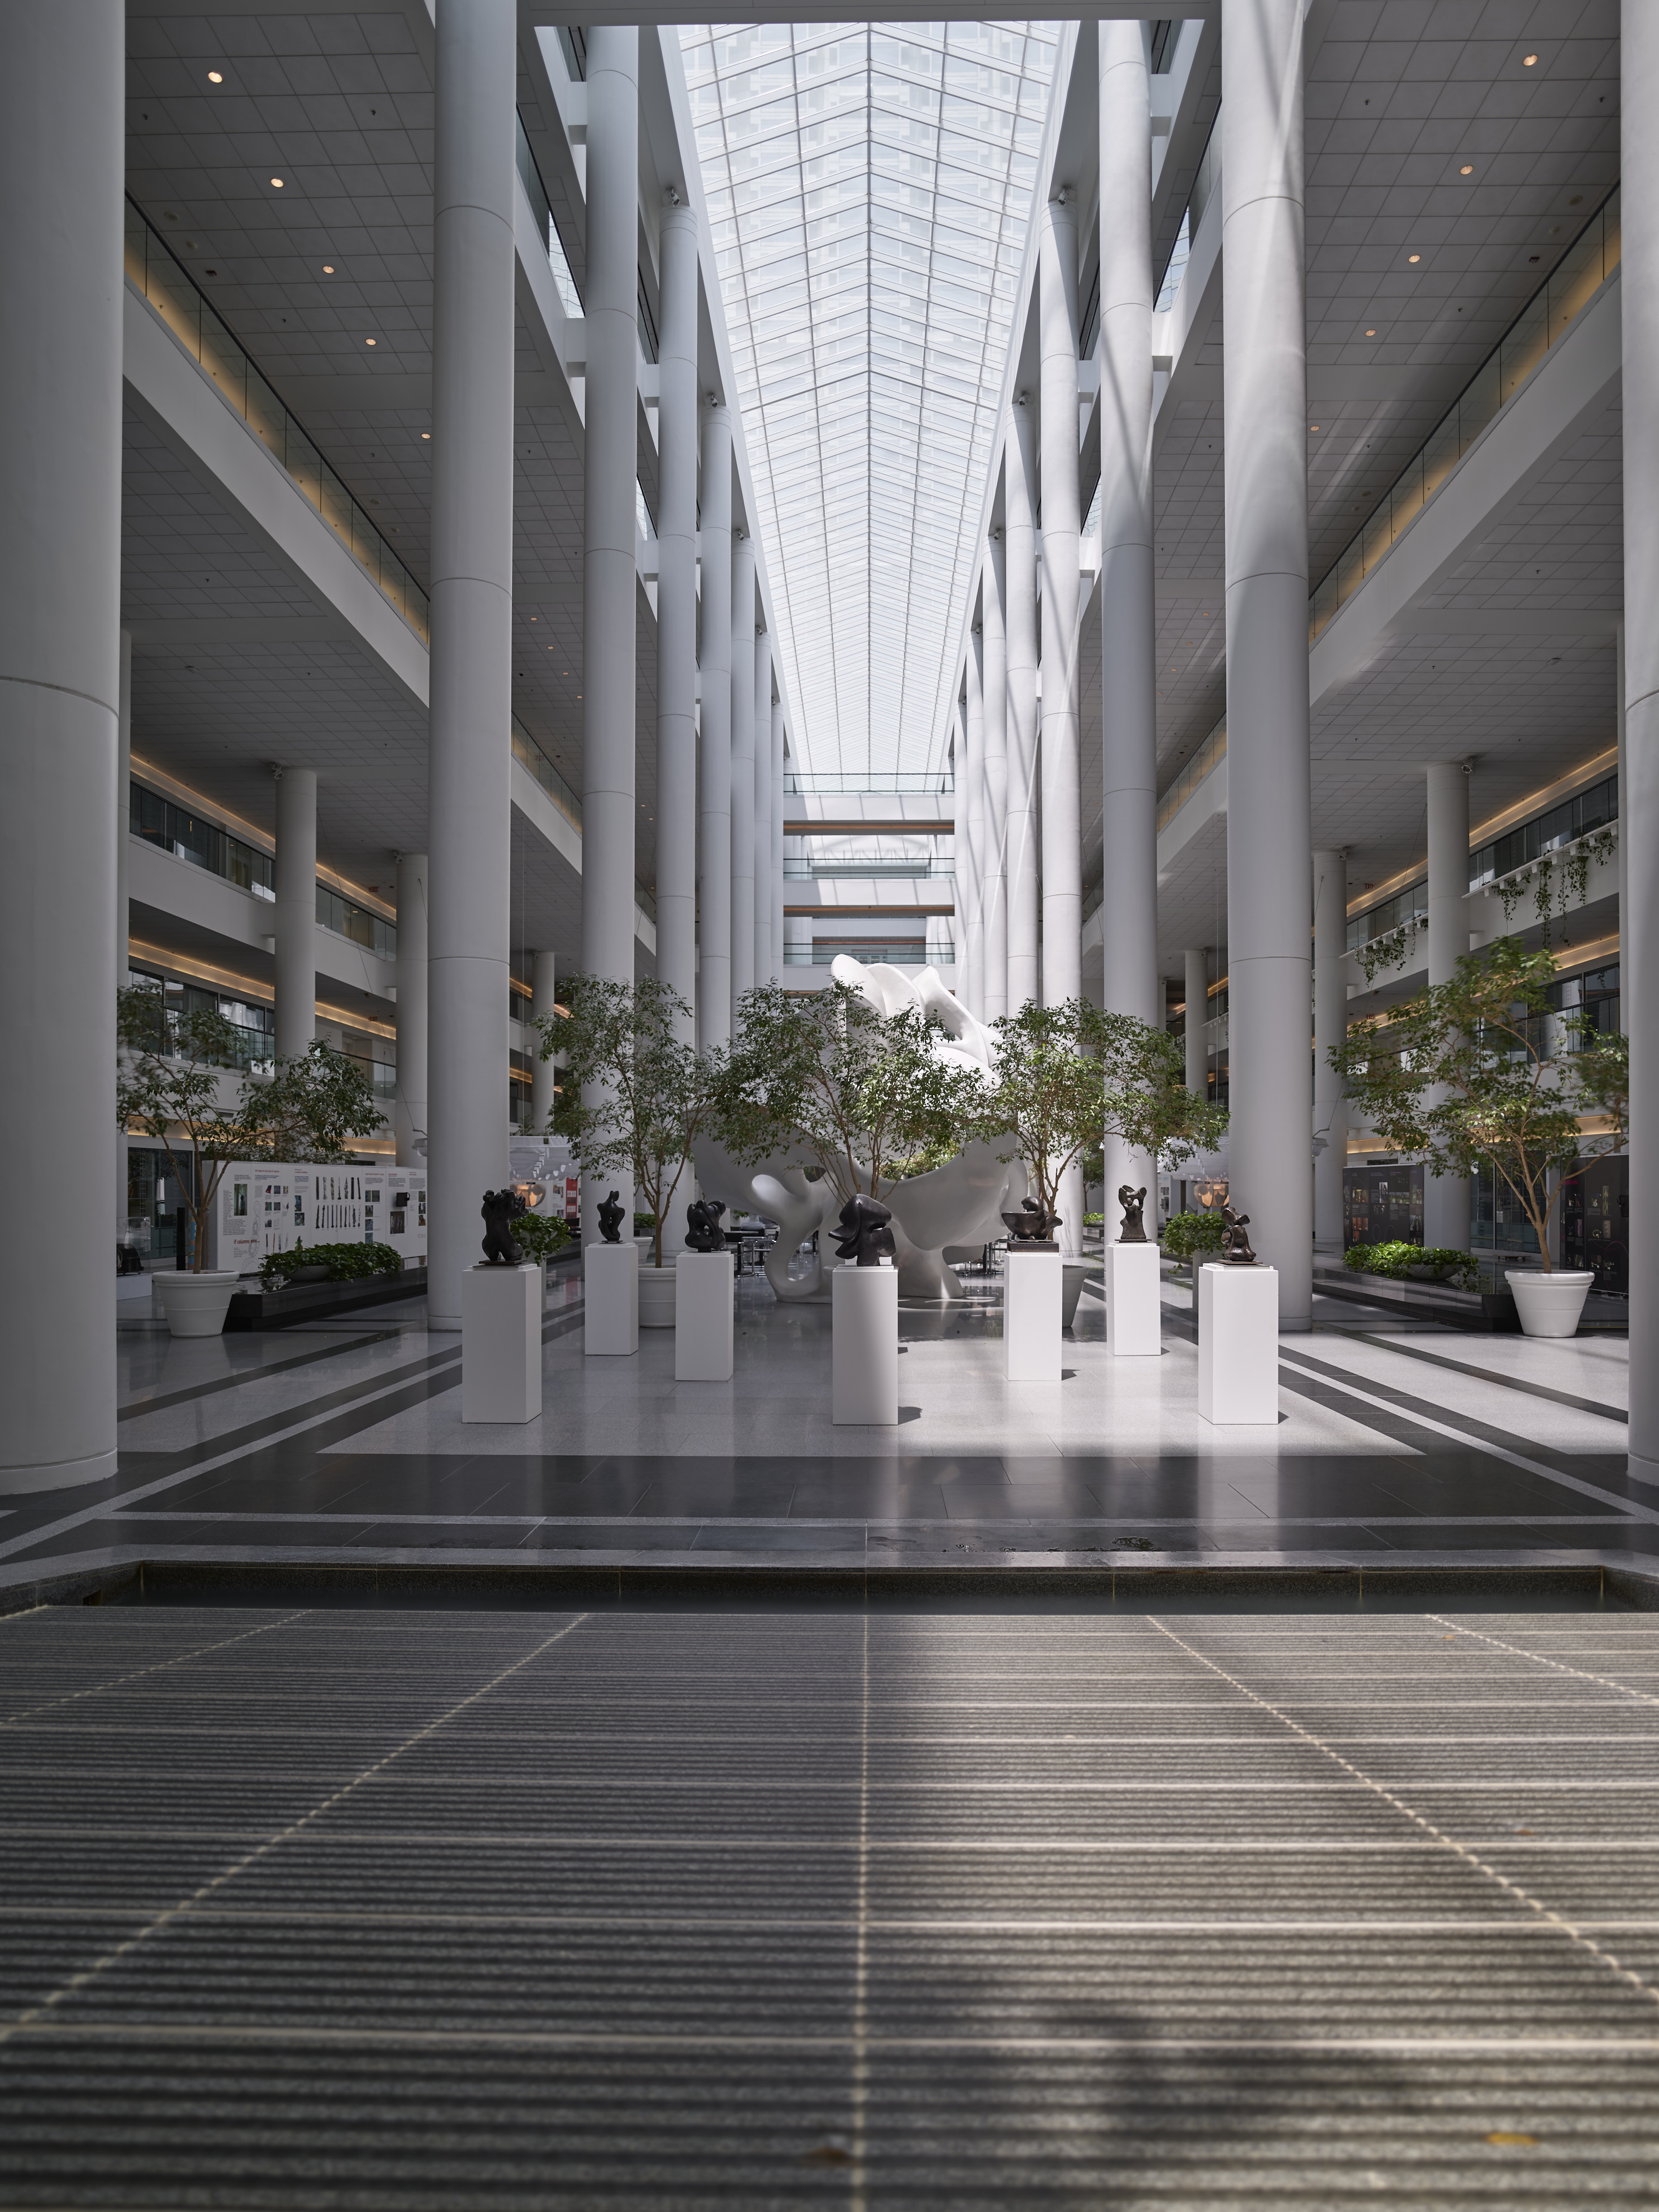
9m59s, Automated Frame Average – Ok, my lines aren’t perfectly straight… test first, beauty later.
Readers, this is where Frame Averaging shines! For those of you who are looking for some benefit beyond daytime water smoothing or eliminating noise with high ISO captures, read on.
Before we even get into the beautiful tonality, the increased detail in the low-midtones and shadows, have a look at the practical side of this tool in the following video, shot as a time-lapse as the above image was being captured.
Where’s Waldo? Yeah, he went and got his ass Frame Averaged out of existence!! This is an architectural photographer’s dream.
As we say in my house, ‘my hot dog stand’s got no ketchup’ and I’m running out of gas on this Friday evening, so the following images will speak for themselves.
Note the clean solid squares devoid of noise even when shadow detail is brought up 35 in HDR:
Left: 2 Minute Frame Average – Center: Single Shot – Right: 7 minute Frame Average
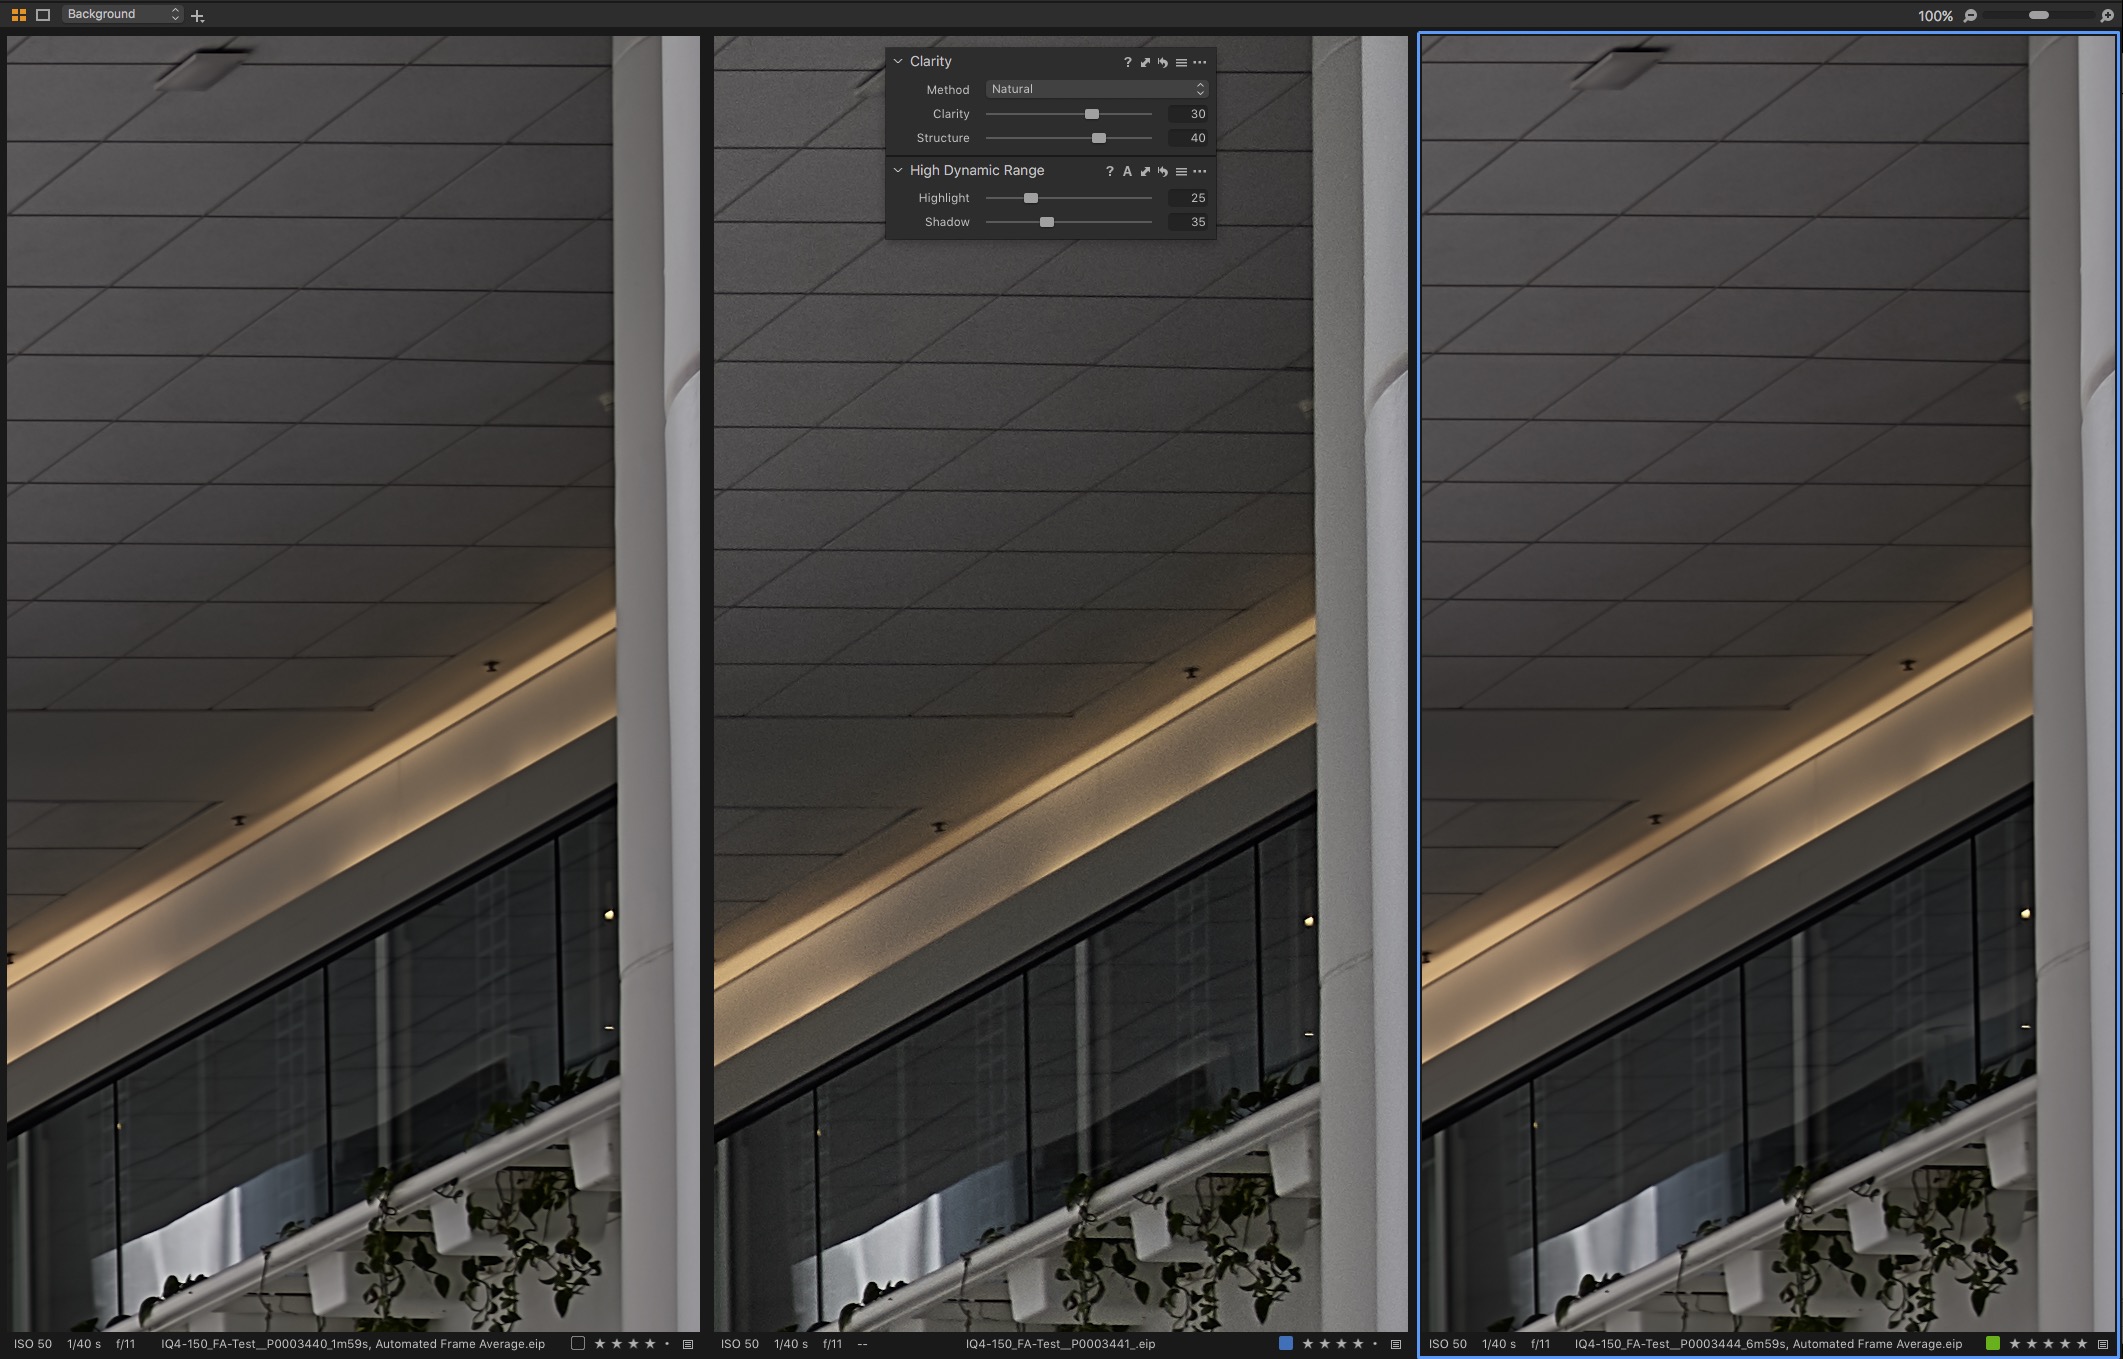
2 minute frame average on left, single frame center, 7 minute frame average on right
We live in a post process world. It is not realistic to evaluate images and noise based only on out of camera results. Similar to comparing lenses shot at f/11 vs wide open, the differences in image quality and noise become more apparent as you yank on that file. Even though the above file was captured at ISO 50, which is supposedly “noise-free”, nothing is really noise free, unless you do nothing to it. But that’s not the real world. Add clarity, push some shadow, etc, and in that singe frame IS 50 shot, there is noise and grain. In the frame averaged shot with the same adjustments, there is none.
But that’s not all. Note the beautiful gradients provided by an exposure over time:
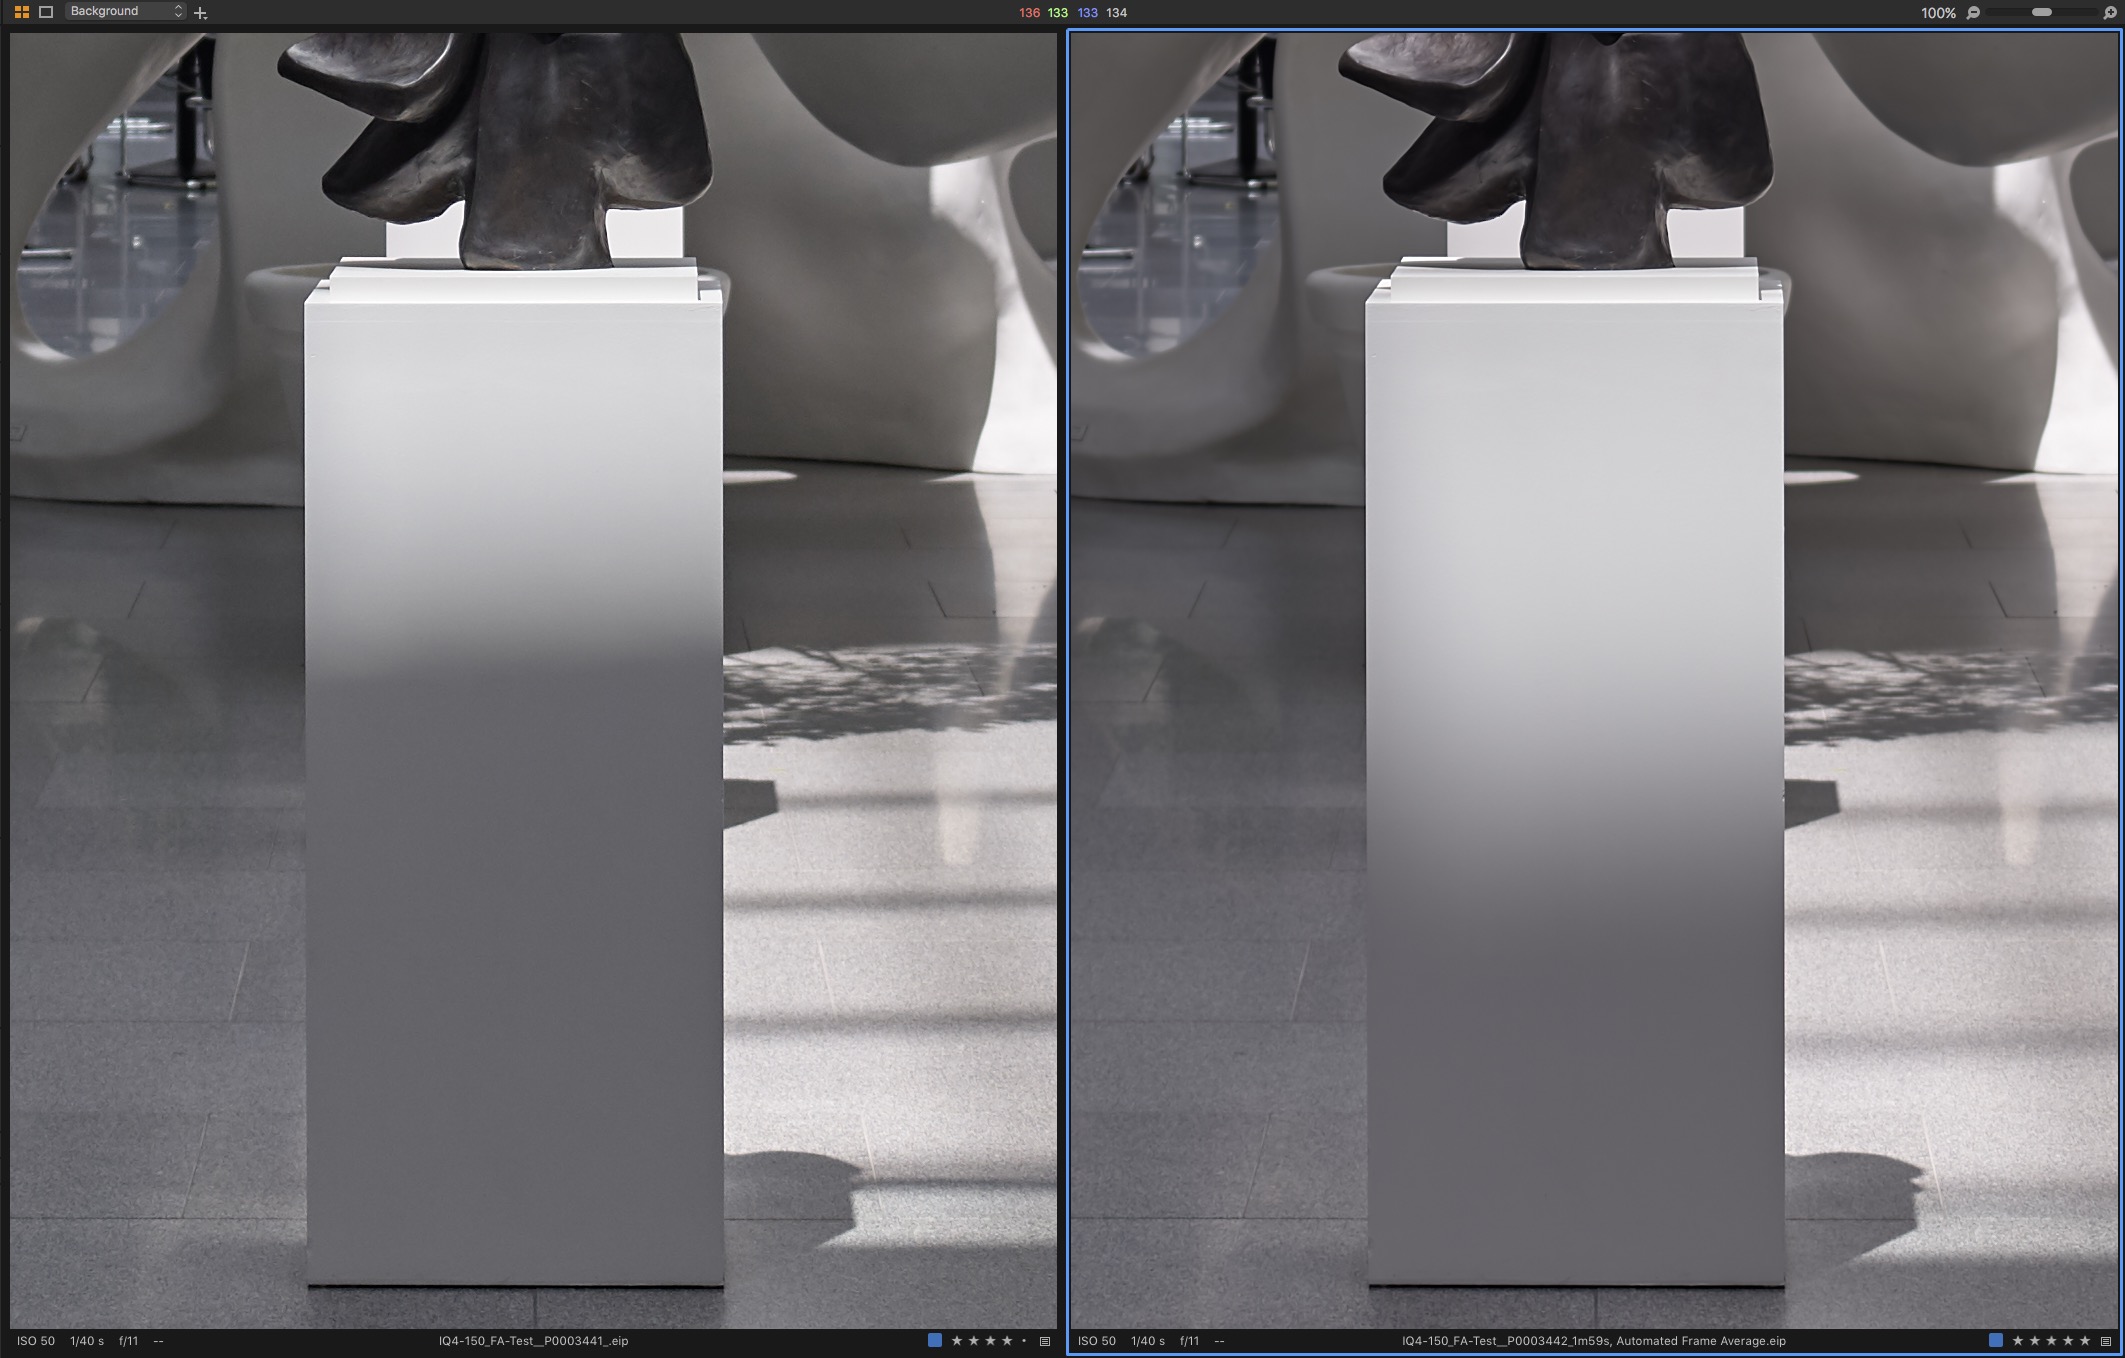
Single frame capture on the left, frame averaging capture on the right.
Note the reduction of shadow edge definition: If you’re going for an edgy, harsh look, fine, then don’t use frame averaging. But if you want beautiful soft gradients, then YES, use frame averaging.
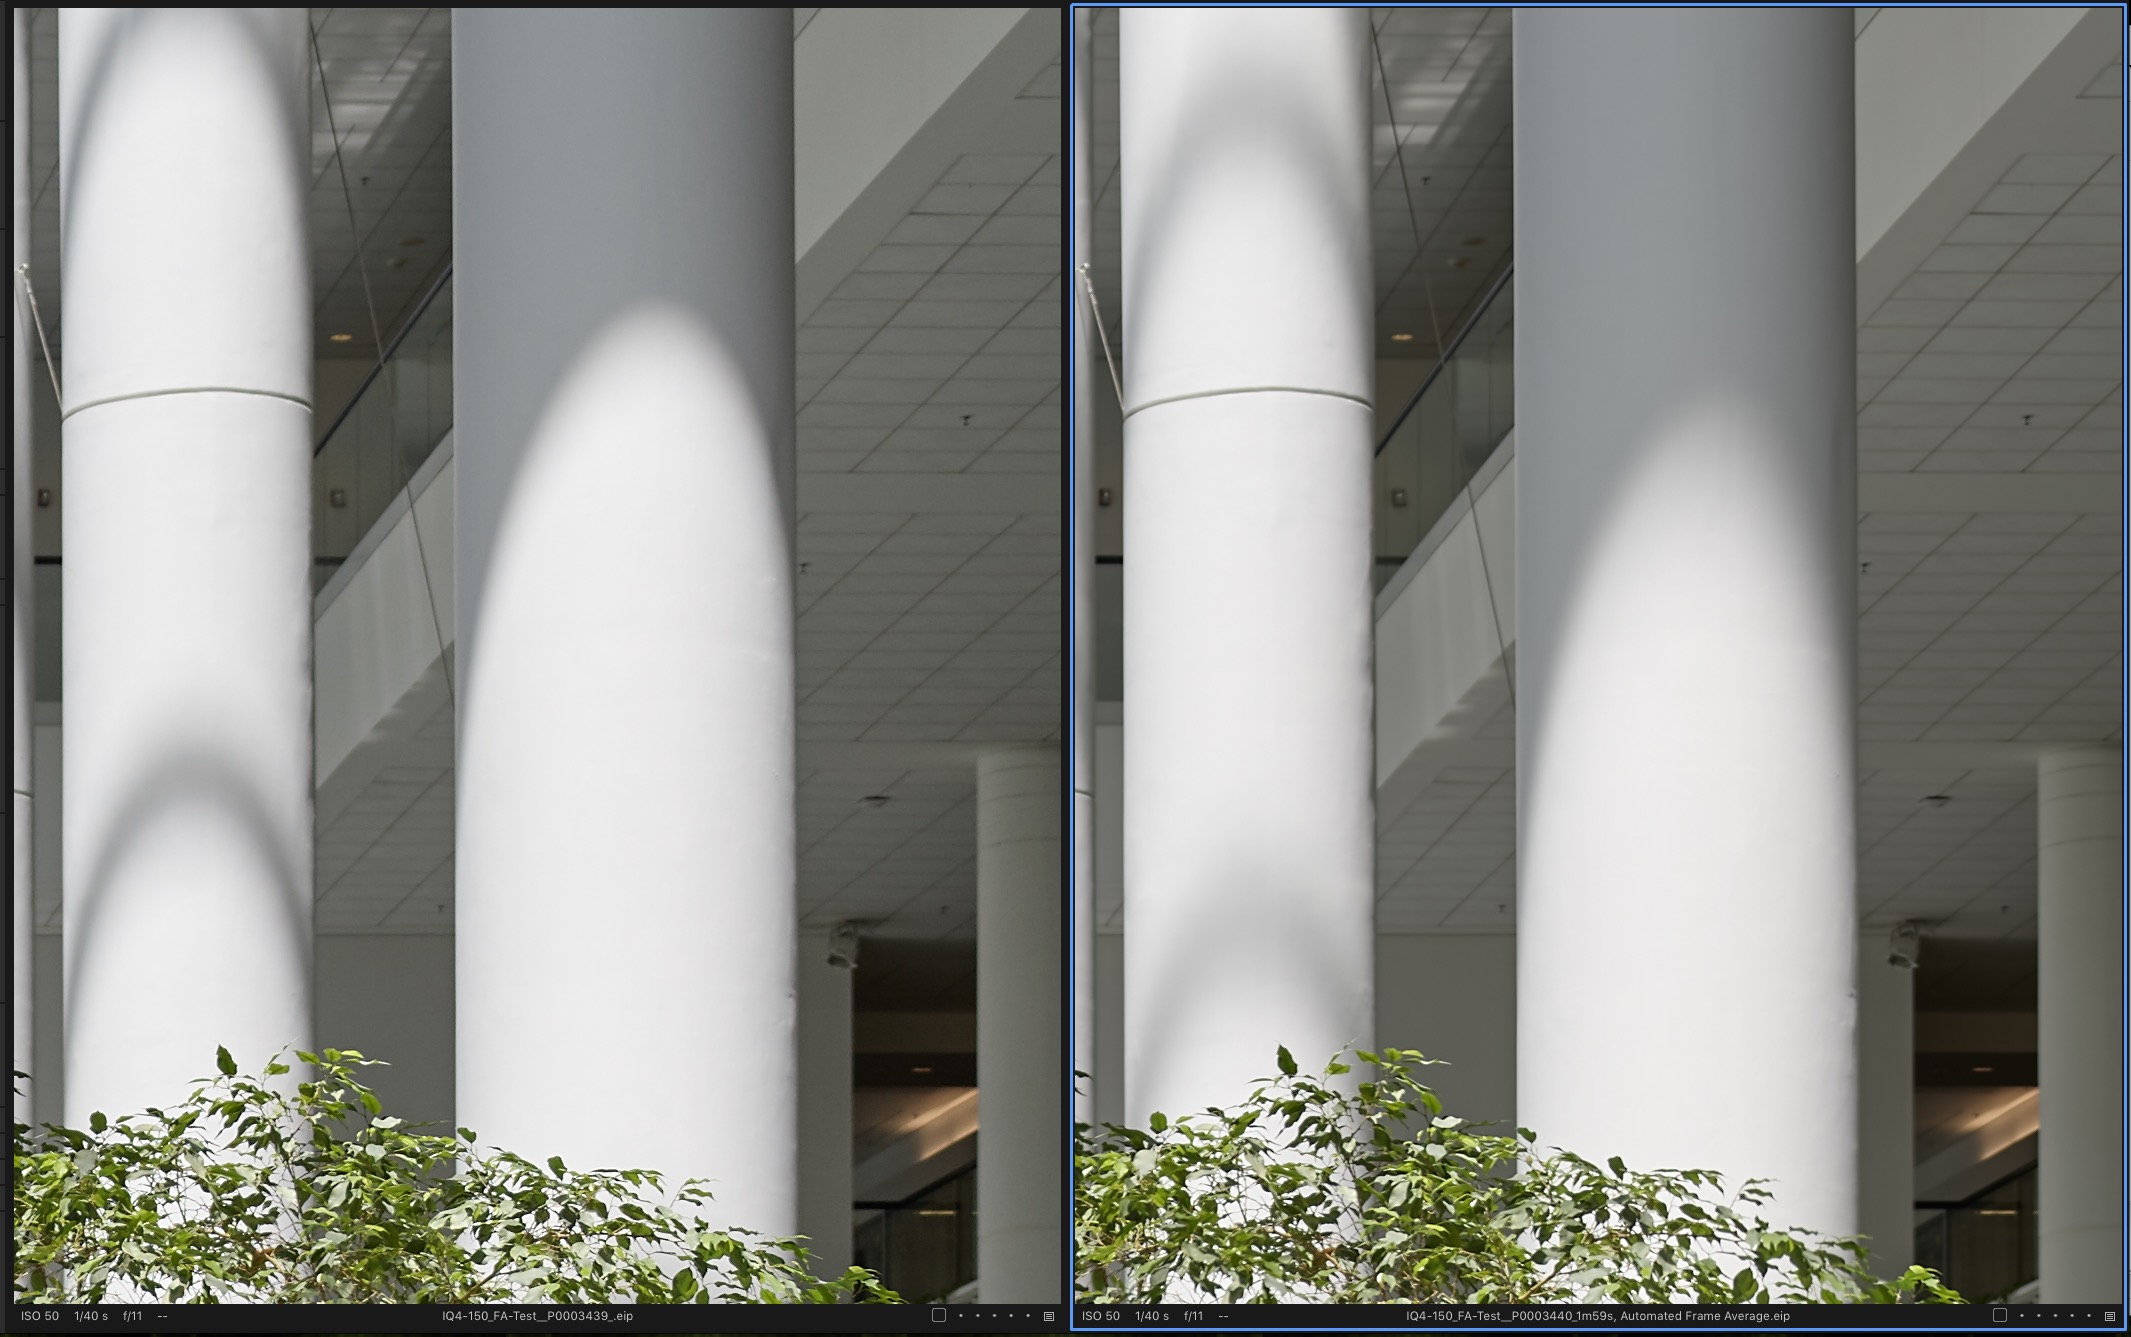
Single frame capture on the left, frame averaging capture on the right.
This was Day One of testing for me with (at this writing) having just 24 hours with this amazing new tool. I look forward to continuing to test with it and exploring what it has to offer. -BK
–
As part of the IQ4 Creative Control series of features, Frame Averaging debuts along with Custom Styles for IQ4 as well as Refined Storage and Workflow flexibility.
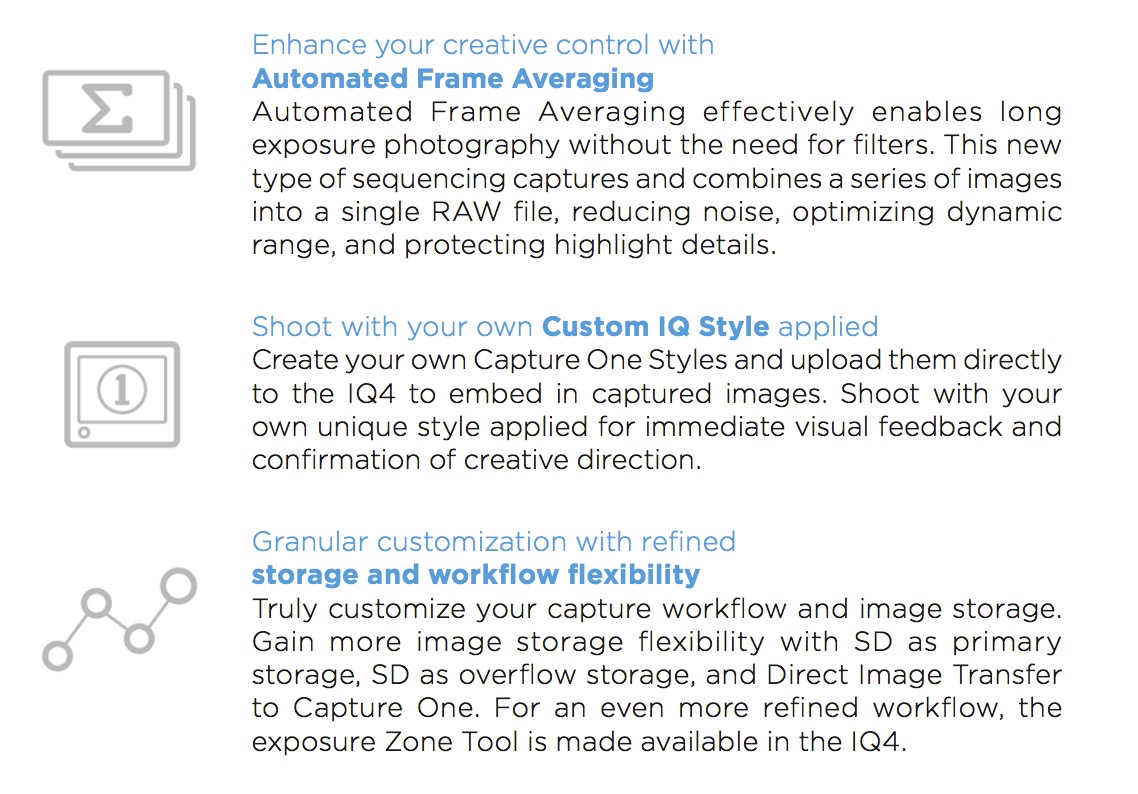
Final Note: In-camera, automatic frame averaging is going to be a very helpful tool for anyone that wants to improve the quality of their images with an IQ4 150. High ISO and low ISO noise is decreased, water can be smoothed with short exposure times and no ND filter, gradients are smoother, softer, are beautiful. How , when, and where this tool will be implemented is up to you, but hopefully the above is a good reference for what it is capable of. We are looking forward to more editions and updates from the Phase One Beta Labs.