
This is Part One of a Three Part series on transitioning to Capture One Sessions. Stay tuned to our blog for the next series!
Transitions are never easy, especially when it comes to switching your image processing software. Often times, it’s comparable to switching camera systems after years of investing in lenses or moving office locations after 20 years. The bottom line – it’s just never easy and most of the time more trouble than it’s worth. So when changing from another image editing software after years or thousands of specific edits & adjustments, it can seem like a big hassle. But for the best results, we are sometimes willing to try it anyway. When you do, here are a few tips to make the transition easier!
Why is it such a hassle?
Transitioning from any raw converter to another always has its drawbacks, namely because each looks at and interprets the raw file differently. It’s as if we all had to listen & write down the same story, but we all used our own unique language. It’s the same story, but we’d each emphasize different parts of the story. Plus, we would have a hard time understanding each other’s version because of the different languages. It’s not so different with each RAW image processor.
There are a couple of ways that can make your transition from Lightroom easier, but there aren’t any methods that are perfect. In other words, not all of your edits and adjustments will make it over. One strategy is to start fresh and move onward, leaving all of your prior images edited and adjusted in your previous program while your all new images you shoot get processed in Capture One Pro.
Yet, most of us switch to Capture One because of its amazing file processing technology. So why wouldn’t we want to bring over our previous images?
2 Methods for Approaching the Lightroom to Capture One Transition
When it comes to moving from Lightroom – here are two methods for getting your images into a new Capture One Session. One method is to enable XMP data from Lightroom, and the other is to temporarily use a Capture One Pro Catalog as an in-between to a Capture One Session. We still do not recommend the use of catalogs with Capture One Pro 7, but this method can bring the most adjustments from Lightroom into a Capture One session.
XMP Method
- Easier, but less info transfers
- Transfers ratings and metadata
Catalog Method
- More work, but more adjustments transfer.
- Uses Capture One Catalogs & an “unfinished” beta functionality.
Thoughts Worth Noting
There are a few things worth paying attention to when moving files from Lightroom into Capture One, specifically when dealing with non-RAW images.
- After transferring your images to Capture One, they may appear slightly different from your equivalent Lightroom edits due to a difference in the Processing engines and Capture One’s custom camera input profiles (this can be a very good thing).
- While Capture One can process TIFF, JPEG, and PNG files, it’s strength is RAW files. You will get better results from editing your RAW files than the other file types (with the exception of Phase One’s .TIF files, which are RAW files).
- While Capture One can edit processed .TIF files, make sure they are flattened. It doesn’t work well with layered files and can produce unexpected results.
- Certain file types (such as Photoshop’s .PSD files) will NOT show up in Capture One, and/or may not be able to be edited. It does not appear to alert you regarding this.
- Close Lightroom before initiating the import – otherwise the .lrcat file will be unreadable.
A quick way of getting your images from Lightroom into Capture One is to simply use XMP data. Adjustments in programs like Lightroom and Photoshop write all the settings non-destructively, and keep a basic ‘list’ of adjustments that the program refers to for that image. You can tell Lightroom to write those XMP files next to each raw file instead of a centralized location. Since Lightroom has its own proprietary way of writing this information, any other program (such as Capture One) can only interpret certain parts of this file. You can see a warning for this one of the screenshots below. Click any image below to view it larger.
- Set up Lightroom to write adjustments to a sidecar XMP file. To do this, go to your Lightroom menu > Catalog Settings. Under the Metadata tab, be sure to check “Automatically write changes to XMP.” From now on, this should begin writing any new adjustments to the XMP files, but for the existing files, you may want to go to Metadata menu > Save Metadata to files.
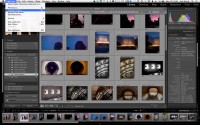
Lightroom Menu Catalog Settings
|

Enable Write to XMP
|
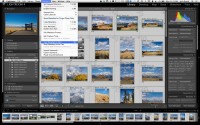
Tell LR to Save Metadata
|

Save Metadata Dialog
|
- Next, in Capture One create a New Session. You can choose to name it the same as the main folder of your images. This will put the session and session folders in the same folder automatically.

Create a New Session
|
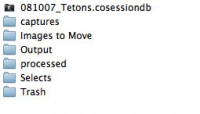
Capture One Session Folders
|
- Pro Tip: To make it easier, you can add the folder that contains your captures as a Session Favorite. An quick way to do this without hunting through the system folders is to right click (or Ctrl + click on a Mac) on the Selects folder and choose “Show in System Folders”. From there you can see the correct folder and by right clicking again, you can choose “Add to Favorites.”
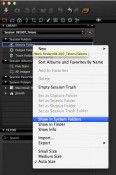
Quickly Find in System Folders
|

Add Folder to your Favorites List
|
- Now when you click on the session favorite, you will see your images load. If you rated your images, you should also start to see Image Ratings & Keywords sync too.
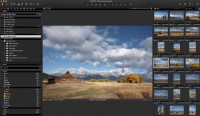
Images Imported with Ratings
|
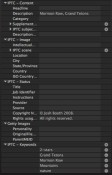
See the Keywords
|
- The Caveat: Image adjustments (including Virtual Copies), collections, Color Labels, etc., do not transfer.
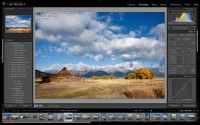
Images in Lightroom
|

Images in Capture One
|
In Capture One 7.1.3, Phase One introduced importing Lightroom Catalogs into Capture One 7 Catalogs. As stated earlier, we at Capture Integration do not think that the catalog system in Capture One 7 is stable enough to recommend for thorough use. However if you feel daring, you can use a catalog as an in-between to potentially get more settings out of your Lightroom images than using XMP data alone.
- While you could do the entire Lightroom catalog, it will be easier to do one job at a time. Also, catalogs in Capture One tend to have stability issues when containing large numbers of files. To make it easier and more stable, you should export each batch of images you want as “sessions” into their own catalog. To do this, select the images you want, and choose File > Export as Catalog. Give the catalog a name that makes sense, and store it next to your raw files for easy access. We don’t need to move or copy the raw files at this point, so uncheck Export Negative files and Include Previews, as they will be regenerated by Capture One anyway.
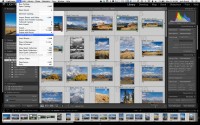
Export Smaller Lightroom Catalogs
|
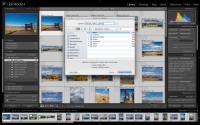
Name the Catalog
|
- Next, in Capture One create a New Catalog. This catalog is only temporary, so put in a place you can easily access and later easily throw away. Then choose File > Import Catalog > Another Catalog and choose the catalog you exported earlier. You should see a warning dialog pop up letting you know what to expect in the transfer. As this is a BETA, it may not work perfectly. After you should get a summary dialog box.

Create a New Catalog
|

Import Catalog > Another Catalog
|
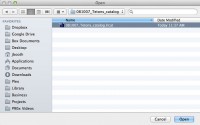
Choose the exported LR Catalog
|
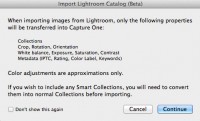
Import Dialog
|

Import Summary
|
- After the import is complete, you should see your images (referenced in their current location) with some adjustments to them. Notice in this example you can white balance adjustments, cropping, saturation, color labels, etc. However, notice that the any images that were converted to black & white in Lightroom did not transfer as black & white into Capture One, unless the image was only desaturated in Lightroom. There may also be missing files such as PSD files. There is one more step to get these images ready for a Capture One Session.
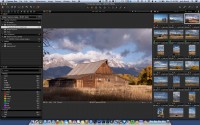
Verify Imported Images
|
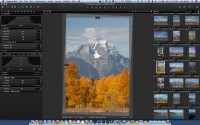
Even crops transfer!
|
- Capture One Catalogs store all of the image adjustments internally, unlike Sessions with store them next to the raw files. Unfortunately, at this time you cannot import from a Capture One Catalog into a Capture One Session. To do this, you must export the originals to a new folder. This will duplicate files. Go to File > Export > Originals. Create a folder near where you stored your raw files before. You may want to designate with a “C1” in the folder name if that helps you, but it isn’t necessary. Make sure on the next dialog that “Include Adjustments” is checked.
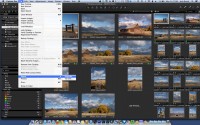
Export the Originals
|
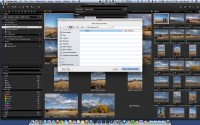
Create a New Folder
|
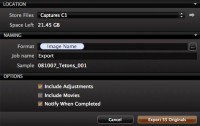
Export Originals Settings
|
- Next, in Capture One create a New Session. Name it the same as the main folder of your images. This will put the session and session folders in the same folder as your captures automatically. Now if you open the folder we exported above in your Capture One Session, your images should contain the ratings, keywords, color labels, white balance, etc from Lightroom. You can now delete the temporary catalog as this is no longer needed. You may also choose to delete the previous raw folder, but you may want to keep it in case you want to reference the file from Lightroom again.

Create a New Session
|
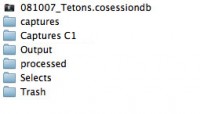
Capture One Session Folders
|
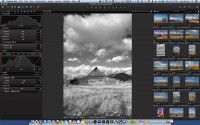
Lightroom to C1 Session with Adjustments
|