Today Phase One announced and launched the exciting next version of their Capture One software. We have been diving into this software since its first beta and are excited that we can finally talk about the new improvements to the software. As a former post-production tech and photo retoucher, this new version is easy to see that Phase One hasn’t forgotten this very important aspect of workflow, as many of the new features are geared toward post-production. Below are our top ten new features in Capture One 9 (in no particular order).
10. Three activations per license
In the past, for a single user license you were allowed to have at most 2 activation at one time – like a laptop and a desktop, for example. In Capture One 9, based on customer feedback Phase One has allowed an additional activation for a total of three activations per license.
9. Revised Contrast Engine
With each new version of Capture One, they are sure to improve the color engine. This release is no different as they have reworked the color engine, specifically in areas of how it relates to contrast, color, and luminosity. Saturation has been improved to better respect luminosity in the image – often resulting in images with increased saturation without losing critical luminance control.
The Contrast slider has also been improved dramatically. Where areas in Capture One 8 would sometimes show color banding and increased saturation with added contrast, Capture One 9 does a better job of increasing contrast with better hue and saturation protection.
Brightness is another major update in the new color engine. Prior to Capture One 9, the brightness slider was more of a blend of Exposure, mid-tone correction and levels, but in Capture One 9 it’s its own unique adjustment – still handling the midtones but in its own unique way. You are able to achieve results using just the brightness tool that you can’t get using the other sliders.
-
Saturation
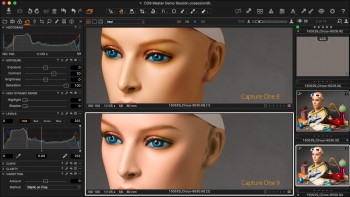
Top: Capture One 8,
Bottom: Capture One 9
-
Contrast
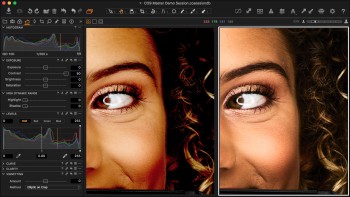
Left: Capture One 8, Right: Capture One 9
-
Brightness
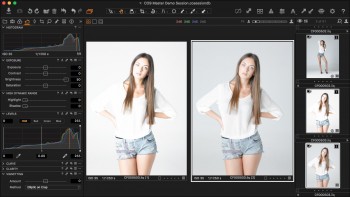
Left: Capture One 8, Right: Capture One 9
8. Better DNG Colors
DNGs in Capture One have often been hit or miss. Even files that Capture One exported as DNGs looked terrible in Capture One at times. In Capture One 9, you are now able to get much more accurate colors from supported DNG files, especially if the original raw file is embedded. If that’s the case, there will be no discernible difference between the native raw file and a converted DNG in Capture One. Haven’t been embedding the original RAW file? The results are still significantly better than in previous versions of Capture One.
*Note: due to the way web browsers limit color information and display colors differently, test against your own images too!
-
New DNG Colors
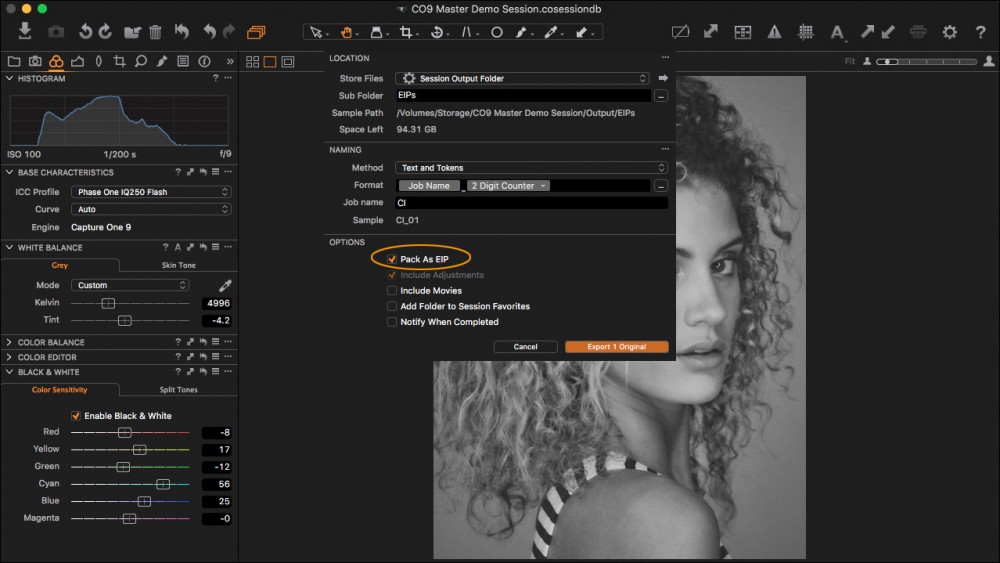
7. Export direct to EIP
Another nice workflow improvement is the ability to export directly to EIPs from a session or a catalog. In Capture One 8, you couldn’t export as a EIP from a catalog at all, and it was a hassle to create a duplicate EIP file. Now it’s as easy as File > Export Originals and making sure “Pack as EIP” is checked.
-
Export Direct to EIP
6. Luma Curves Channel (and more)
Another introduction in to Capture One 9 is a new channel in the curves tool for Luminance. Using the Luminance channel for increasing or decreasing your contrast will produce a different look than using the RGB channel – which often changed overall saturation particularly when contrast increased.
Another nice addition is you can now scale the Curves tool to as big as you like to get the ultimate fine-tuned approach.
Lastly (but definitely not least), you can perform Curves adjustments on Local Adjustment layers – opening up a whole new world of possibilities for post-production work.
-
Luma Curves
-
Curves on Layers
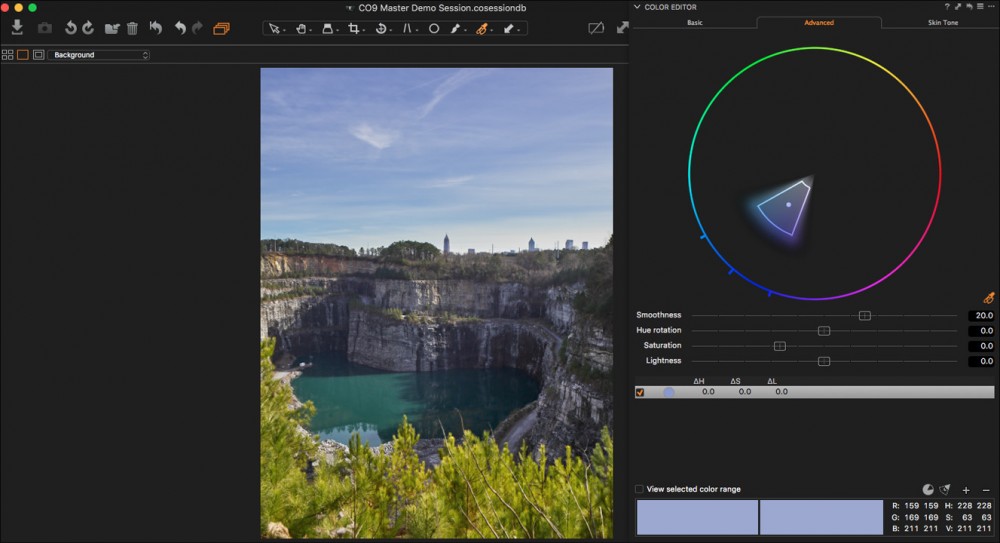
5. Scalable Color Editor
This has been one of my requests seemingly since I started using Capture One. The Color Editor has always been my favorite tool – in fact it was the single tool that got me to switch away from Lightroom. I loved the how you could precisely select ranges of color – even fine variations within a color – and use those selections to dramatically improve your image by adding texture, luminance changes, etc. However, sometimes trying to click on those selection circles from earlier versions of Capture One made you want to throw your computer against the wall.
Capture One 9 now allows a scalable Color Editor window (joining its curves and color balance counterparts) with an updated interface to make working with the color editor a much easier process. Instead of hard-to-click selection circles, you can move your mouse over the edge you want to adjust and it turns to arrows showing the direction you can adjust. You can alternatively click on the colored tabs at the top for easier adjustments, similar to working in the updated Color Balance tool.
-
Scalable Color Editor
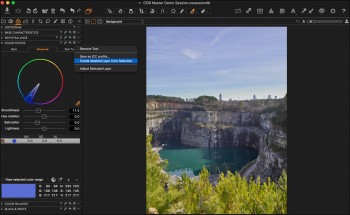
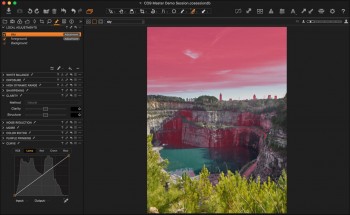
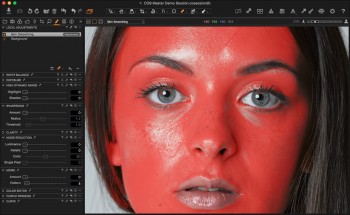
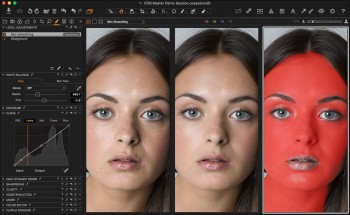
4. Generate Masks from Color Editor (and Skin Tone Editor)
Perhaps one of my favorite (and personally unexpected) new features found in Capture One 9 is the ability to make local adjustment masks from Color Editor selections. Make your color editor selection and fine-tune it down to the color range you want, click on the Color Editor tool menu (…) and choose “Create Masked Layer from Selection.” You’ll get a new local adjustment layer with just the color range masked out. This allows you to easily create more complicated masks that allow you to much more in Capture One. My mind began whirring when I first saw this feature: quickly & easily compensating for mixed lighting in interiors, easy make masks for skin softening and portrait retouching, and so much more!
-
Generate Mask
-
Mask from Color Editor
-
Mask from Skin Tone
-
Skin Softening
3. Brush upgrades
On top of generating masks from the Color Editor and having access to the Curves tool (with Luma channel) for local adjustments, Phase One also added new features to the brushes in Capture One. You can now link your brush (additive) and eraser (subtractive) tool settings, so hardness and brush size are the same when switching back and forth. Also added is a flow slider, which limits the amount of mask the brush outputs at once. If you have the “Airbrush” option checked, as you go over and over the same spot, the mask will build up. Combining the flow slider with opacity, this gives you incredible control so you can really fine tune your masks.
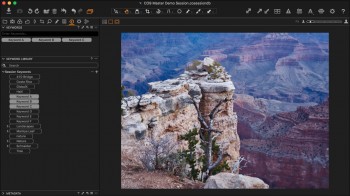
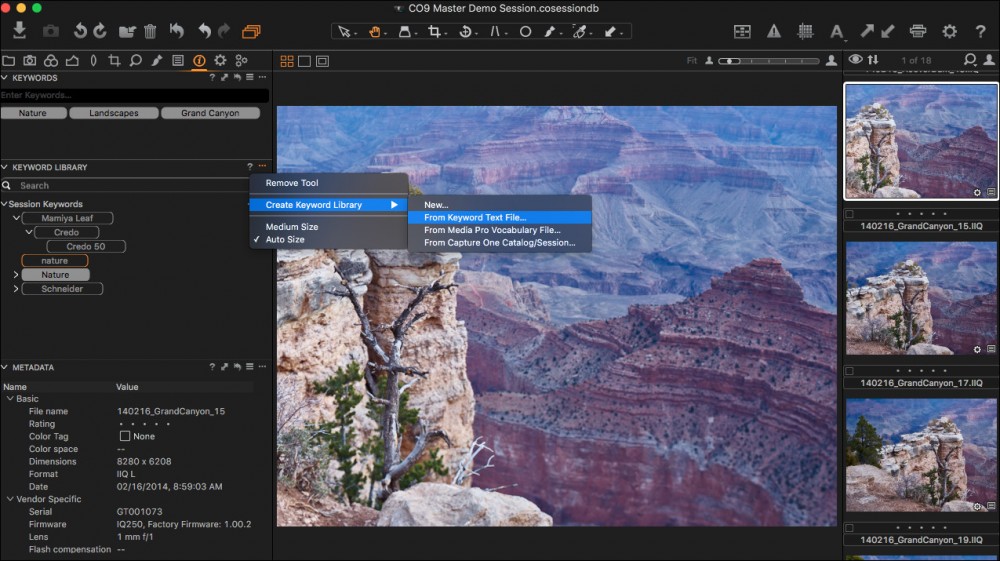
2. Additive Keywords & Keyword Libraries
Phase One has also added improvements to the Keyword tool in Capture One 9. Thankfully (and finally) they have added stackable keywords. In the past, if you copy & applied keywords (or used keyword presets) on images that already had keywords, the previous keywords were overwritten. Now in Capture One 9, the keywords are additive, allowing you to more effectively use keyword presets than in previous versions.
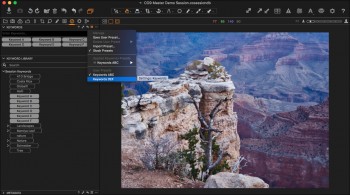
Also added to Capture One 9 are Keyword Libraries. Keyword Libraries can be imported from other Capture One Catalogs/Sessions, Media Pro Vocabulary files, or from Comma Separated Text files. This allows you to easily move large amounts of keywords between sessions or catalogs, or use defined standards for Stock imagery, Photojournalism, etc.
-
Additive Keywords
-
Additive Keywords
-
Additive Keywords
-
Keyword Libraries
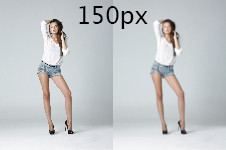
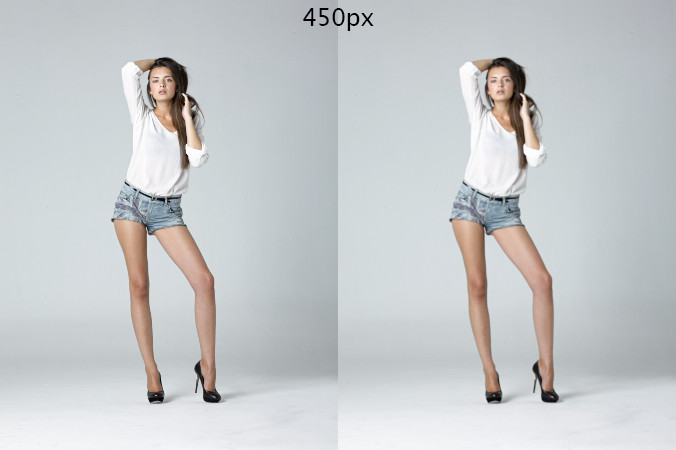
1. New Scaling Engine
Last but not least, Capture One 9 has a new scaling engine for processing files. This is especially noticeable when scaling images down (which, if you shoot with an 80 mp back, occurs quite often). The image below scaled a Credo 80 test image (long edge:10,328px) to a long edge of 150px. The Capture One 8 result is jagged, but the Capture One 9 result is much more pleasing to the eye, but may need a little sharpening afterwards in Photoshop.
-
Scaled to 150px
-
Scaled to 300px

-
Scaled to 450px
Summary
The new features in Capture One 9 open a new world of possibilities for post-production efficiency – allowing you to do more work on the raw file rather than a processed, rasterized file. Not having to process an 80MP image to a 485mb 16-bit TIFF file not only saves hard drive space, it allows you to batch process your adjustments across multiple images which can save you tons of time and work. These new tools and features in Capture One 9 allow you to do so much more to take your images to the next level.
Questions?
Don’t hesitate to reach out to us! Contact our technical support team for questions or additional information!
[gravityform id=”32″ title=”true” description=”true”]