Sometimes an easy fix is all you need.
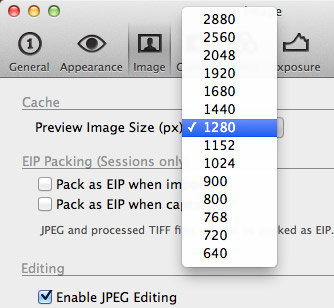
Capture One Pro is a powerhouse for RAW file editing, but an intense program can have intense demands on your machine. Occasionally Capture One may feel like it is acting consistently sluggish for no apparent reason. There is an often-overlooked setting in Capture One Pro’s preferences that can help keep Capture One running quite snappy, but if ignored can grind your machine to a halt especially when handling large amounts of images. The setting is the Cache Preview Image Size and can be found in Capture One Preferences under the Image Tab.
-
Available Image Preview Sizes

(click to enlarge)
-
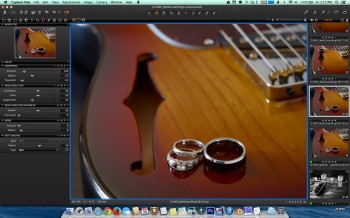
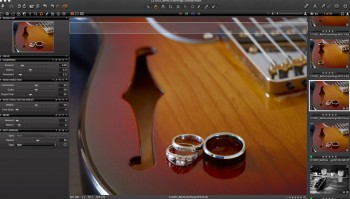
Screen Overview

(click to enlarge)
The Viewer area is typically not as large as your maximum screen resolution.
Anytime it sees an image, Capture One creates a image preview (called a proxy). If you use Sessions, Capture One stores the .cop proxy files in a subfolder next to your RAW files. You can delete these .cop files at any time without affecting any of your edits, as Capture One stores your adjustments in a separate file and simply regenerates the previews when necessary. The proxy is also more than just a flat preview of the image – it contains extra bits of information about editing conditions and possibilities like a small RAW file. In Capture One’s preferences, you can adjust the maximum size of these previews to cut down on their file size and the system resources needed to display them. When an image is viewed at a size smaller than the generated proxy, it uses the preview from this smaller file rather than regenerating directly from the original raw file. This not only saves your computer memory and resources, it is significantly faster as well.
The Trick:
The trick, then, is to choose a proxy size slightly larger than how you normally view and edit your images. Capture One Pro 7.1.4 defaults to 2560px for the preview size, but the maximum screen resolution on my non-Retina 15″ MacBook Pro is only 1680 x 1050. Naturally, one might then choose a preview size of 1680px, but realistically you can go even lower. If you have the Tools and Thumbnails visible, your working area is actually much smaller than your maximum screen resolution. On my 15″ MacBook Pro the working area is only around 1135px, so setting a proxy size of 1280px works just fine. On a 23″ Cinema Display with a maximum resolution of 1920px x 1200px, the preview area is around 1400px, so a preview size of 1440px or 1680px would work.
So how do you determine what size you need? There is an easy way to find out:
- Open Capture One Pro and load an image into your viewing area by clicking on its thumbnail.
- Take a screenshot of the working area of your image. On a Mac, an easy and precise way to do this is use the keyboard shortcut: Command + Shift + 4, then click and drag a selection that covers the length of the preview area. This saves the screenshot to your Desktop.
- You can open the screenshot in Photoshop, or if you don’t have it you can use a free program included with your Mac called Preview.
- In Preview, you can view the size of the image by going to the Tools menu and choosing “Adjust Size”. This will show you the basic length of your working area.
- With that number in mind, open Capture One’s Preferences, click on the Image tab, and choose a size slightly larger than your working area.
-
Make a Selection Screenshot

(click to enlarge)
Use Command + Shift + 4 then click & drag a screenshot selection.
-
Open in Photoshop or Preview
(click to enlarge)
Open the screenshot in Photoshop or Apple’s Preview application.
-
Determine Proxy Size
(click to enlarge)
In Preview, go to Tools > Adjust Size to determine the size of your Proxy.
Optional:
The thing to note here is this only affects FUTURE proxies, and does not resize any previously generated proxies. If you wish to regenerate the proxies, you can navigate to the Cache sub-folder near your RAWs in the Finder and delete the Proxies folder that lives inside. Alternatively, you can go inside the Proxies folder and delete individual proxies related to your image with the .cop file extension. The next time Capture One views those images it will regenerate the image proxies.
This isn’t necessarily a magic bullet for Capture One Pro’s performance, but little tweaks here and there can really add up in the long run. As always, if you have any questions, please don’t hesitate to reach out to us.