One of the most valuable currencies we have, especially as photographers, is time. While everybody works differently, a lot of us would rather be out shooting than sitting in front of a computer processing images. Any time we can find a faster/better way to do a certain task it’s a happy day. As a former die-hard Lightroom user for years, I wear a critical eye when trying new methods or programs for image processing. After switching to Capture One Pro 7 for my own image processing, the vast improvement in output rendering quality still blows my mind at times. In addition, one simple and extremely useful feature that impresses is me the ability to select multiple output recipes and process them all at the same time without having multiple dialogs asking the same questions each time.
Consider this typical scenario: You are ready to deliver images to a client, and need full-size 16bit TIFFs, 2000px JPEGs for basic on-screen use, 800px JPEGs for web scenarios, and you want to post an image on your blog which needs to fit certain size specifications. In other image editing programs, you would have to output for each scenario, a minimum of 4 processing commands. Capture One Pro 7 makes this an easy task!
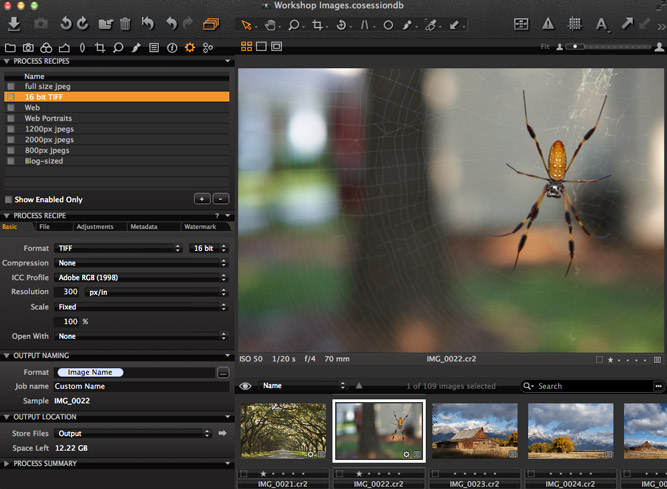 After selecting an image go to the Output module & begin selecting your recipes.
You can always add more recipes by clicking on the + button.
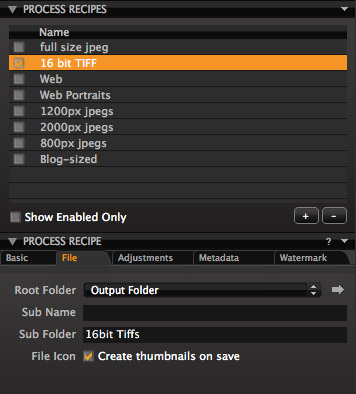
Under the Process Recipe module, click on the File tab. Here you can change the Root output folder. It’s also useful to add a subfolder with a name that makes sense, like “16 bit Tiffs” or “800px jpegs.”
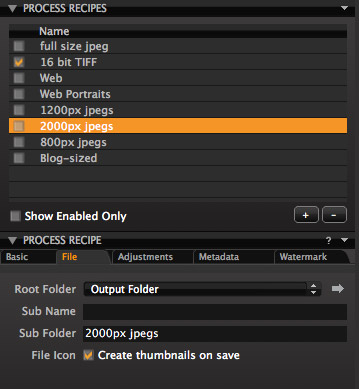 Selecting different recipes allows you to change settings like the subfolder name, but doesn’t necessarily select it for output. Be sure to check the box next to it!
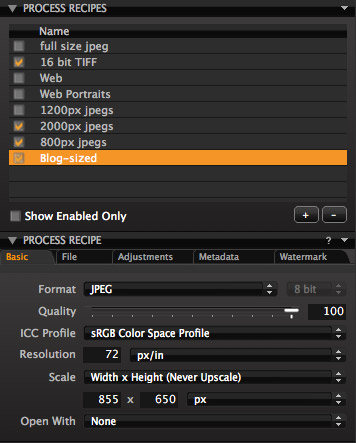 Each recipe has its own settings, so you can have different scales and output folders without affecting other recipes.
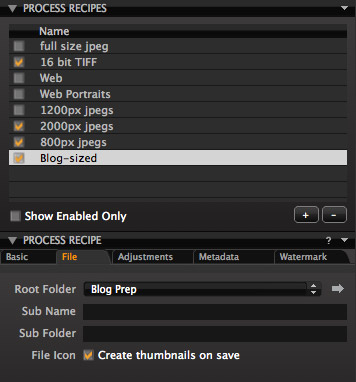 You can also specify folders outside the default output folder. This can be useful if you want to drag a folder straight to a client delivery method like dropbox or a dvd, but want to have a processed file output to somewhere else for you to work on. This way, you don’t have to navigate to the same folder and remove files. It’s a simple step, but the convenience is very nice.
 After processing, your images go to their respective folders as you designated in your recipes.
Bonus Pro Tip:
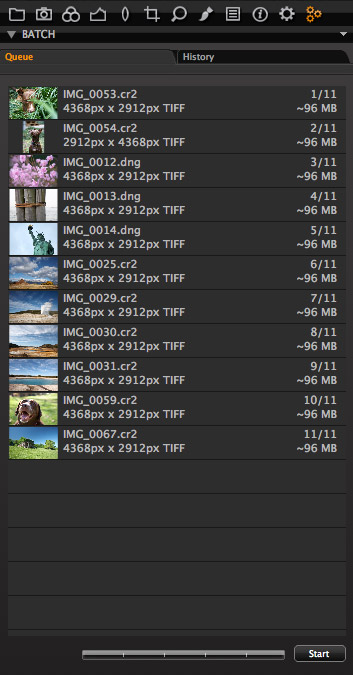
Click on the Batch Queue module, and hit the “Stop” button at the bottom to prevent immediate processing. Then make all your selections for processing using the desired recipes and hit Process as usual. Once you’re ready to begin processing the batch, hit Start, then go about your business. It will process each image into the correct folder while you’re getting coffee, asleep, or in a meeting and be ready for you when you return. The image above doesn’t show it, but for each image a full size tiff, 1200px jpeg, and 800px jpeg were all output at the same time.
All in all, it’s the little things that make us want to use one program over another for editing. While this isn’t major feature, it can save you time and that can make all the difference.
-Josh