 Phase One announced an update for their IQ250, the world’s first medium format digital back featuring a CMOS sensor.
As per the release notes, there’s some definite improvements listed, including the following:
- Super high quality images with the ISO range from ISO 100 to ISO 6400
- Fast capture with 1.2 FPS on the Phase One 645 DF+ camera system
- Support for 256 GB and larger CF cards
- Fluid and responsive high quality Live View
- A new focus Meter with up to three Concurrent Live View focusing areas. This feature is available with Capture One Pro 8 and is USB ONLY.
- Mobile device WiFi-support for remote capture control, Geo-tagging of images, and full Live View on supported external devices using Capture Pilot (app version 1.7)
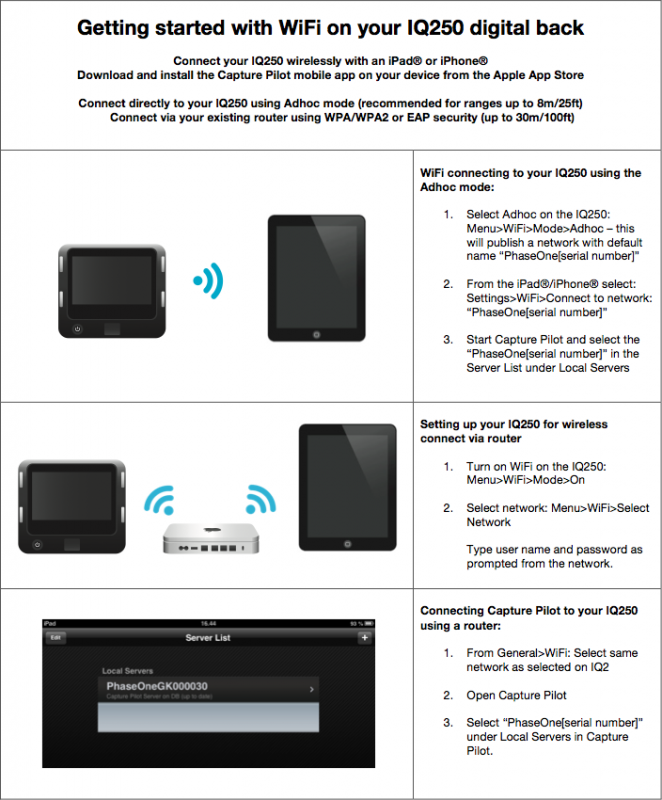
Phase One has included a handy guide for getting started with WiFi on the IQ250 back with this release notes:
Power-Up and Down from the 645DF+ camera
- Turn ON the 645DF+ and the IQ250 will automatically power up.
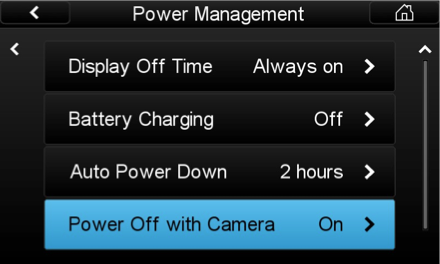
- Turn OFF power on the 645DF+ and the IQ250 will power down after 3 seconds, unless it is interrupted manually on the screen or by pushing a button.
Phase One notes that this feature is not fail proof, and if operated quickly in sequence, the back may not power on or off properly.
Disabling this feature can be done in the Power Management menu.
New Live View features
Starting Live View
Live view on the 645DF+ is supported in Manual or Aperture Priority mode. Live View on X, Tv, and P mode is not supported.
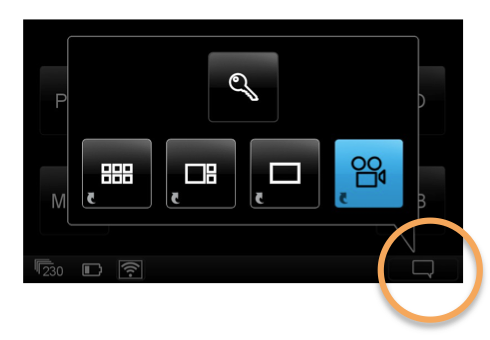
- Live View is started from the Contextual menu pop-up in the lower right corner of the IQ250 display.
- In the pop-up menu, click on the camera icon.
If the IQ250 is attached to a 545DF+ the camera automatically opens the shutter and Live View is displayed on the screen. When you want to capture an image, you have to exit Live View first.
If attached to any other camera, then the shutter has to be manually or electronically opened to get a Live View on the screen.
Tethered Live View is supported on USB2 and USB3 only.
Contextual Menu inside Live View
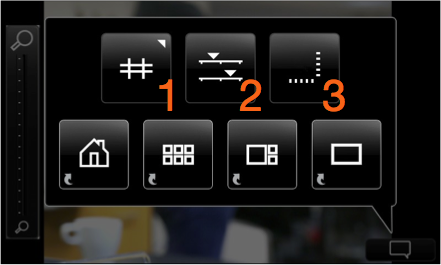
3 buttons are available in the top of the Contextual menu
- Grid
- Lightness
- Virtual Horizon
Each of these features are described in depth below:
Turn on Grid inside Live View
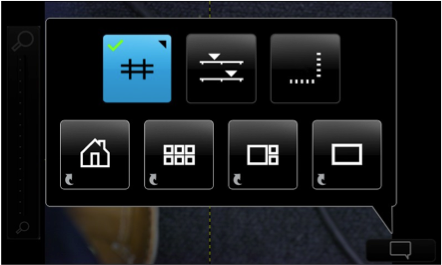
- In Live View select contextual menu pop-up from lower right corner
- Long press on the grid button (the one that is blue in the image)
Select the new grid option “Custom Cross”

- In the Grid Mode dialog scroll down and select “Custom Cross”
Moving Custom Cross lines
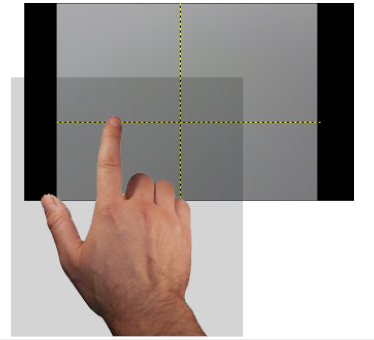
When Custom Cross is selected, the grid lines can be picked up and moved around.
- Long-press on the gridline you want to move. (You will get a confirmation beep)
- The flashing gridline can be moved around
- When you are finished setting the line, you can tap on another area of the screen, and the gridline will lock itself
- The gridline will also lock itself after a few seconds of inactivity once you release your touch on the touchscreen
Light levels in Live View
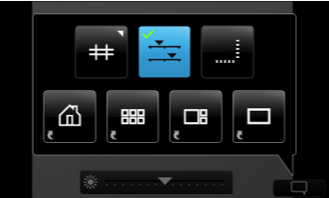
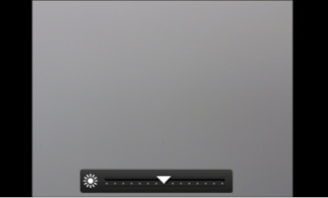
The light levels are automatically adjusted to the screen. Even in low-light conditions, the level is adjusted to a usable level.
The lightness of Live View can be globally adjusted:
- From inside Live View, click on the contextual menu
- Click on the top center button in the contextual popup
- A Lightness slider will show in the bottom of the Live View display
- Lightness can be adjusted by moving the indicator mark to the right or left on the slider.
New Virtual Horizon Tool in Live View
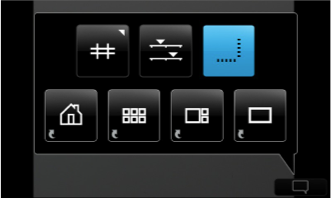
- From inside Live View, click on the contextual menu
- Click on the top right button in the contextual pop-up
This will bring up two bars one below the Live View, and one to the right. now you can align both roll and pitch uing the indication on the bars, and you will get a clear indication when things are level.
Live View anti-flickering
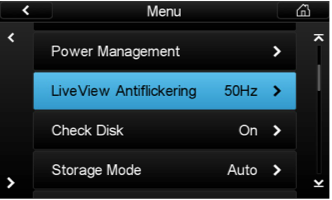
Depending on where you are located in the world, the power outlet operates at different frequencies. In general it is either 50hz (EUR) or 60Hz (US and parts of Asia.)
To minimize the amount of flickering when using Live View with artificial light, you can set up the screen redraw frequency to either 50Hz or 60Hz. This is setup in the menu “LiveView Antiflickering”
Capture Pilot app Features
Live View in Capture Pilot
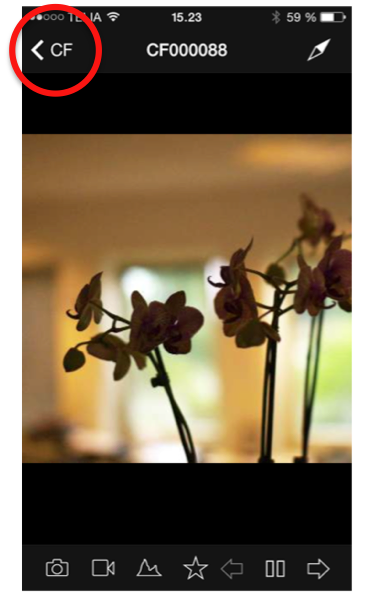
Live View is started from the Live View camera icon at the bottom of the Capture Pilot screen in both image browser view and single image view. In Live View 100 zoom is available with a “double-click.”Depending on the actual bandwidth choose Low Quality (LQ) or High Quality (HQ) for best Live View result.
To return to single/browser view press the top left “CF” icon on the top left of the Capture Pilot screen.
Geo-tagging Images using Capture Pilot app
Enabling Geo-tagging with location data in Capture Pilot
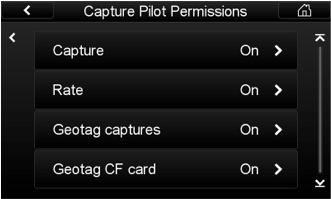
Please Note: On the IQ250 the WiFi mode must firs be turned off in order to change settings.
Geotagging is enabled inside the menu Wifi > Settings > Capture Pilot > Capture Pilot Permissions
- Set the “Geo-tag captures” to “On” to let the IQ250 geo-tag all images capture in a shooting session with the camera connected wirelessly to Capture Pilot.
- Set the “Geo-tag CF card” to “On” to let the IQ250 geo-tag all images on the CF-card/cards inserted upon WiFi-connecting to Capture Pilot after a shoot.
Geo-tagging files after a shoot, when connecting to Capture Pilot
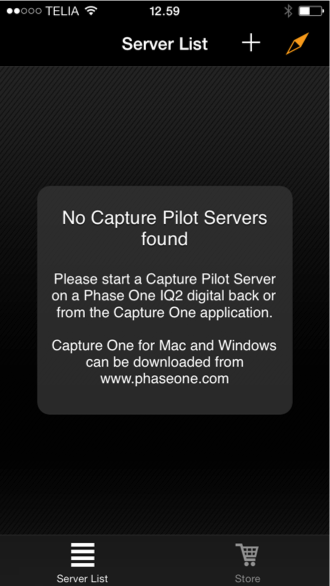
With the “Geo-tag CF card” turned On as described above, Capture Pilot can run in the background on your iPhone/iPad and log location data paired with time, without being WiFi connected to the IQ250. After the shoot, you WiFi-connect the IQ250, and all the files on the CF-card/cards are tagged with the corresponding coordinates matched by the capture time.
To Geo-tag location data into your files after the shoot, please use the following procedure:
- Before Shooting: start Capture Pilot and click on the compass needle in top right corner, so that it is enabled (orange).
- Leave Capture Pilot running in the background until after the shoot.
- Once you connect your IQ250 to Capture Pilot – the image files on the CF-card in the IQ250 will be Geo-tagged.
- If you have captured to multiple cards, you can insert the cards one by one. Capture Pilot and the IQ250 will tag all the files for you.
In the mobile device Settings for the Capture Pilot app, the Geo-tagging can be turned off automatically after a certain interval to avoid unnecessary use of battery power.
Confirmation that the files on the CF card are tagged
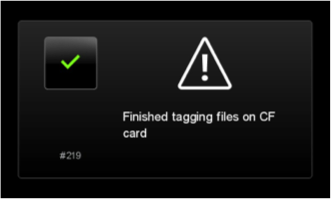
You will see the above dialog on the IQ250 when it is finished tagging the files.