I have an offer for you and it’s absolutely free. Are you interested? I know that you are.
For some years we (and others) have been pushing Xrite to add ICC profiling to the ColorChecker Passport Application. Why was this so important? Because the majority of our clients use Capture One. And when the ColorChecker Passport profiling application was introduced oh, about 10 years ago, the only option for creating a profile was based on a DNG file, which necessitated raw conversion of your camera files through Adobe. The reasons don’t matter, this was it. And regardless of your feelings for Adobe, if you were entrenched into a Capture One workflow, or simply preferred the raw conversion quality of Capture One vs Adobe (as many do), you had no option to use this with the Xrite solution.
Until now. For several months, we have been working with a private beta of new ColorChecker software (now public beta). This new version adds ICC Profiling capability, specifically with Capture One tuned tiff files. YES!!!
https://xritephoto.com/cameraicc
The process for creating the profile is very, very simple. Simply follow the PDF instructions from Xrite, Step 1, 2, 3, 4, done. Be sure to capture a properly exposed image. The results are below. My take on the results is that they are not perfect, but a significant step forward over standard profiles. Just because you can create a profile doesn’t mean the profile you create will be better than what existed previously. However, in the case of this application, the results we’ve seen are extremely encouraging. For our testing, we used subject matter that contains some difficult colors for digital cameras to render accurately. For you, the viewer, the challenge is that you are not familiar with these items. But you don’t have to take our word for it, download it and try it for yourselves!

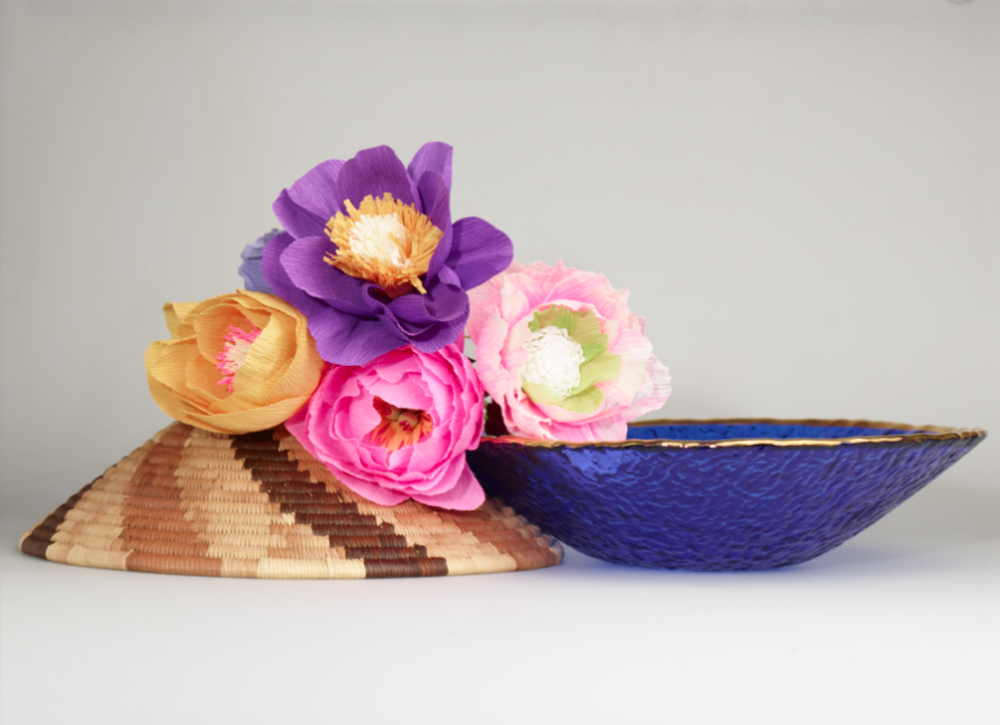
Our standard difficult subject matter for color test.
The above subjects are selected because they pose some specific challenges for digital capture. Deep cobalt blues are very difficult to capture accurately, and we’ve thrown in an assortment of other colors as well as some neutral-ish colors. For this test, we shot a Phase One IQ280 CCD sensor on the Phase One XF Camera with the Schneider 120mm Blue Ring Lens. We shot with Broncolor Flash equipment, and color balanced with an Xrite ColorChecker Passport. Keep in mind that the profile you create is going to be light specific. A profile created for flash will not produce good results when your lighting is tungsten, etc.

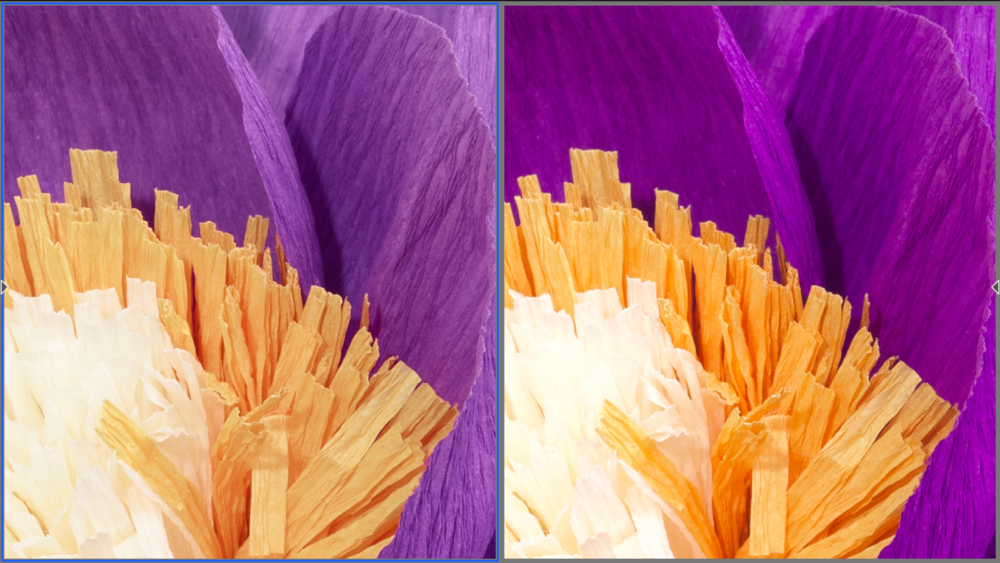
Phase One IQ280 Flash profile on the left, Xrite Custom Profile on the right.
So, without knowing, in actuality, is the color of the purple paper flower closer to lavender or fuchsia? It’s somewhere in between, but it is closer to fuschia. The yellow petals display the proper vibrancy with the Xrite profile, but appear washed out with the standard IQ280 flash profile.

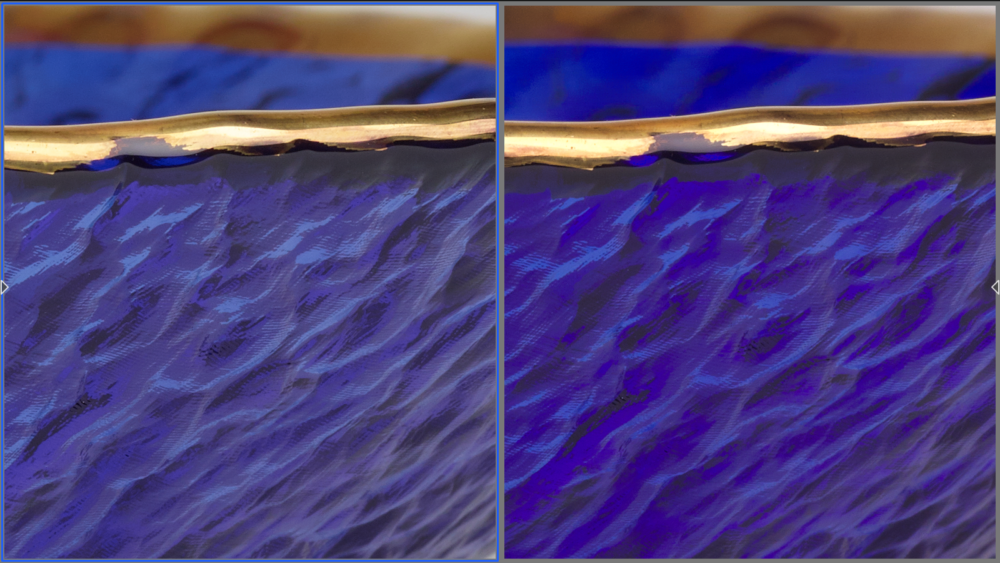
Phase One IQ280 Flash profile on the left, Xrite Custom Profile on the right.
This extremely deep blue bowl is somewhere between a royal blue and a cobalt blue and has a rippled surface texture that produces many different angles of light, which impacts the colors. The standard Flash profile yields a result closer to purple. The Xrite profile is indeed getting some of this intense blue color. It’s quite a difference.

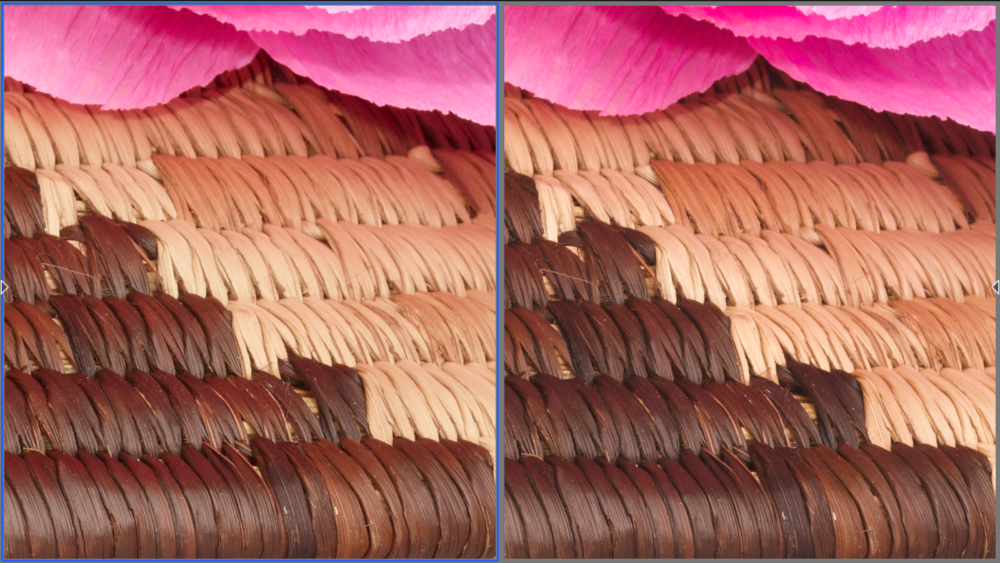
Phase One IQ280 Flash profile on the left, Xrite Custom Profile on the right.
Finally, and perhaps most interesting of all, is the whicker basket, with its neutral-ish brown and light beige rattan bindings. On its own, the standard Flash profile renders the basket as what one would identify as brown and light beige, but upon closer inspection and in comparison, it can be seen that the Xrite profile is much more neutral, with less red content.
I would say that the Xrite profiles seem a bit on the saturated side of things, but nevertheless, the hue that is rendered is much more accurate than the standard Flash profile. The resulting editing space is improved considerably. Thank you Xrite, for finally granting us our wish.
If you have any questions please contact us!