Sometimes you may need to completely uninstall Capture One Pro for tech support reasons, or if you are upgrading major versions (i.e. Capture One Pro 7 to Capture One Pro 8). Here we have provided an Capture One uninstall script (Mac OS 10.7+ Only) which will backup your custom recipes, workspaces, styles, etc, while removing the necessary files for Capture One.
*Firefox users: Please right click (control + click) and choose Save Link As
While we tried to be as universal as possible, there is always the chance that something may not work perfectly in this script. In those situations or for those who simply prefer to get your hands dirty & do it manually, follow the instructions below to remove the necessary files.
Removing Capture One Pro Manually
Here is a step by step process on effectively uninstalling Capture One completely from Macs running OS X 10.7 and later.
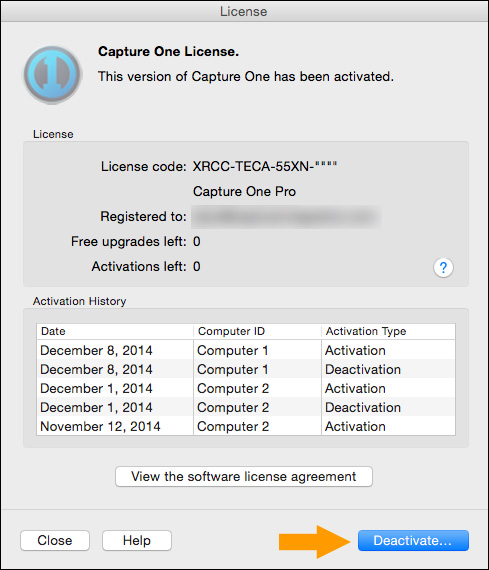
- Optional: Deactivate your license on the current installation of Capture One, this can be done by going to Capture One > License > Then clicking Deactivate. If you are planning on reinstalling immediately on this machine, you do not have to deactivate Capture One.
- Quit Capture One then delete the main application (typically found in the Applications folder) by dragging it to the trash.
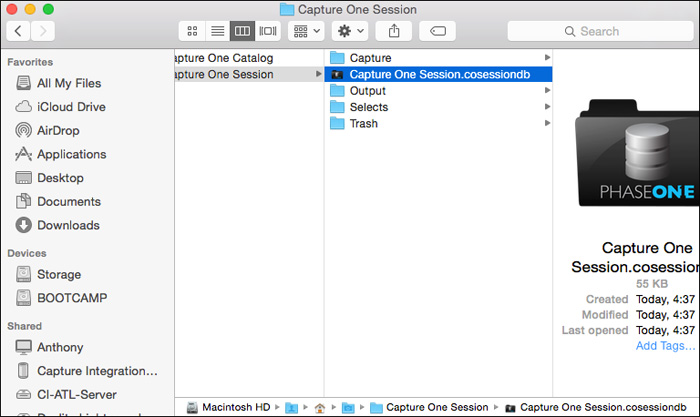
- Navigate to User > Pictures > Capture One Session and delete a file titled Capture One Session.cosessiondb. You do not need to delete the entire folder, just the .cosessiondb file.
 If you are using or have used Capture One 6 then there will also be a folder within the Pictures directory titled Capture One Library, in there you will see a Capture One.col file, delete this as well.
- The next step requires you to access the User Librarywhich is hidden by default in OS X 10.7 and later. To access it, with a Finder window open go to the drop down menu labeled “Go”, once that is open hold down the Alt / Option key on your keyboard to reveal the hidden Library folder between Home & Computer in the list. Once you click on that we can move to the next section.
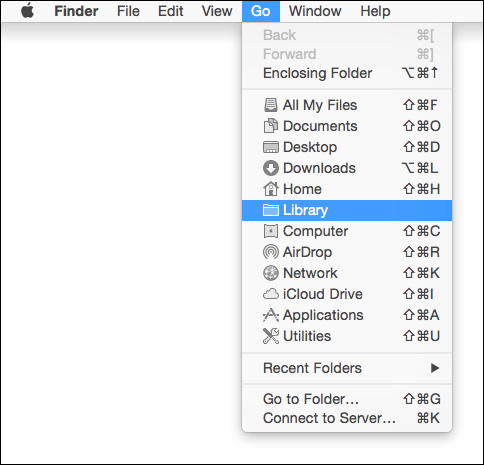
If you get tired of having to keep jumping through hoops to access your user Library folder, you can permanently unhide it using Terminal. Here’s how:
- Open the Terminal application found in the Utilities folder located inside your Applications folder.
- Copy and paste the following (without quotes) then press the Return key: “chflags nohidden ~/Library”
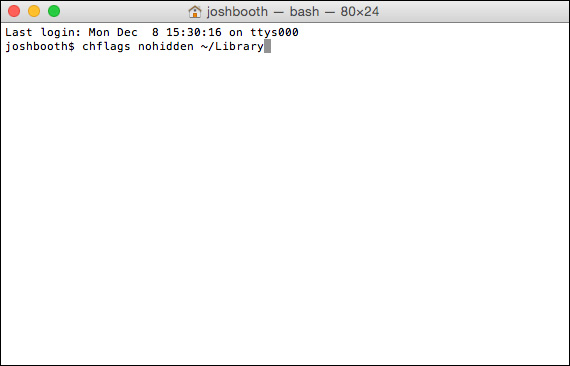
- That’s it! You should now see the Library folder in your user’s home folder now.
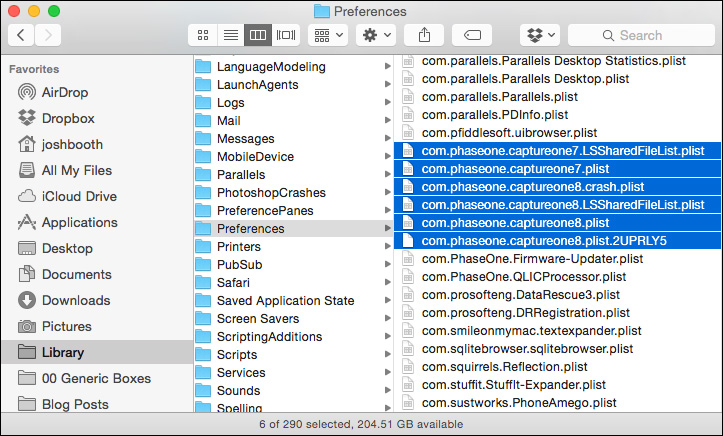
- Navigate to User > Library > Preferences, here you find many .plist files, we are looking for files that start with “com.phaseone.captureone”.
-
If you have Capture One 6 installed they will be simply called
- com.phaseone.captureone.plist
- com.phaseone.captureone.LSSharedFileList
-
If you have Capture One 7 installed they will be labeled
- com.phaseone.captureone7.plist
- com.phaseone.captureone7.LSSharedFileList
-
If you have Capture One 8 installed they will be labeled
- com.phaseone.captureone8.plist
- com.phaseone.captureone8.LSSharedFileList
If you have had at one point other versions of Capture One installed you may see all of these files. Delete all of these.
*SUPER IMPORTANT NOTE FOR: MAVERICKS (10.9) – YOSEMITE (10.10)
– EL CAPITAN (10.11) – SIERRA (10.12) USERS
Since OS X 10.9 Mavericks and OS X 10.10 Yosemite cache the application preference files (keeps them in buffered memory), you will need to flush the cache before deleting the preference files. (You can see the effect of this in the screenshot below: there is a com.phaseone.captureone8.plist file and a com.phaseone.captureone8.plist.2UPRLY5 file.)
To do this, open up the Terminal application on your Mac and type:
killall -u $USER cfprefsd
then press enter/return. It doesn’t really give you any feedback that it’s done the trick, but now you can delete the preference files.
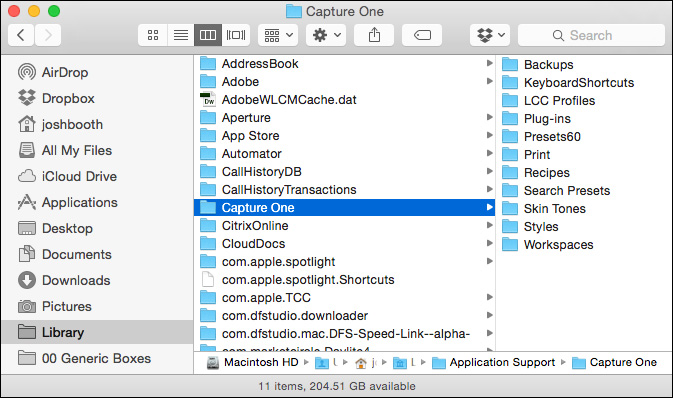
- Now proceed to the Application Support folder within the Library, User > Library > Application Support > Capture One. If you would like to save any styles, workspaces or preferences this will be the time to do so by backing up the appropriate folders. I recommend deleting the entire Capture One folder as this without a doubt will clear any bad settings or pref’s.
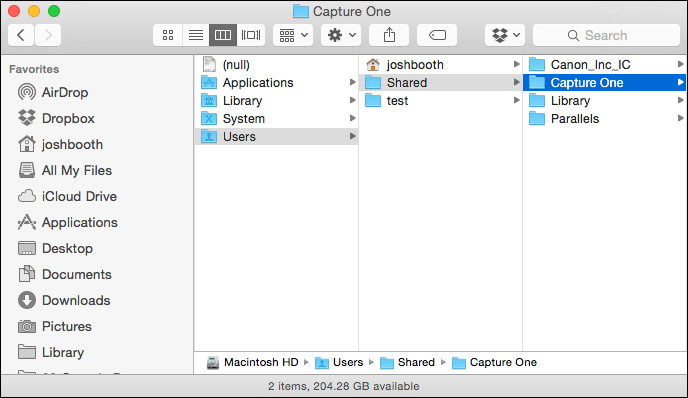
- Lastly, navigate to the Users/Shared folder. To easily do this while in the Finder click on the “Go” menu and choose “Go to Folder” then type “/Users/Shared/” and press Go.
Delete the entire Capture One folder located here.
Reset Capture One
Let’s say you don’t want to completely uninstall Capture One but need to reset it for a few reason. Here are the steps to take, much of it is the same as above minus deleting the full application:
- User > Library > Application Support > Capture One
- User > Library > Preferences > com.phaseone.[anything]
- User > Pictures > Capture One Default Session > Capture One Session.cosessiondb
- Macintosh HD > Library > Application Support > Capture One
Note: that if you need to maintain specific files such as LCC files you can move them out of their specific subfolder prior to uninstall Capture One and, after uninstalling/re-installing, place them back into the appropriate subfolder.
Last Resort
You’ve done all above but you are still have issues with a particular session, you can delete all of the proxy and cache files related to that session. This will force Capture One to recreate previews and focus mask files.
1. Navigate to your session folder, within the main directory navigate to Capture > CaptureOne > Cache > Proxies. Here will have all your preview and focus mask files, .cop & .cof respectively. Delete these. You can also do a system wide search and delete for .cof & .cop files to eliminate any more variables if just deleting local session .cop & .cof files does not help you.
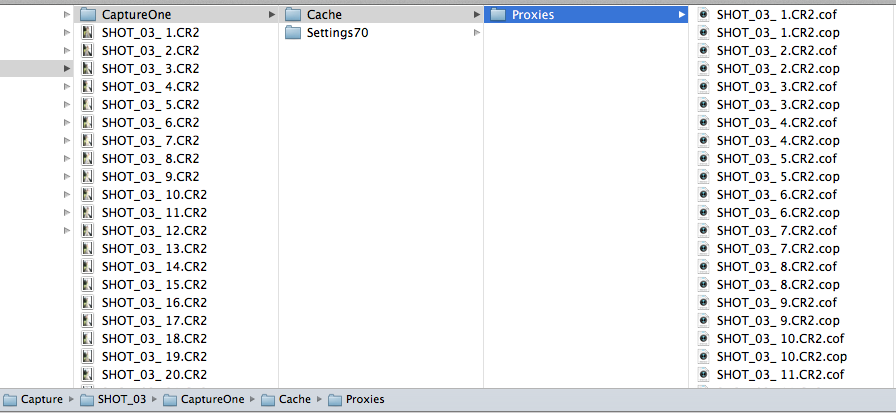
Note: The Settings70 (or Settings60, Settings80, etc) folder contains all of your adjustments for sessions, deleting this will erase all adjustments for that session. It is more recommended that you move just your RAW files into a new session rather than deleting this whole folder as you can always move this folder over if the above corrects your issues.
Always double check before you delete anything, never delete any RAWs unless you are absolutely certain!
Questions?
Have any questions? Leave us a comment or contact our technical support team for additional information!