If you haven’t used Capture Pilot on your photo shoots, it’s an incredible tool to keep handy. It allows you to preview images you are shooting on a webpage or an iPad/iPhone/iPod, rate and color tag images, or even remotely tell the camera to capture with certain camera configurations. Capture Pilot is naturally intended to only work within a local network, meaning the viewer (be that a 1st assistant or art director — who I will refer to throughout this post) needs to be on the same wifi network. What many users don’t realize is that with a little networking mojo you can allow viewers outside of your network (even in other cities) to do the very same thing.
Stipulations:
- You will need to set up your computer that you will use to be consistently at the same IP address on your network.
- Ideally your network’s global IP will be a static one, but if it’s not, you will need to periodically check to make sure it hasn’t changed (it will make sense why in a little bit)
- You will need to access your router’s admin panel to forward specific ports to your machine, so people outside your network can access.
Here’s what to do in a nutshell:
- Set your computer’s internal IP address to stay the same all the time.
- Tell your network’s router to forward a specific port to your computer.
- Set up Capture Pilot to look for that port.
- Give that info to your clients.
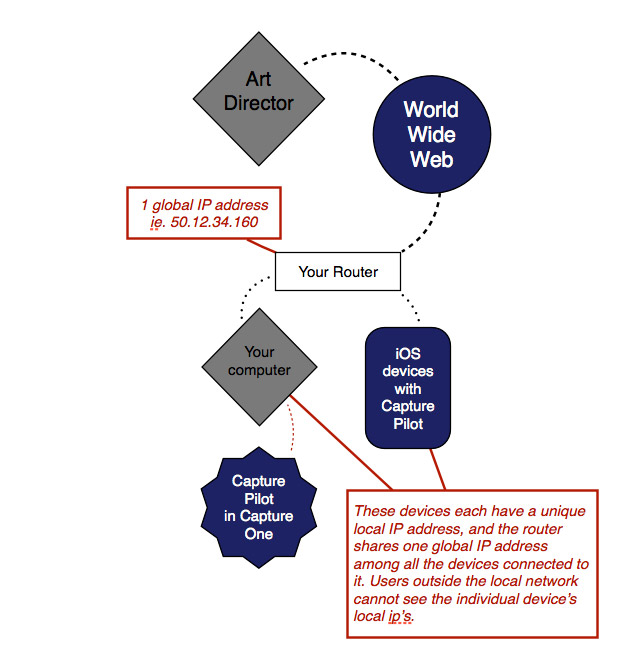
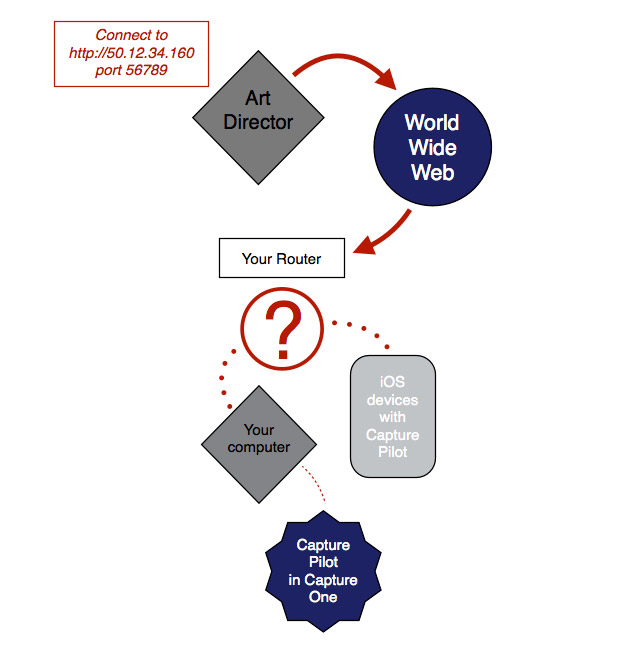
The Art Director needs your router’s global IP to find your computer in the Internet universe, as well as the specific port (like a doorway) Capture Pilot has opened. Even with the global IP address, your router does not know which computer on its internal network the Art Director is looking for.
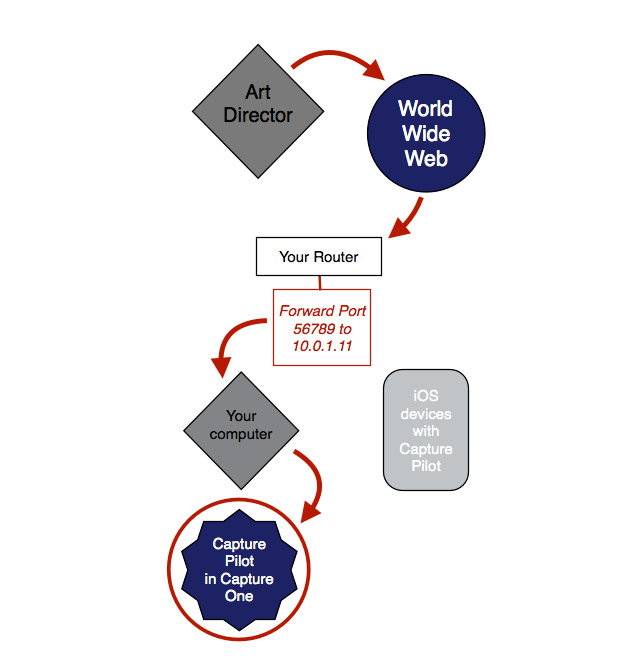
Once you tell the router to take anyone that enters through a specified port to connect them to a specific computer, users outside of your local network can access the Capture Pilot server.
Part One: The Setup
- First you need to figure out your machine’s IP address. On a Mac, you can go to System Preferences and click on Network Settings.
- Take note of your current IP address, then click the lock to make changes and click on the Advanced button.
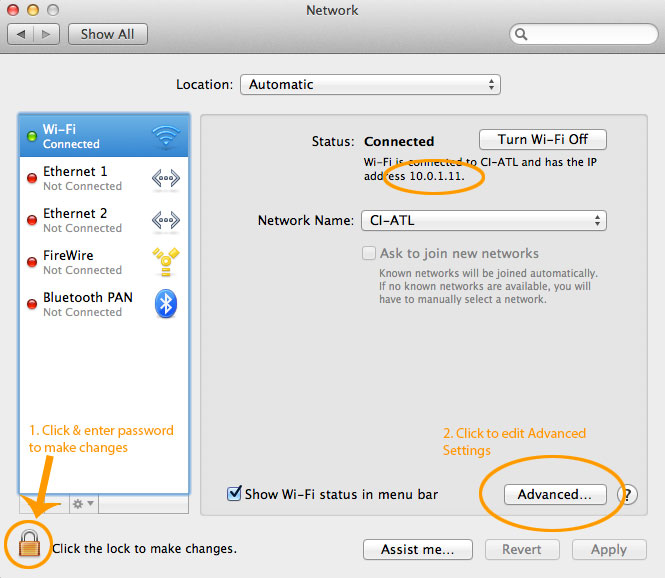
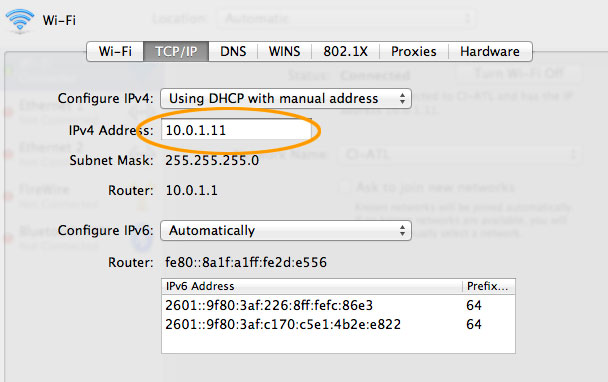
- Under TCP/IP, change Configure IPV4 to “Using DHCP with Manual Address” and enter your IP address below it.
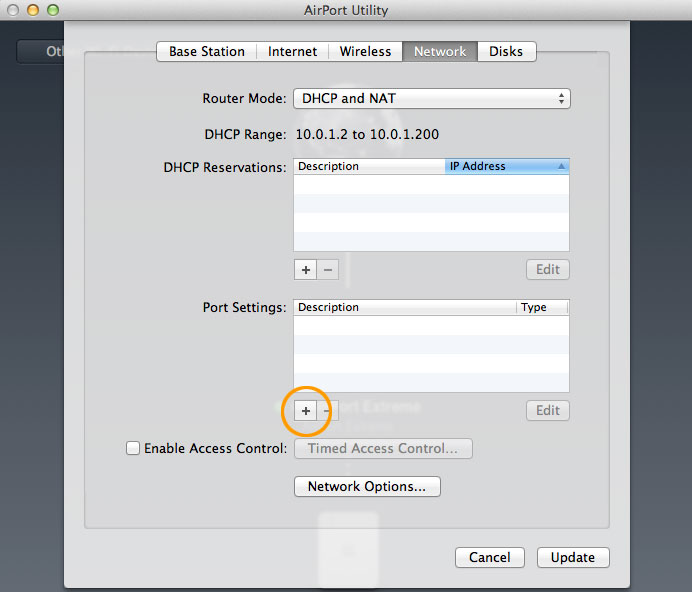
- Next, you will need to access your router’s admin panel to forward a specific port. Look for something related to Advanced Network Setup, Port Forwarding, or something similar. On a mac using an Airport Extreme, you can use the Airport Utility from the Utilities folder to do so. Click on your router then click Edit. Navigate the Network tab and click on the plus (+) sign under Port Settings.
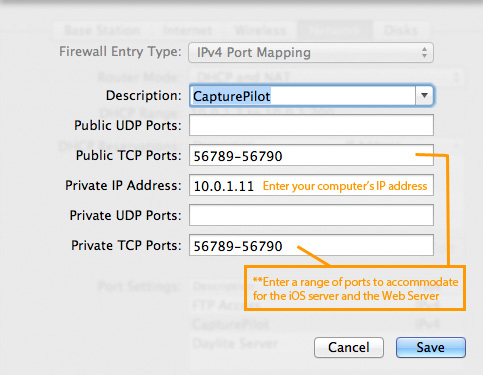
- Enter an unused port number (I used 56789-56790 without any problems) in the TCP ports on both the Public and Private settings and enter your IP address to designate the target. This points anybody who tries to access that port from the outside world to your specific computer through the same port. This is why your IP address on your machine cannot change and why we set it manually in step 3.
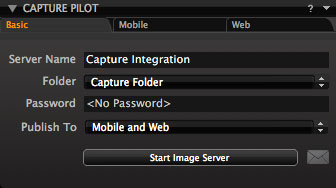
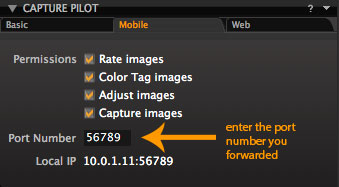
- In Capture One Pro, under the Capture tab open the Capture Pilot section. Enter a server name, then click on the Mobile tab. Choose whichever permissions you would like, and enter the port number you forwarded earlier then press enter/return on your keyboard. Do the same for the Web tab. Since you are opening up your computer to the outside world, it’s a good idea to enter a password here too!
**You must still hit “Start Image Server” when you are ready for clients to access your Capture Pilot Server. Otherwise, they will not be able to connect and see your images.
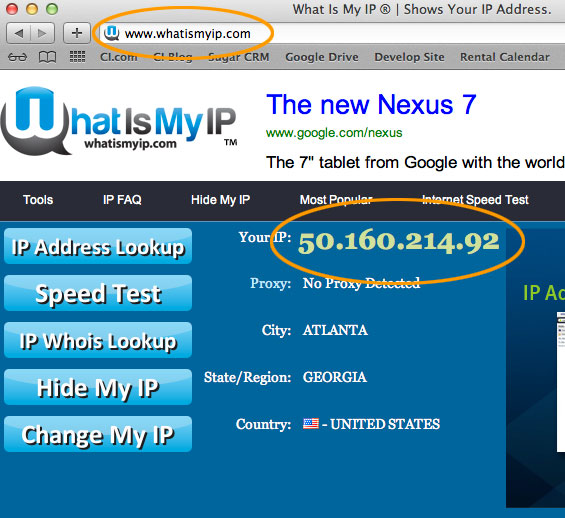
- Lastly on your end, you need to determine your network’s ip address in the Internet world. A great way to do this is to go to http://whatismyip.com in your favorite web browser. You will need to revisit this occasionally if you don’t pay your Internet provider for a static (non-changing) IP address.
Part Two: Instructing your Clients
*Update*
While you can use the iPad/iPhone in a remote configuration, I’ve not gotten the best results with it. Accessing via a web browser produces much better results.
- On your Art Director’s computer, open a web browser like Safari, FireFox, or Google Chrome.
- In the address field (where you would normally type “www.capturetintegration.com”) enter the IP address you collected from WhatIsMyIp, followed by a colon ‘:’, and then the Port Number you chose earlier without any spaces.i.e. the web address would be ‘http://50.160.214.92:56790’ (without quotes)
- Hit the enter key to access the Capture Pilot server.
- On the iPad, make sure they have an active internet connection (preferably WiFi).
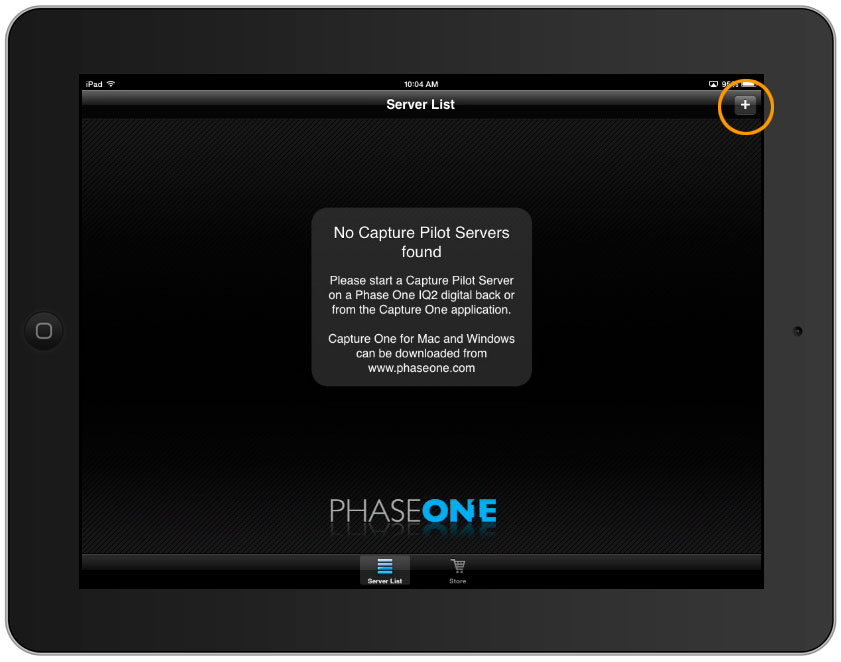
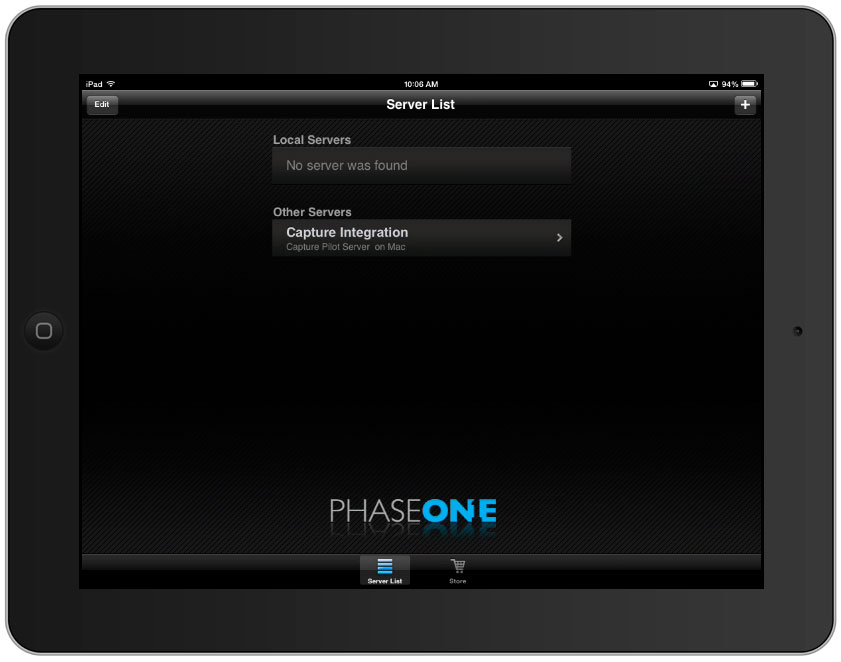
- Open Capture Pilot, and click on the plus (+) sign in the top right to manually add a server.
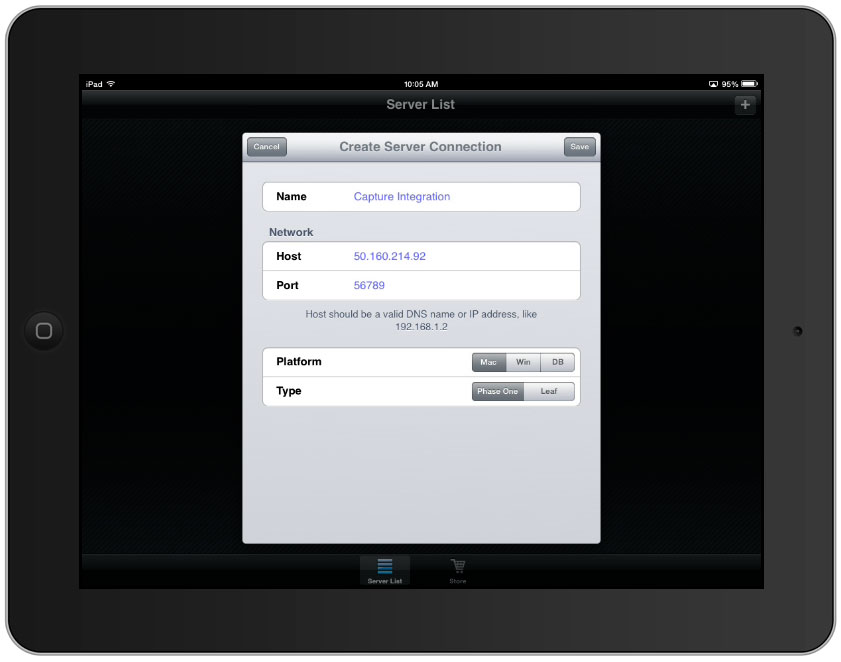
- Enter a name for the server, then the IP address you collected from WhatIsMyIp and the Port Number you chose earlier then hit save.
- Your session will show up under “Other Servers” and they can connect to it, provided you have started the Capture Pilot Server in Capture One Pro.
- Tap on the server to see images!
The thing to remember is if you don’t pay for a static (non-changing) with your Internet Service Provider (ISP), then you will need to periodically check that your global IP address hasn’t changed (see Step 7 above). If it does, just send your clients the new IP address. Also don’t forget to start the Capture Pilot server from your computer, or else the art director won’t be able to see anything!
As always, if you have any questions regarding the concepts described above, don’t hesitate to contact us.