
Smart Albums
Smart Albums (C1’s equivalent to Smart Collections for you former Lightroom users) are an extremely useful tool within Capture One for organizing your images on the fly. At their most basic level, Smart Albums are a saved search that continually & automatically updates. You can search and filter through any images related to a particular session – including images in folders marked as Favorite.
There are many uses for Smart Albums: For example, you can create a quick smart album to view only images from a particular camera model or serial number. You could also create one to see all images shot using a particular ISO or shutter speed, aperture, etc. Perhaps you want to only share client selects with an Art Director over Capture Pilot and not all the images you are currently shooting – you can create a Smart Album that only shows 5 star images with Green color tag and share that album instead of the Capture folder. These are all great & useful – but you have to set them up each time for each session without any way to easily save them as Default. While you can’t set up “Default Smart Albums,” there is an easy way to save them for quick and easy access.
Creating A Smart Album
- First things first: Create a new smart album. Go to the plus (+) sign next to the Session Albums section in the Organize tab (looks like a file folder) or go to the File Menu > New Smart Album.
- Click on a plus (+) sign to create criteria (rules) for your Smart Album. Click the drop down menus to change search parameters, and enter in details as necessary. For more filtered results, click the plus (+) sign again to add additional criteria. You can also click the minus (-) sign to remove criteria.
- Pay attention to the top where it says “Match [all/any] of the following rules:”
“Any” means any of the rules can be true – i.e. it could have 5 stars OR it could have a Green color tag.
“All” means every one of the conditions must be true for the image to appear in the smart album – i.e. it must be rated 5 stars AND have a Green color tag.
-
-
Add Rules
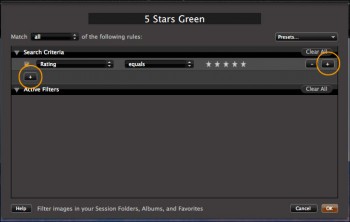
-
Match Any vs All
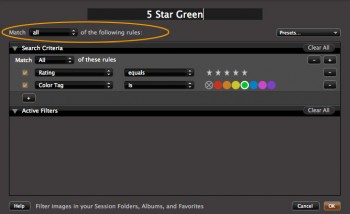
Saving the Smart Album for Use Later
- Once you have created your Smart Album, you will need to save it as a search preset for future use. When creating the smart album, before you hit the OK button, click on the Presets button in the top right corner of the window and choose Save Preset. You can also edit a pre-existing Smart Album by right clicking (or Control + Clicking) and choose “Edit Smart Album”.
- Enter a name that defines your search, then hit Save.
*PRO Tip – these presets are saved in your user library folder along with your custom workspaces, recipes, and keyboard shortcuts. To transfer this to another computer, navigate to this folder (in Finder to the Go menu > Go to folder and type “~/Library/Application Support/Capture One” then hit OK), and copy it to a flash drive to easily transfer to another computer.
-
Save As Preset
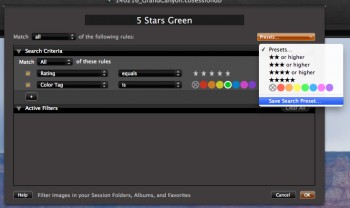
-
Name the Preset
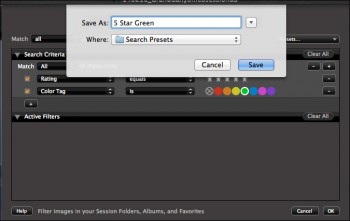
Easy Access
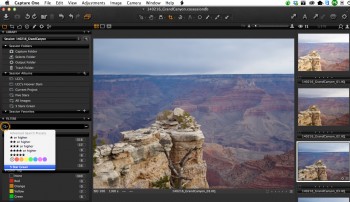
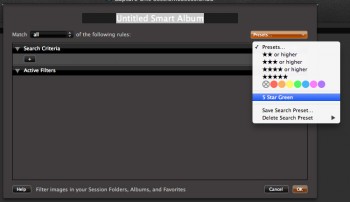
- To easily access this preset again later from this or any other session, you have several quick options. The quickest is to click on the Magnifying Glass in the filters window or Thumbnails window, and choose your saved preset, however this doesn’t save it as a “Smart Album” (which you could use in Capture Pilot). If you want to quickly save it as a Smart Album, all you need to do is File > New Smart Album, then click on the your preset in the Presets menu, type in a name for Smart Album, and hit OK.
-
Quick Access
-
Convert to Smart Album
Conclusion
Saving your Smart Album rules as a search preset is an easy way to quickly access or create Smart Albums you use on a consistent basis. At this time, you can’t save Smart Albums to automatically be created when starting a new session, but with just a few clicks you can quickly set them up before you get started.
Questions?
Have questions about what you just read? Don’t hesitate to reach out to our tech support team!