Can’t Tether your new Canon 5DS or 5DS R?
We’ve received lots (and I mean, LOTS) of phone calls regarding using the new Canon 5DS/R in Capture One Pro 8.3. The overwhelming question is “How do I get it to tether?” The quick answer is “You can’t” – at least not yet in 8.3. The Release Notes for Capture One Pro 8.3 state there is “preliminary file support” for the new Canon cameras, but that doesn’t mean tethering. Chances are it will be added in the next update for Capture One.
-
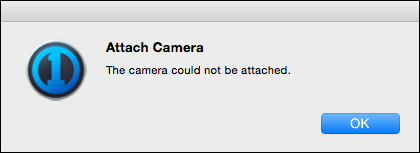
It Won’t Connect!
In the meantime…
So what can you do in the meantime? Well if you shoot to a CF or SD card, Capture One Pro 8.3 should allow you to import the images just fine. *Unless you shoot MRaw or SRaw – since these files are drastically different from regular raw files, their support is limited.
But what if you want to shoot tethered?
The Workaround
This isn’t the only workaround, but it does work. In a nutshell, you’ll be using Canon’s EOS Utility software to facilitate the capture side of things, and enabling Capture One Pro’s Hot Folders option. It won’t copy your adjustments from shot to shot, but it does allow you to work within Capture One Pro while shooting.
- First things first, you’ll need to download & install the latest copy of EOS Utility (version 3.2.21 at the time of this article) from Canon’s website. Once you have that installed, move on to step 2.
—[In Capture One Pro]—
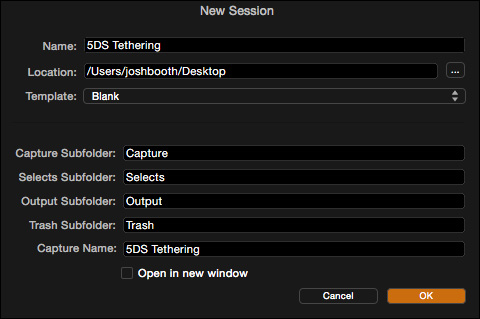
- In Capture One Pro, create a new Session. Be sure to pay attention to where you are saving your Session, as it’s location will be an important step later on.
-
Create a New Session
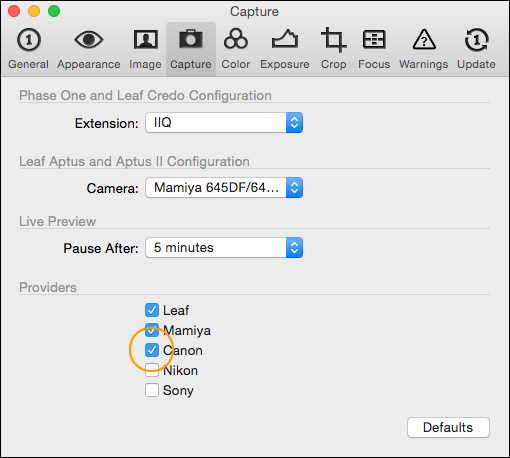
- Optional: Disable the Canon SDK in Capture One Pro’s Preferences > Capture tab. I didn’t do this, but it will be much, more stable if you do. By unchecking Canon (and restarting C1), you will help prevent possible communication conflicts between the EOS Utility and Capture One Pro.
-
Disable the Canon communication
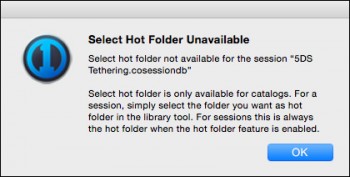
- Enable Hot folders – this tells Capture One Pro that you aren’t while you aren’t using it for capture, you want it to automatically select new files as they appear. If using a session, you won’t need to use the “Select Hot Folder” option as it automatically looks at your Capture folder.
-
-
Select Hot Folder
—[In EOS Utility]—
- Start EOS Utility if it doesn’t open automatically, and choose “Remote Shooting”
- Once the Remote Shooting window opens, click on the Preferences button at the bottom.
- At the top left, you can change tabs in the pull down menu. Go to the Basic Settings “tab”, and make sure that “Automatically display Quick Preview window” is unchecked. This prevents a window from popping up automatically after every shot (in front of C1).
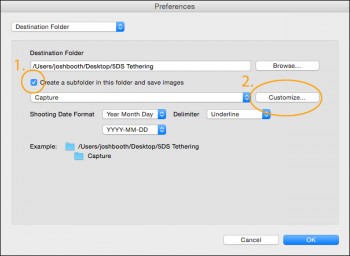
- On the Destination Folder tab – Click Browse to and choose the Session folder – the one that contains your Capture, Selects, Output, & Trash folders for your session. Also, check “Create a subfolder…” then Customize it, typing in “Capture” or whatever you name your Captures folder.
*Why not just choose the Capture folder as the destination folder?This setup is recommended by Phase One largely due to the way the Canon EOS Utility transfers files. From my understanding, it relates to the quick renaming of the file that happens once the image is transferred from the camera – if going directly into the Capture folder it can cause instability with the way that Capture One sees the new files.
-
EOS Utility: Destination Folder
-
EOS Utility: Customize Name
- On the File Name tab, you can change these settings if you like – but I usually prefer to change them later on.
- On the Linked Software tab – change Software to Link to None. This prevents your files from automatically opening in Canon’s Digital Photo Professional software.
-
EOS Utility: Linked Software
- Optional: Go to the Time Settings tab, and sync the camera’s time with your computer’s clock.
—[Using C1P & EOS Utility together]—
- Initiate your Captures with EOS Utility by pressing the large circular button in the top right of the software, or by pressing your spacebar. The image should show up in your Capture folder in Capture One and automatically select. If it doesn’t make sure your Auto Select New Captures under the Camera menu isn’t set to Never.
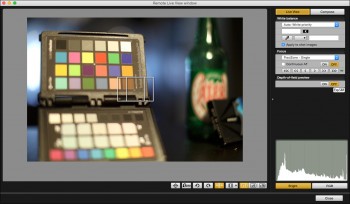
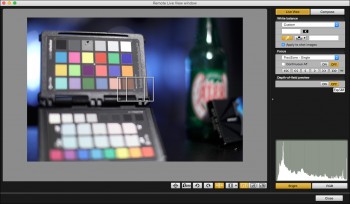
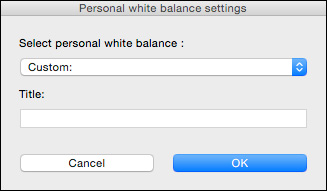
- As mentioned, it won’t automatically copy your adjustments from one image to the next (like it does when you are actually tethering in Capture One Pro. A good idea is to try to set your white balance in EOS Utility – which can be done through the Live View window. See screenshots below for details how to do this!
-
EOS Utility: Setting WB
-
EOS Utility: Choosing WB
-
EOS Utility: Custom Name
Questions?
This workaround should work until Phase One releases the next update containing more solidified camera support for the Canon 5DS & 5DS R. If you have any questions, don’t hesitate to reach out to us! Contact our technical support team for questions or additional information!